The Graph (GRT) is a decentralized indexing protocol for querying networks like Ethereum and IPFS. The protocol lets anyone make blockchain data easily accessible by building and publishing public APIs called subgraphs.
The Graph has decided to move the protocol to Arbitrum since bringing the protocol smart contracts onto a Layer 2 network allows for gas savings (up to 26x), faster transactions and still being able to ultimately rely on the security inherited from Ethereum.
For example, Indexers could open and close allocations to index a greater number of subgraphs with higher frequency, developers could deploy and update subgraphs with greater ease, delegators could delegate $GRT with increased frequency, and curators could add or remove signal to a larger number of subgraphs - all actions previously considered too cost-prohibitive to perform frequently due to gas.
You can delegate anytime over the next few weeks.
Currently, the reward share is 50% on Ethereum and 50% on Arbitrum.
Rest assured that your funds will be completely safe after the migration, and any unclaimed rewards will also move to Arbitrum, once you have moved your delegation.
4. You will then be taken to the following page. Here, Click on ‘Transfer Delegation’.
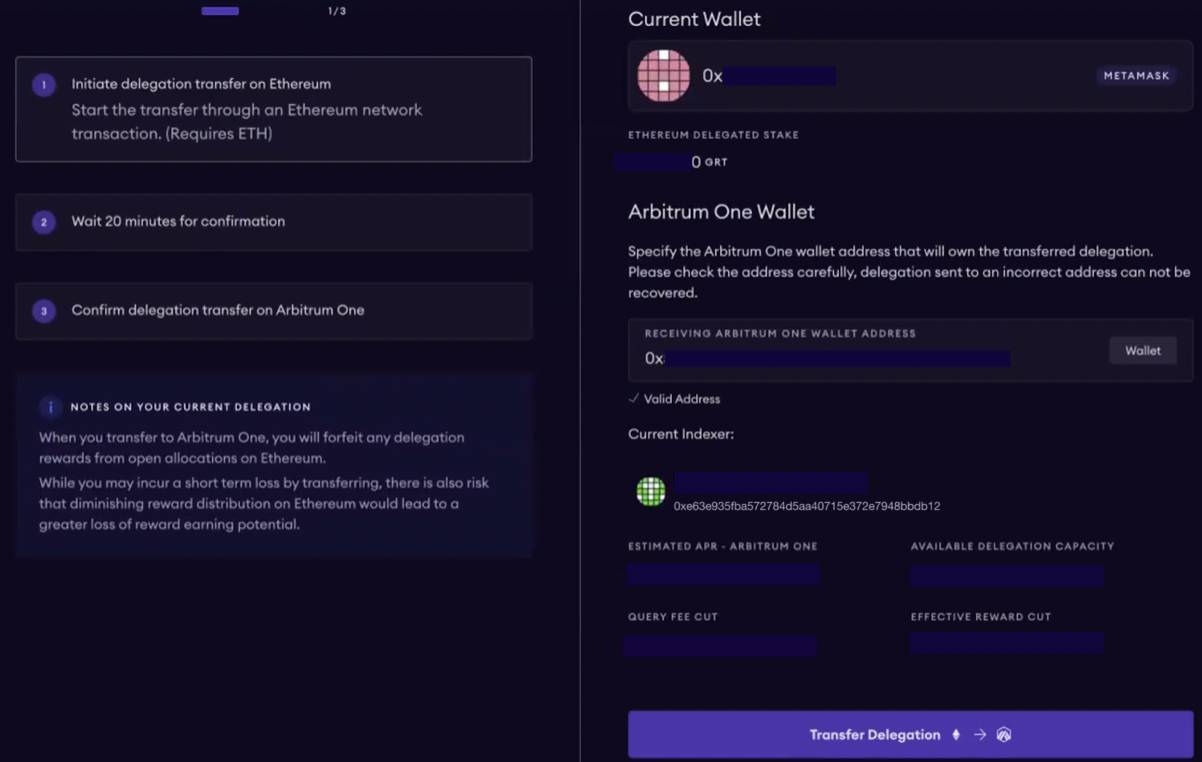
5. The Receiving Arbitrum One Wallet Address will already contain the same address as your current Ethereum wallet.
6. For your convenience, consider sending a small amount of ETH to this wallet address through the official Arbitrum bridge at https://bridge.arbitrum.io if you lack ETH to cover gas expenses. As an optional precaution, you can perform any transaction with the wallet to verify your control over it.
7. Then, click on the ‘Transfer delegation’ button. Your transfer will be initiated.
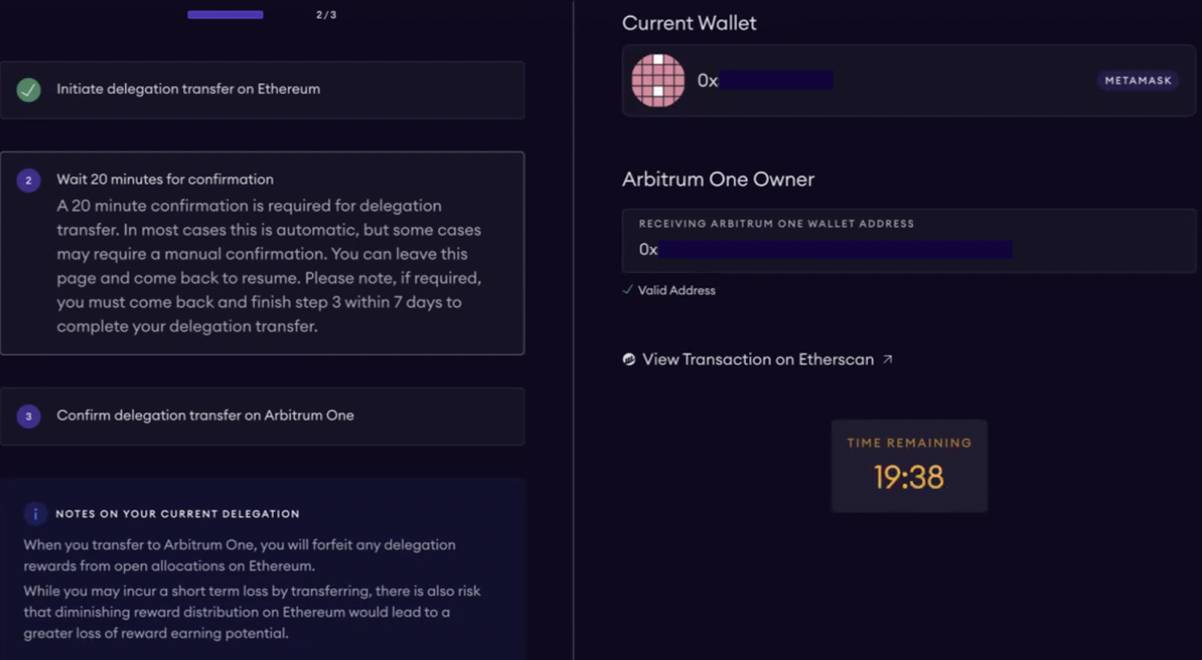
8. You will then see a countdown appear. Once the countdown reaches Zero, the migration will be completed, and your delegations will have moved to Arbitrum!
Note - Going forward, you will still be able to manage your delegations from this portal. Just make sure you're on the correct network, "Arbitrum One".
Here’s a walkthrough guide by The Graph Foundation to help you with the migration.
Additionally, if you have any questions, we are happy to answer them on our telegram channel at https://t.me/chorusone
About Chorus One
Chorus One is one of the biggest institutional staking providers globally operating infrastructure for 45+ Proof-of-Stake networks including Ethereum, Cosmos, Solana, Avalanche, and Near amongst others. Since 2018, we have been at the forefront of the PoS industry and now offer easy enterprise-grade staking solutions, industry-leading research, and also invest in some of the most cutting-edge protocols through Chorus Ventures.
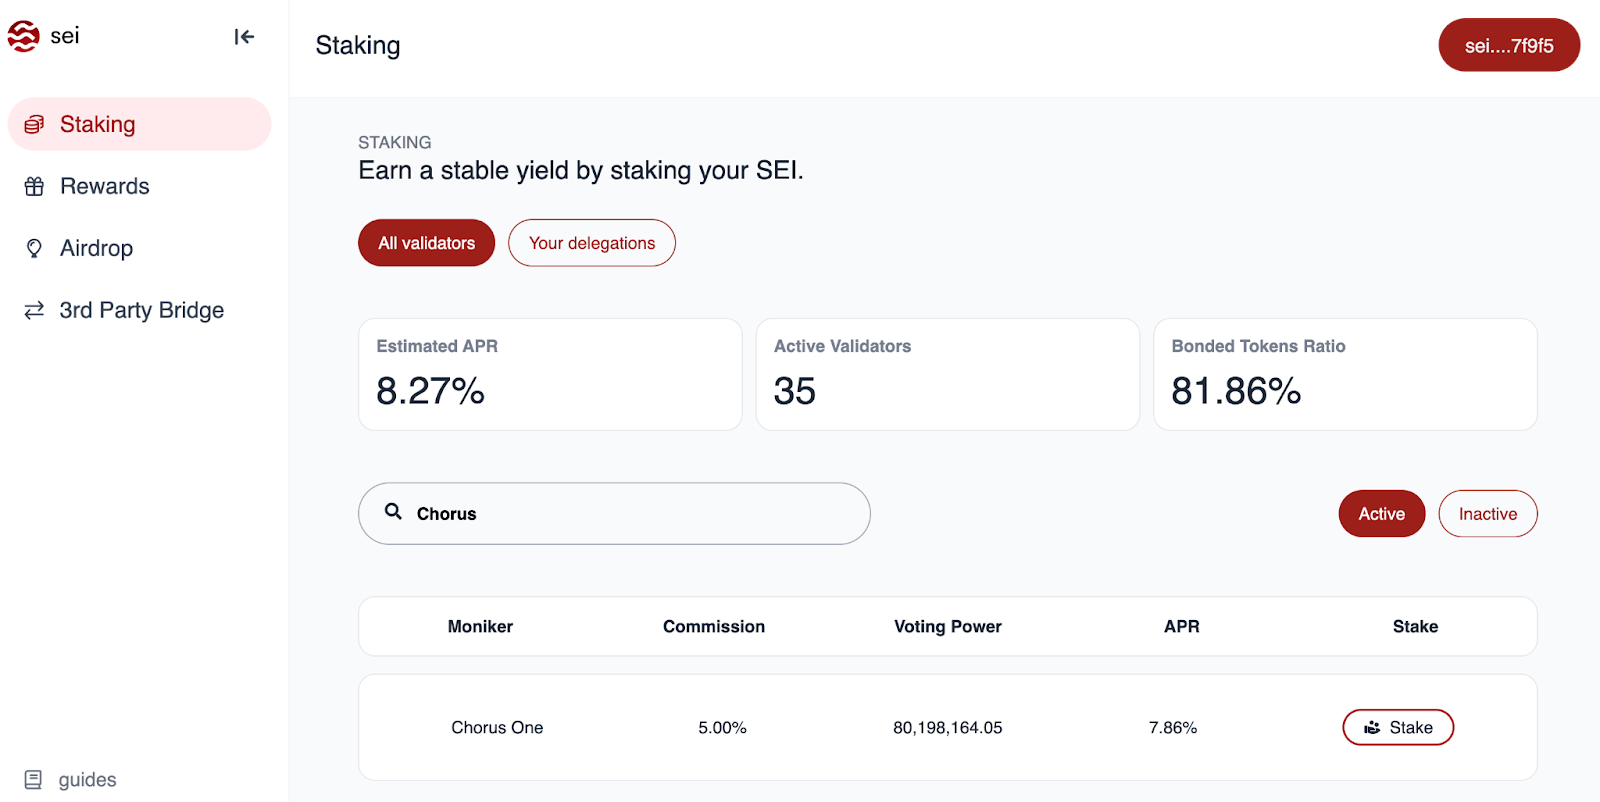
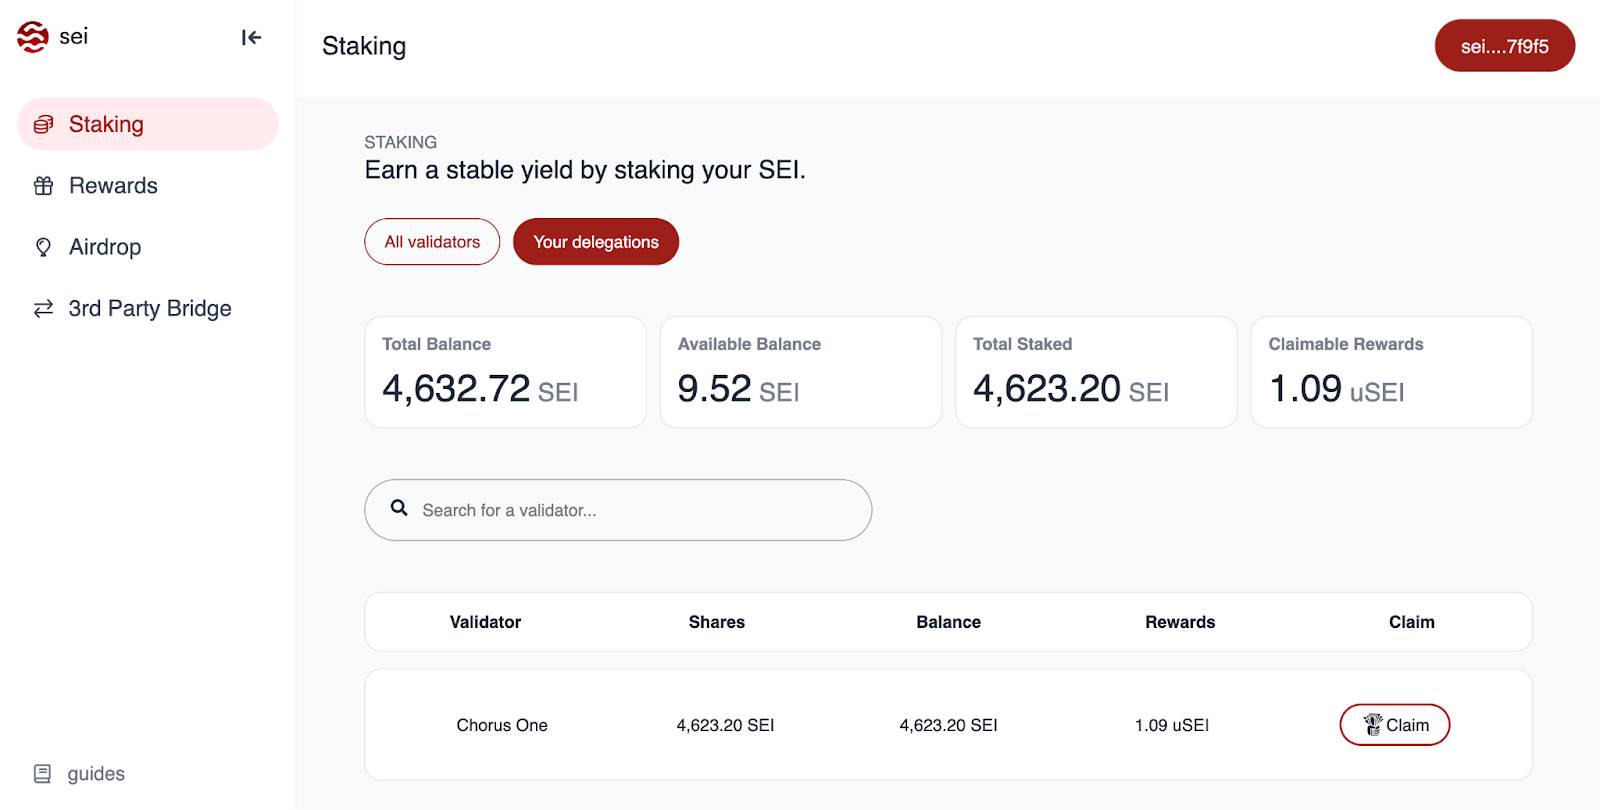
Step 1: Log into the Sei App and connect your wallet.
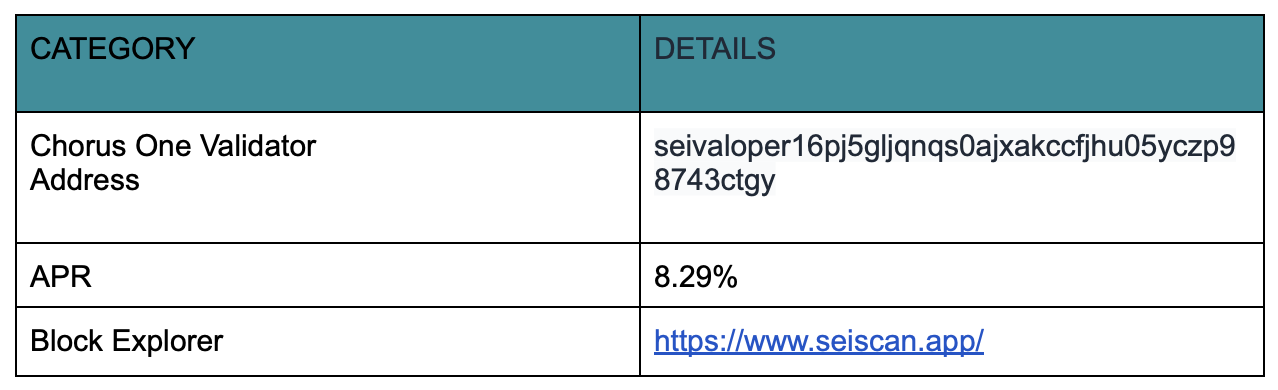
Step 2: Search for Chorus One validator.
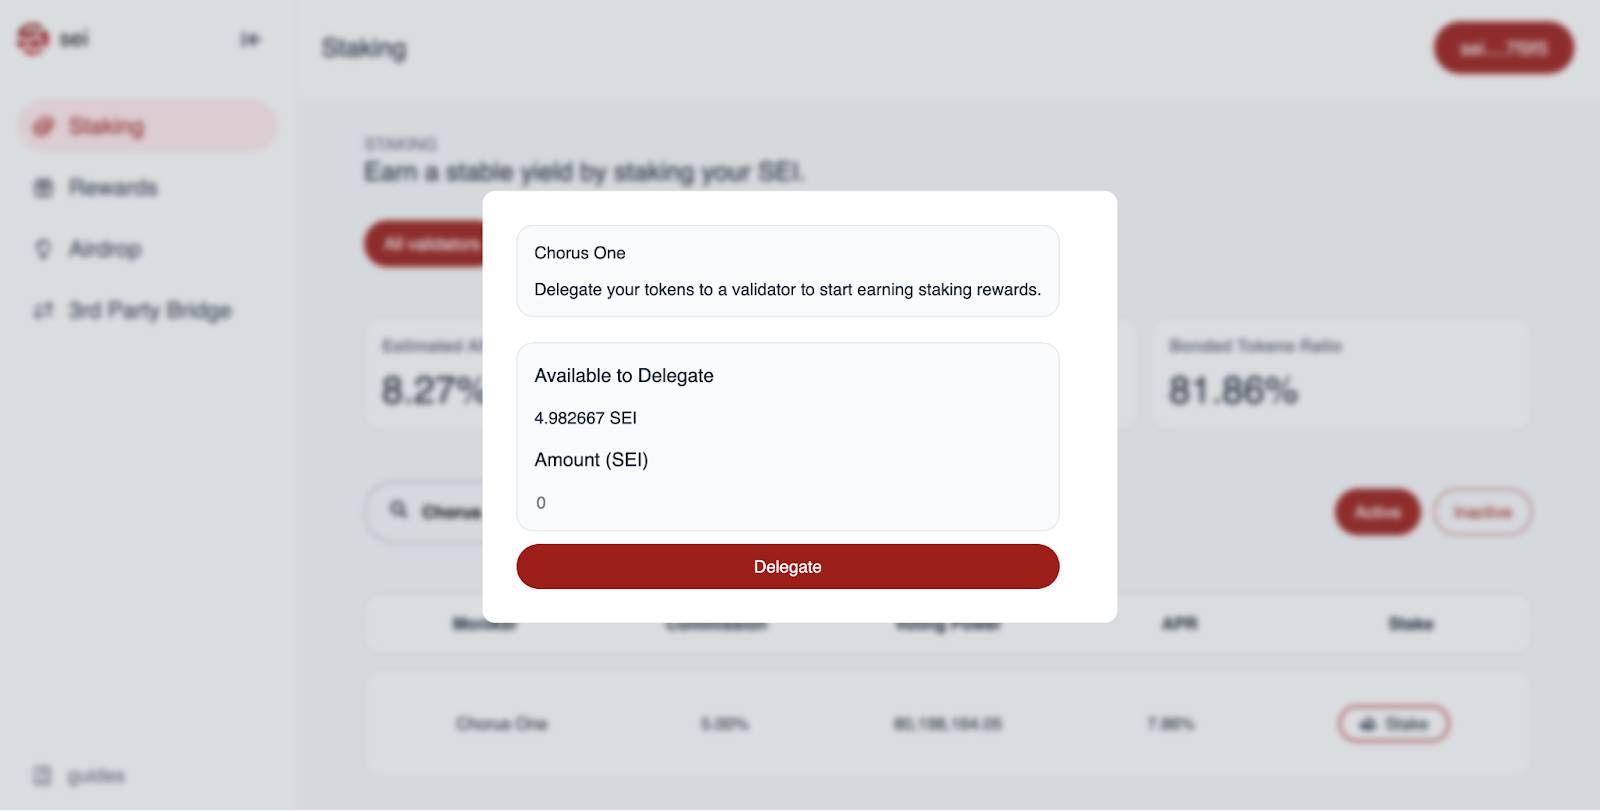
Step 3: Click on ‘Stake’ and review transaction
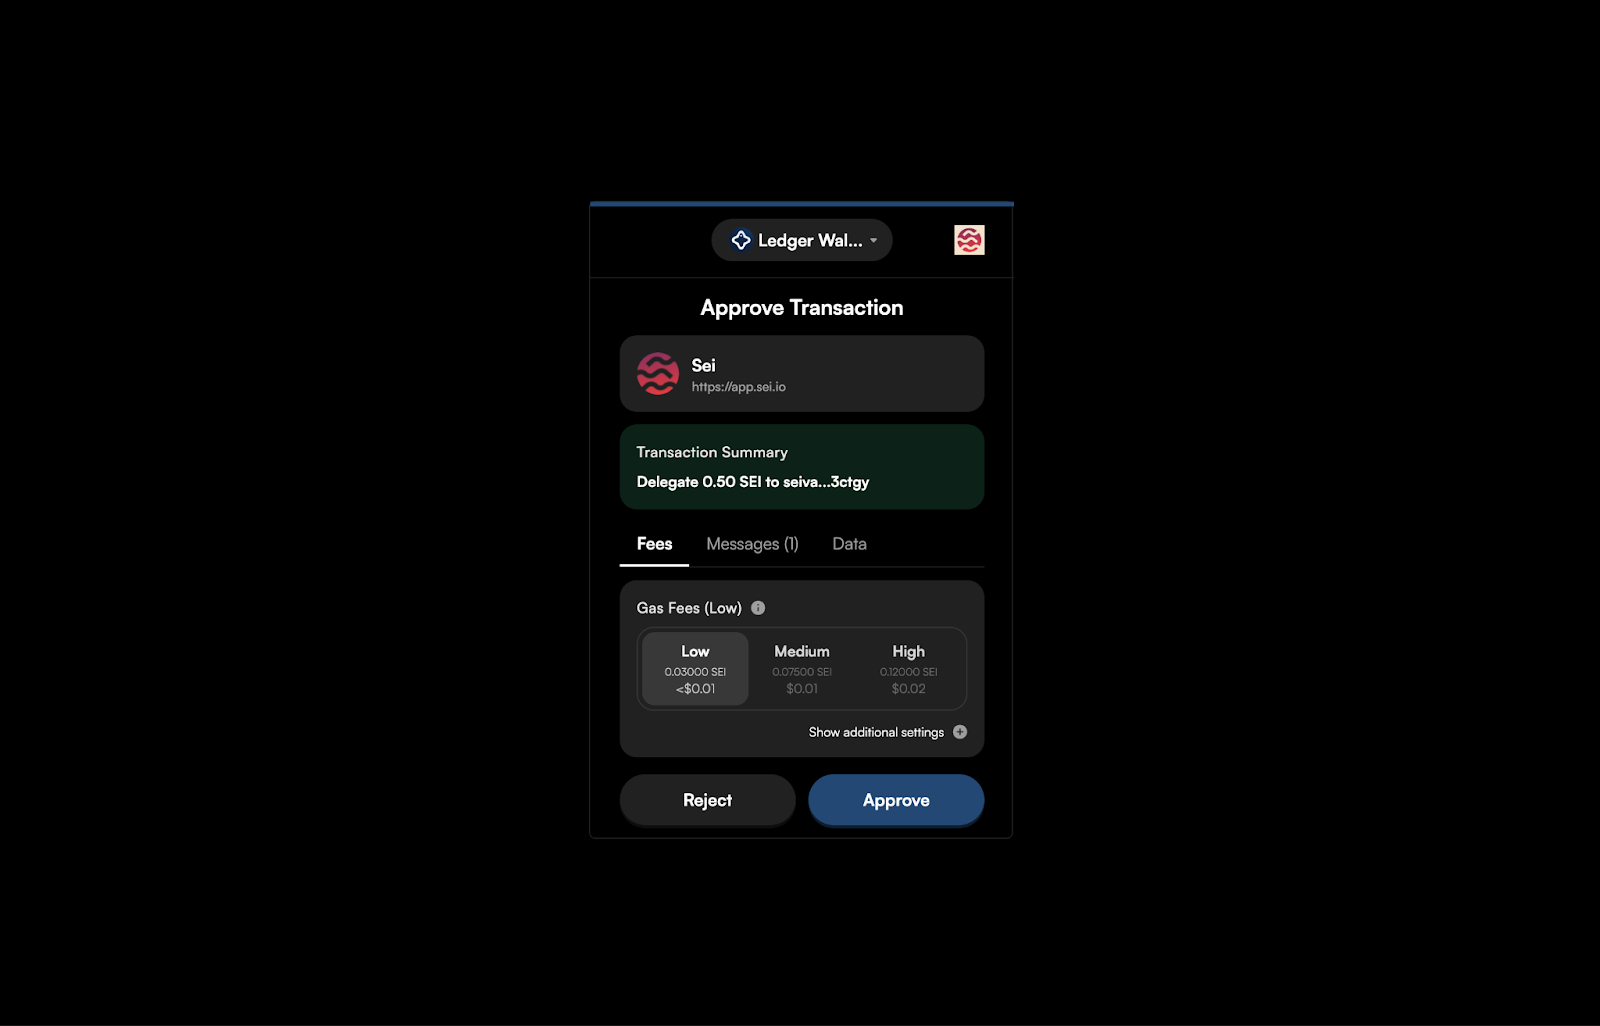
Step 4: Approve transaction
Step 5: You have now successfully staked SEI with Chorus One
Sei is a Cosmos SDK based open-source Layer 1 blockchain that leverages a novel consensus mechanism to become one of fastest blockchain in existence. It is purpose-built to cater to the unique requirements of decentralized trading, DEXes, and DeFi applications. Unlike traditional exchanges, which rely on an automated market maker (AMM) system, Sei adopts an order book model exchange approach, providing enhanced security, privacy, and user control over funds. By optimizing every layer of its stack, Sei creates a trading-focused blockchain that facilitates efficient and reliable transactions.
The easiest way to stake $SEI is using the Sei app at https://app.sei.io/stake
Welcome to the Fireblocks Guide for OPUS Staking. This guide is designed to help you stake with OPUS from your Fireblocks custody. We’ll leverage Metamask Institutional(MMI) chrome extension to seamlessly stake with OPUS.
1. First, connect your Fireblocks account to Metamask Institutional(MMI) wallet extension. Please download and install the extension from here.
2. Then, connect the desired Fireblocks custody vault to MMI.
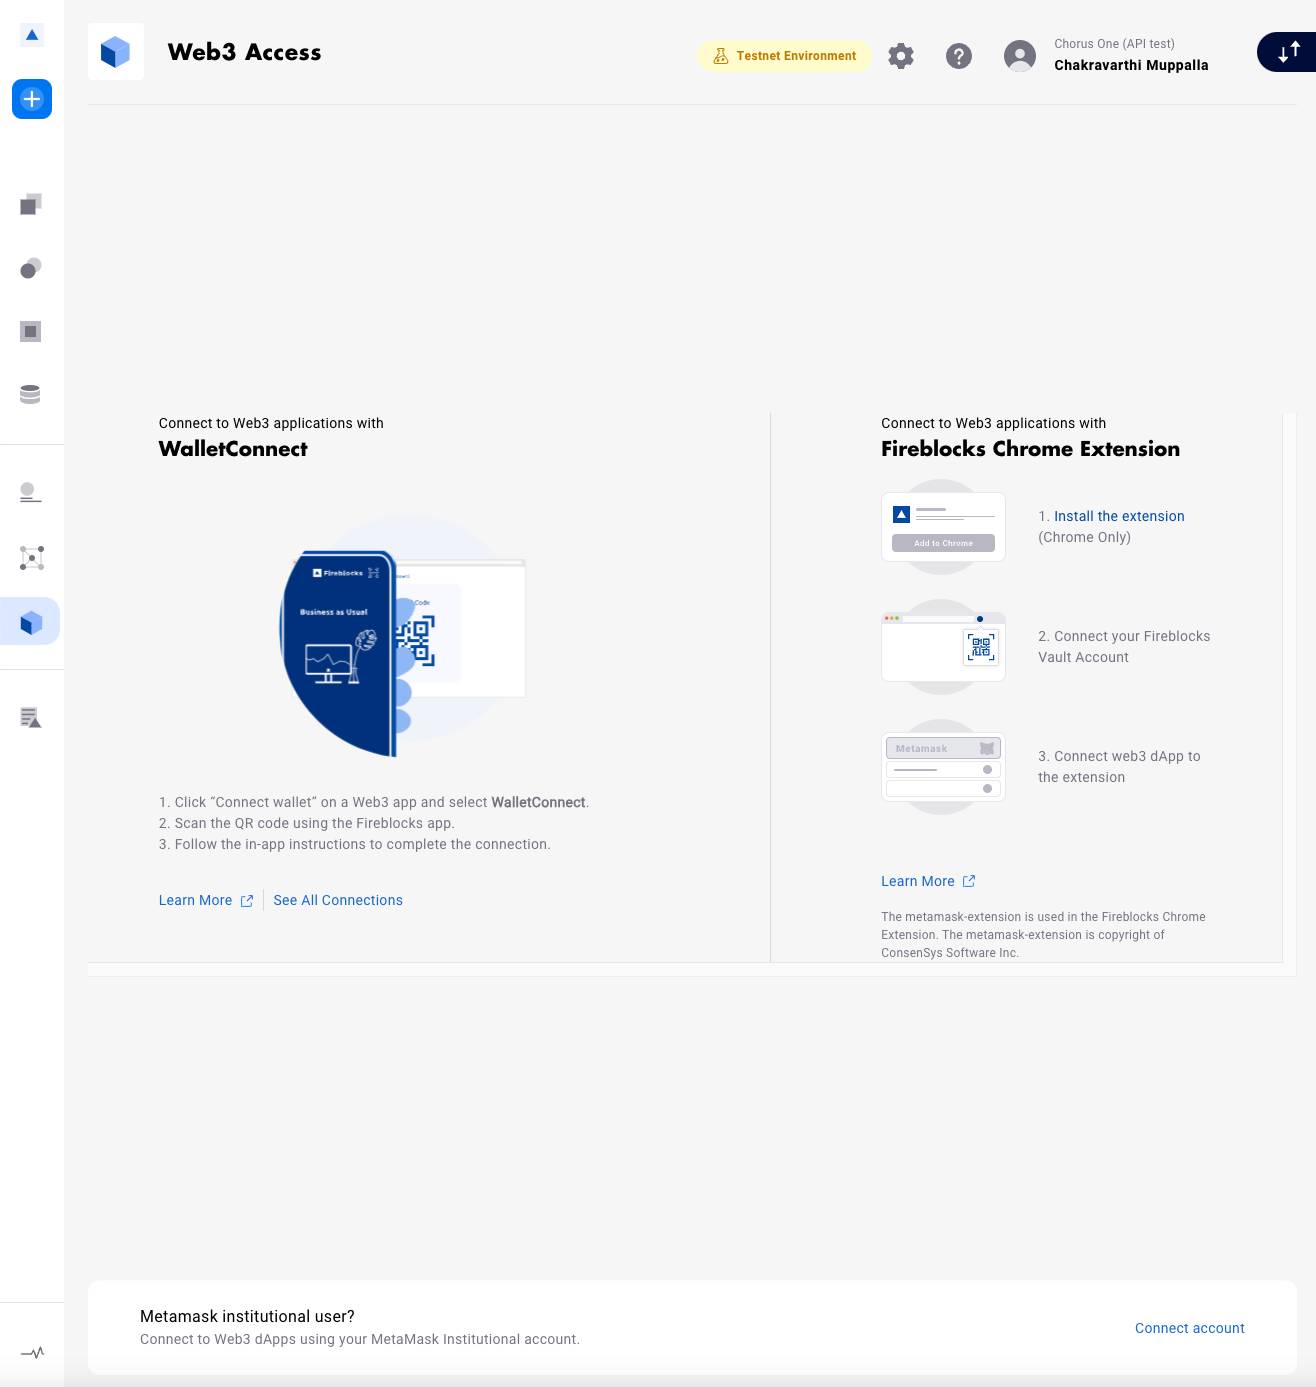
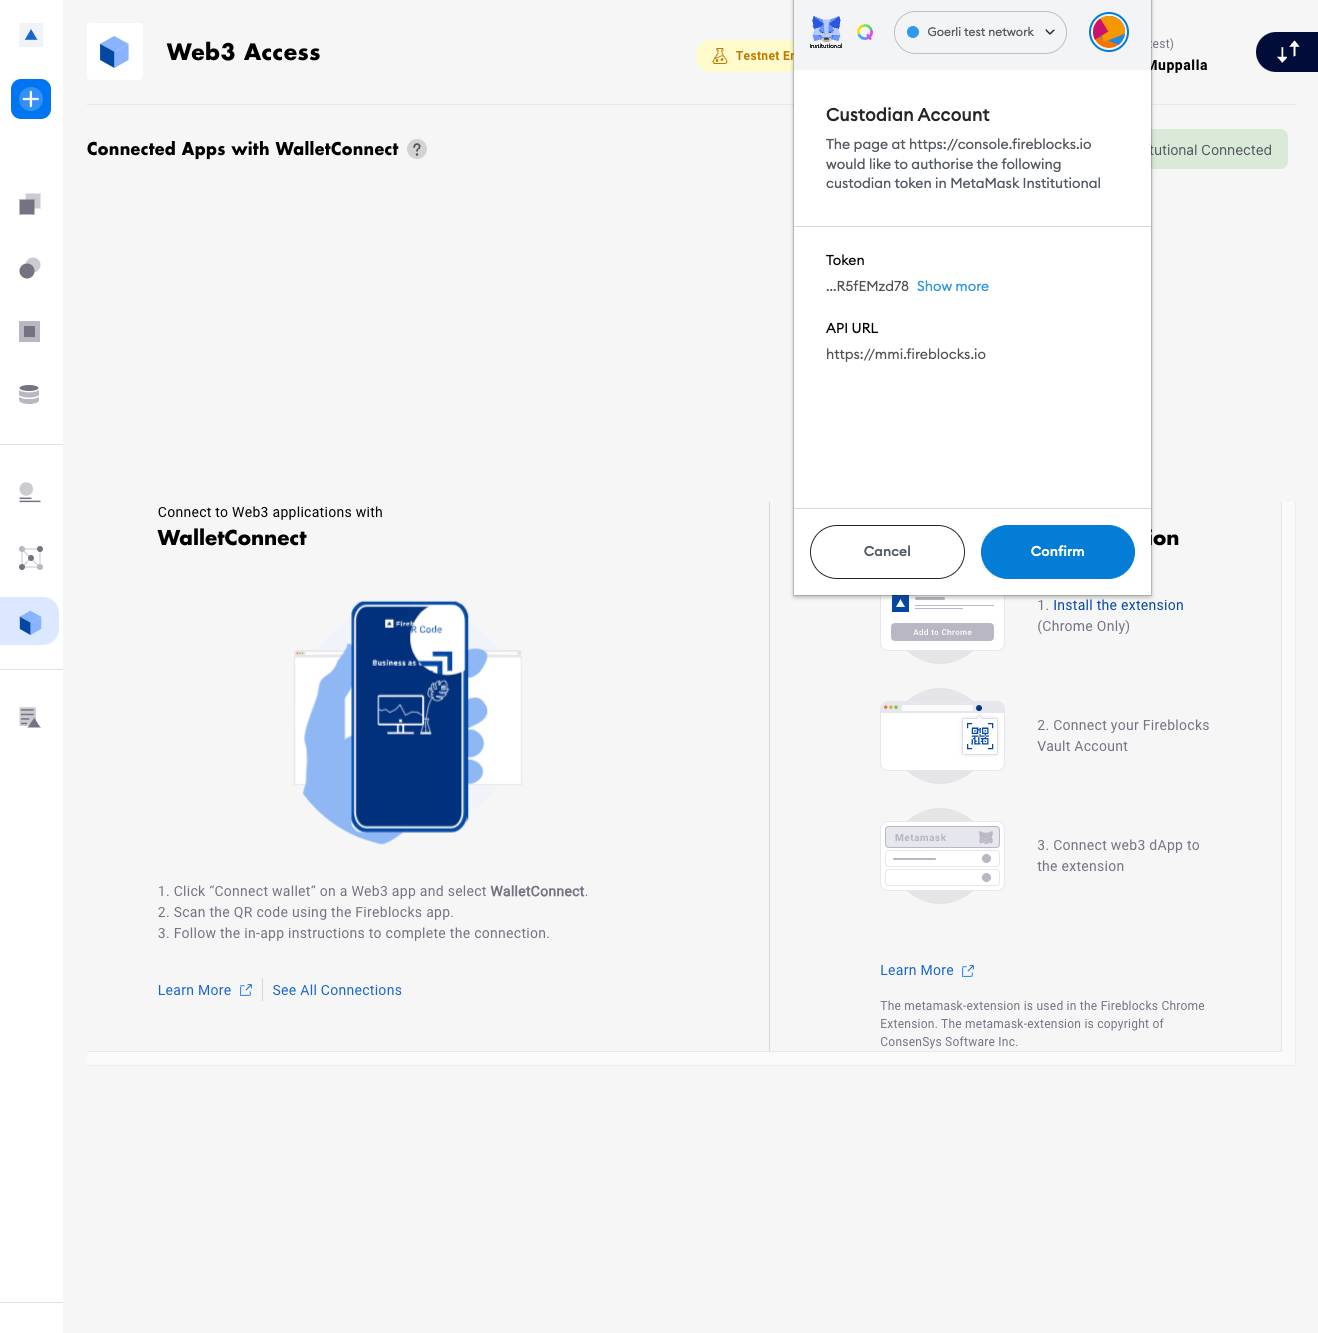
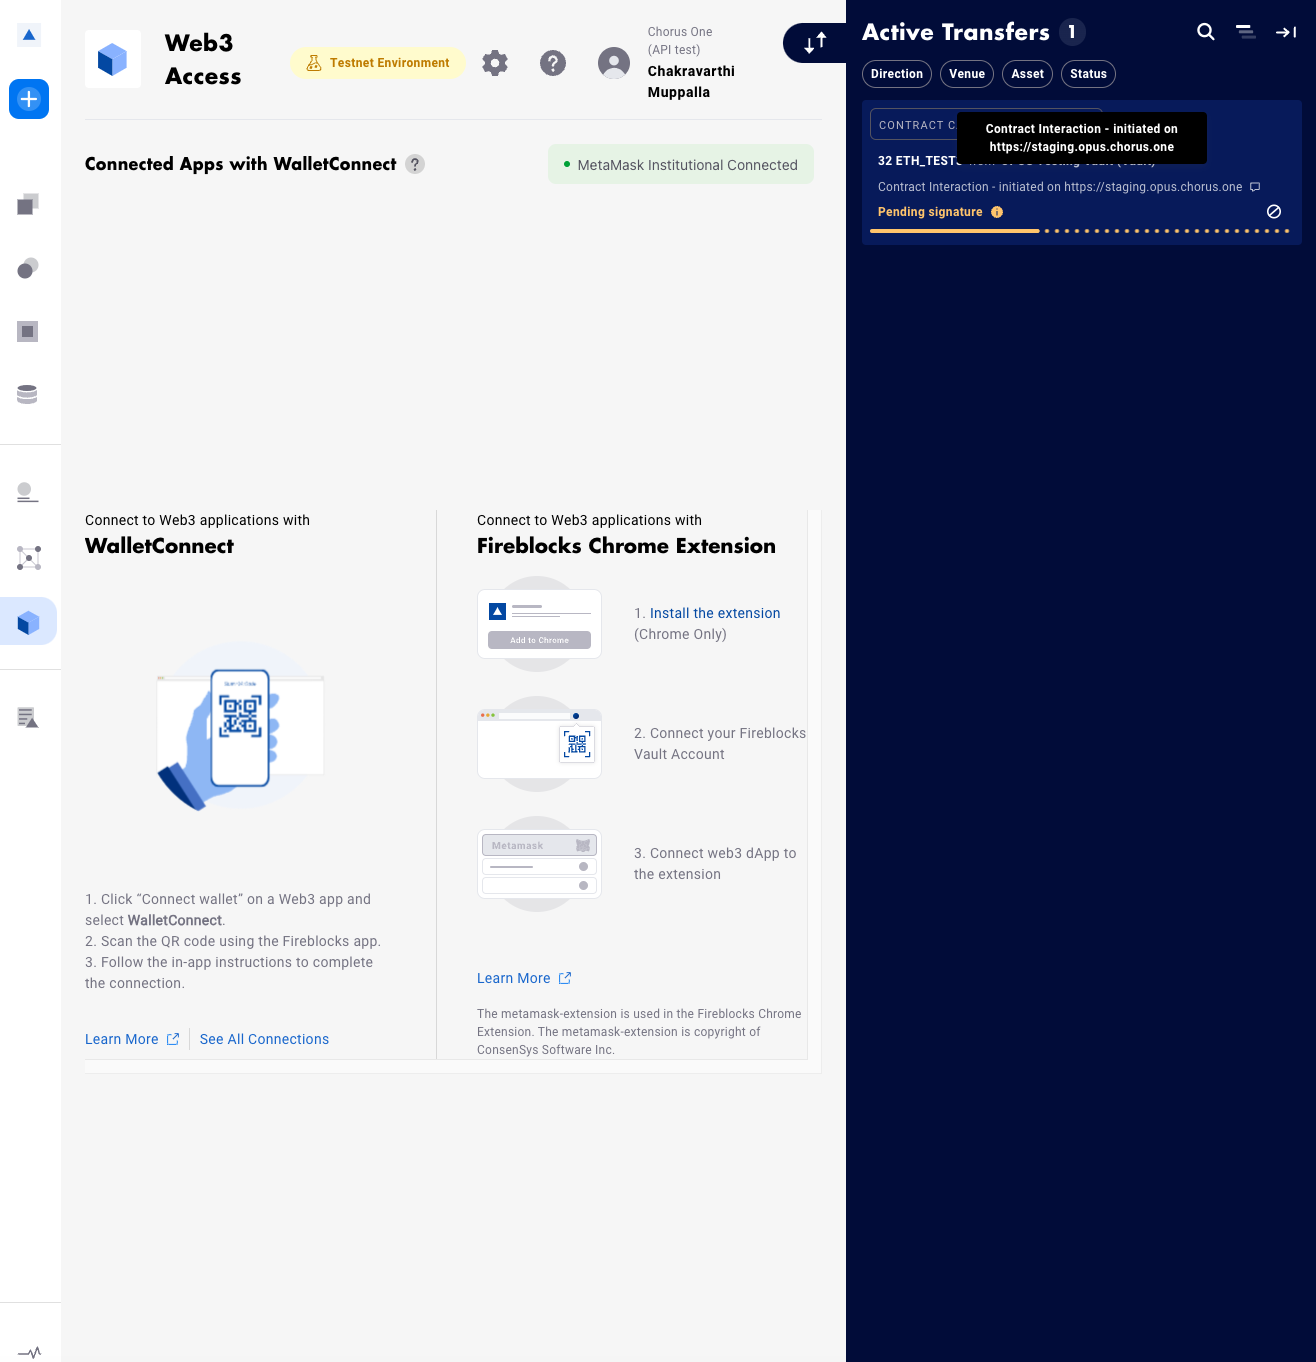
3. To do this, in the Fireblocks custody, you need to click on the “Web3 Access” menu on the left hand navigation.
a. You will find a “Metamask Institutional user?” popup at the bottom of the page. Please click on “Connect account” to proceed with MMI connection.
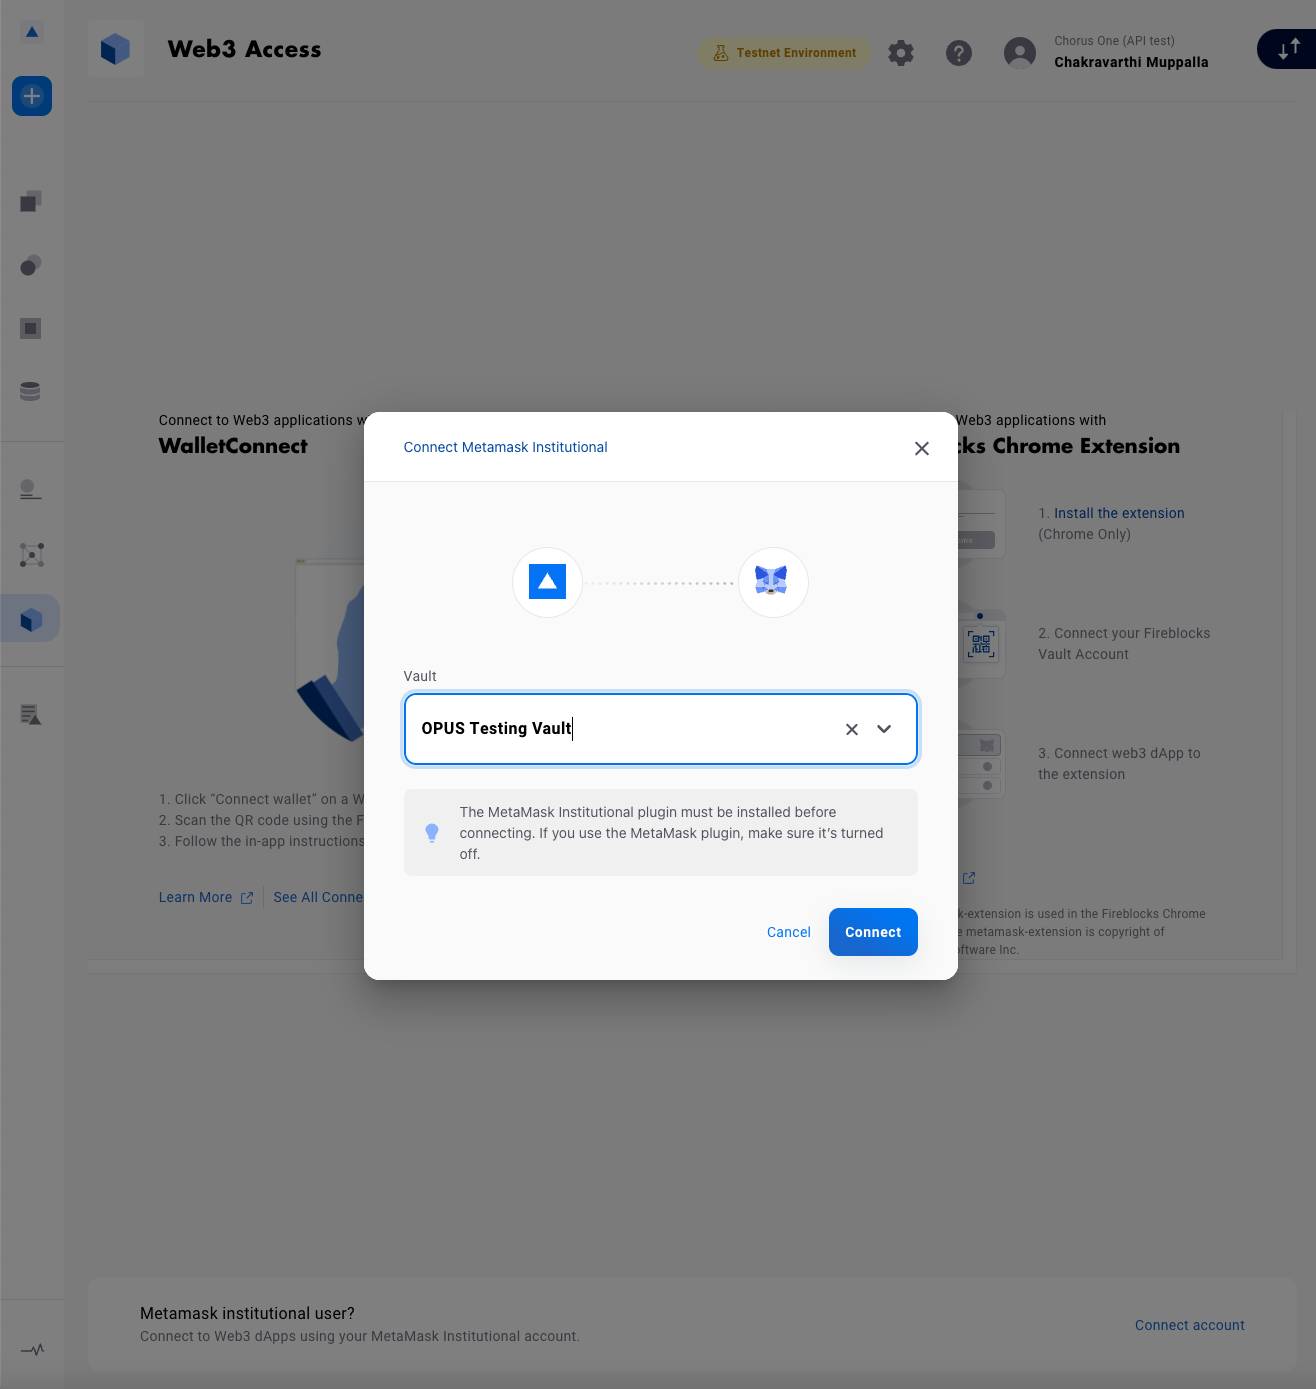
b. Next, please select the desired vault to connect to Fireblocks and click on "Connect".
c. Metamask Institutional Wallet will show the custodian account connection request. Your Fireblocks vault will be connected to MMI once confirmed.
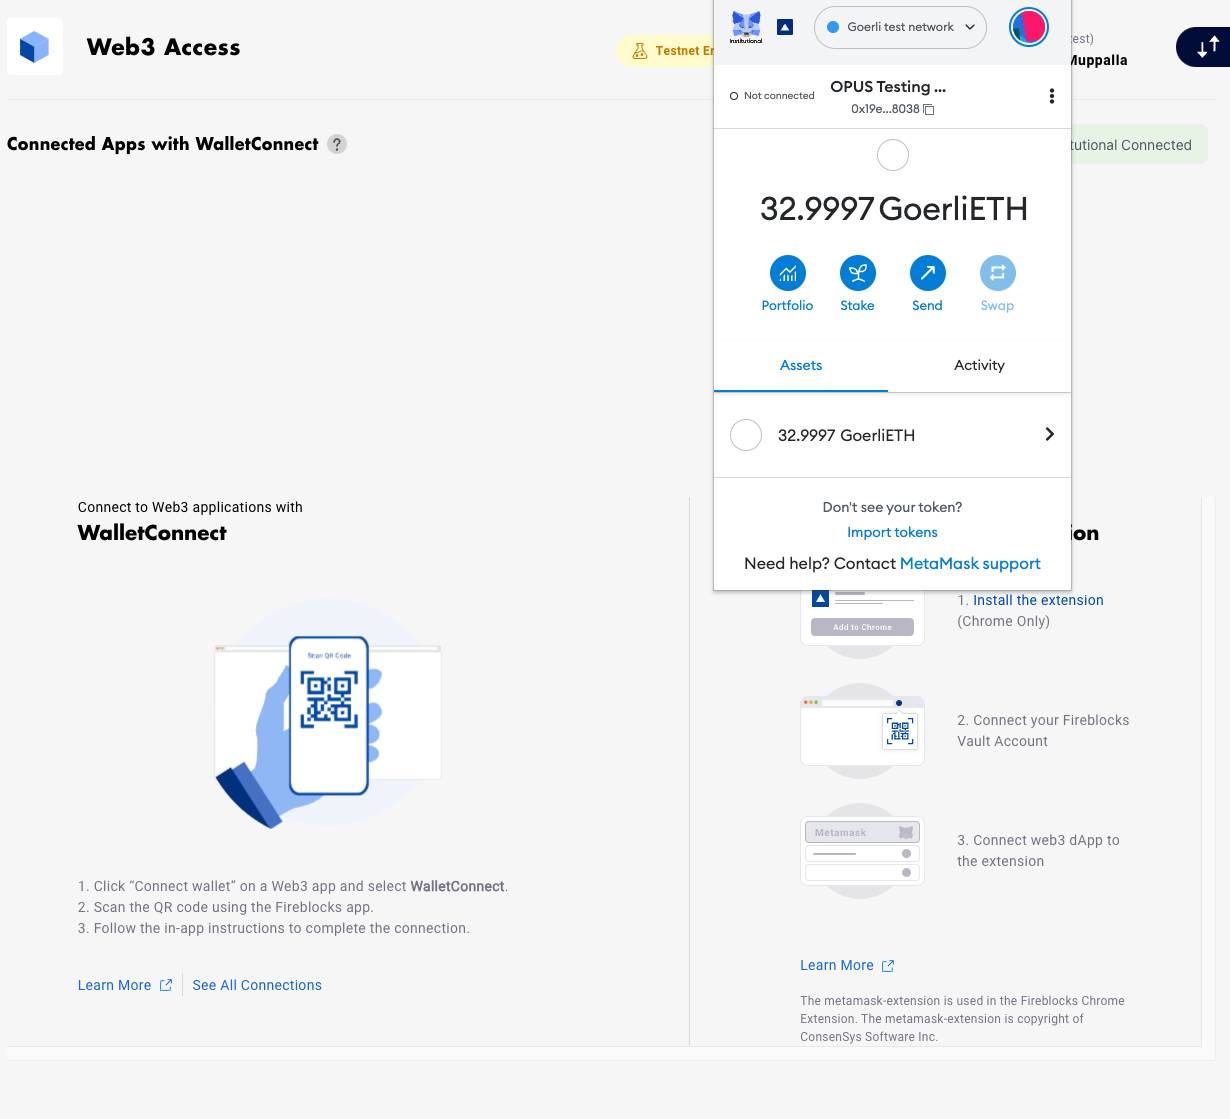
d. You should see the vault balance in MMI wallet
Now, your Fireblocks custody is connected to Metamask Institutional wallet. We are one step away from staking. We need to whitelist the staking contract now.
4. Whitelist the Batch Contract address in Fireblocks. In the Fireblocks Left hand navigation, please click on Whitelisted addresses menu and select the contract address on the screen.

5. OPUS Staking contract address is: 0x9b8c989FF27e948F55B53Bb19B3cC1947852E394
a. Goerli Testnet contract address is: 0x5FaDfdb7eFffd3B4AA03f0F29d9200Cf5F191F31
6. Based on your organisation approval policy, you will need to approval from multiple signers.
Next step is to stake with OPUS through MMI & Fireblocks custody.
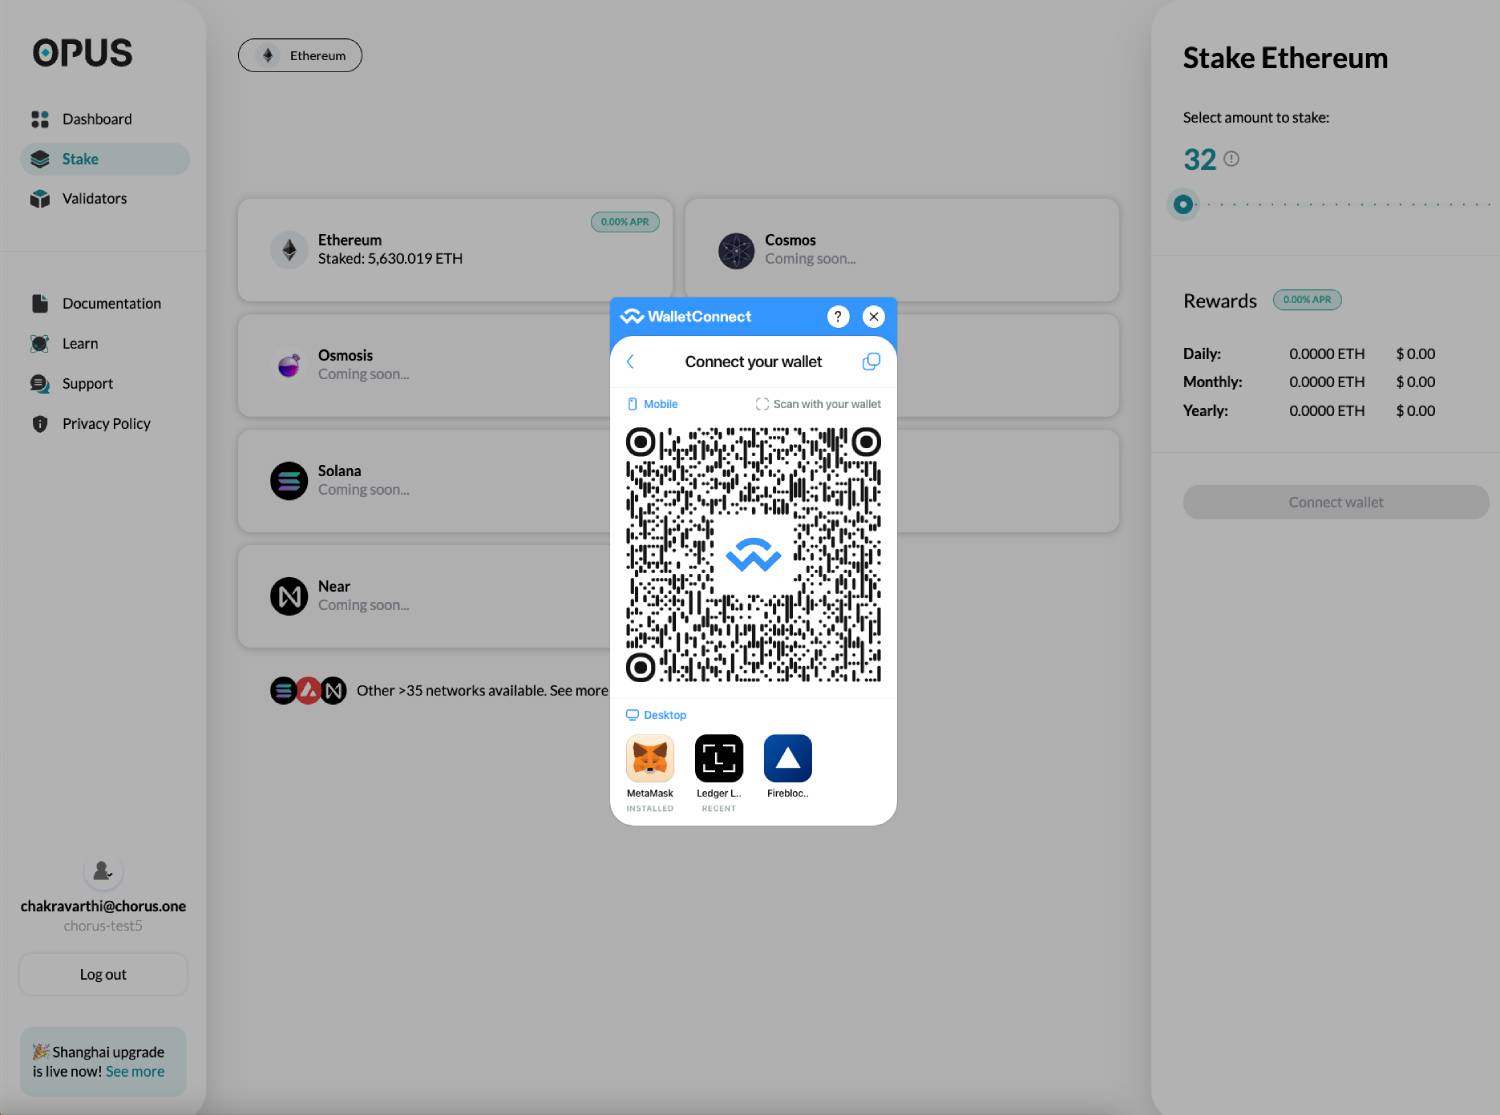
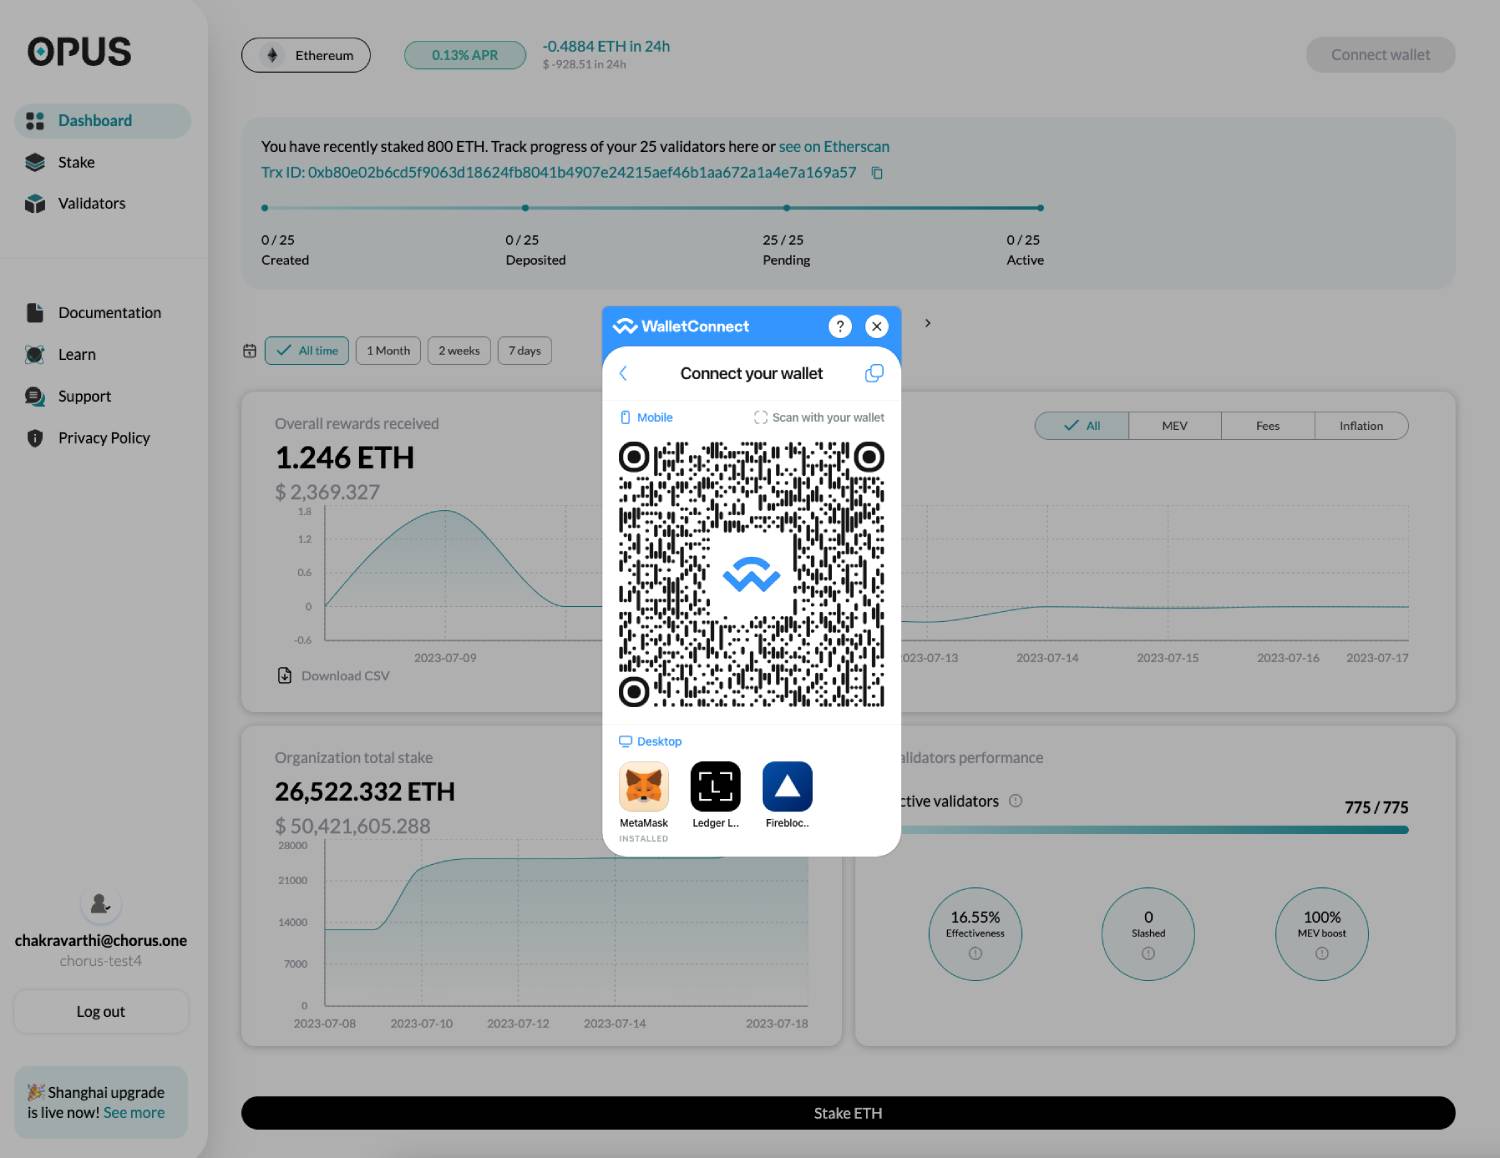
7. Click on Connect wallet button in OPUS UX. Please select Metamask wallet in the walletconnect window.
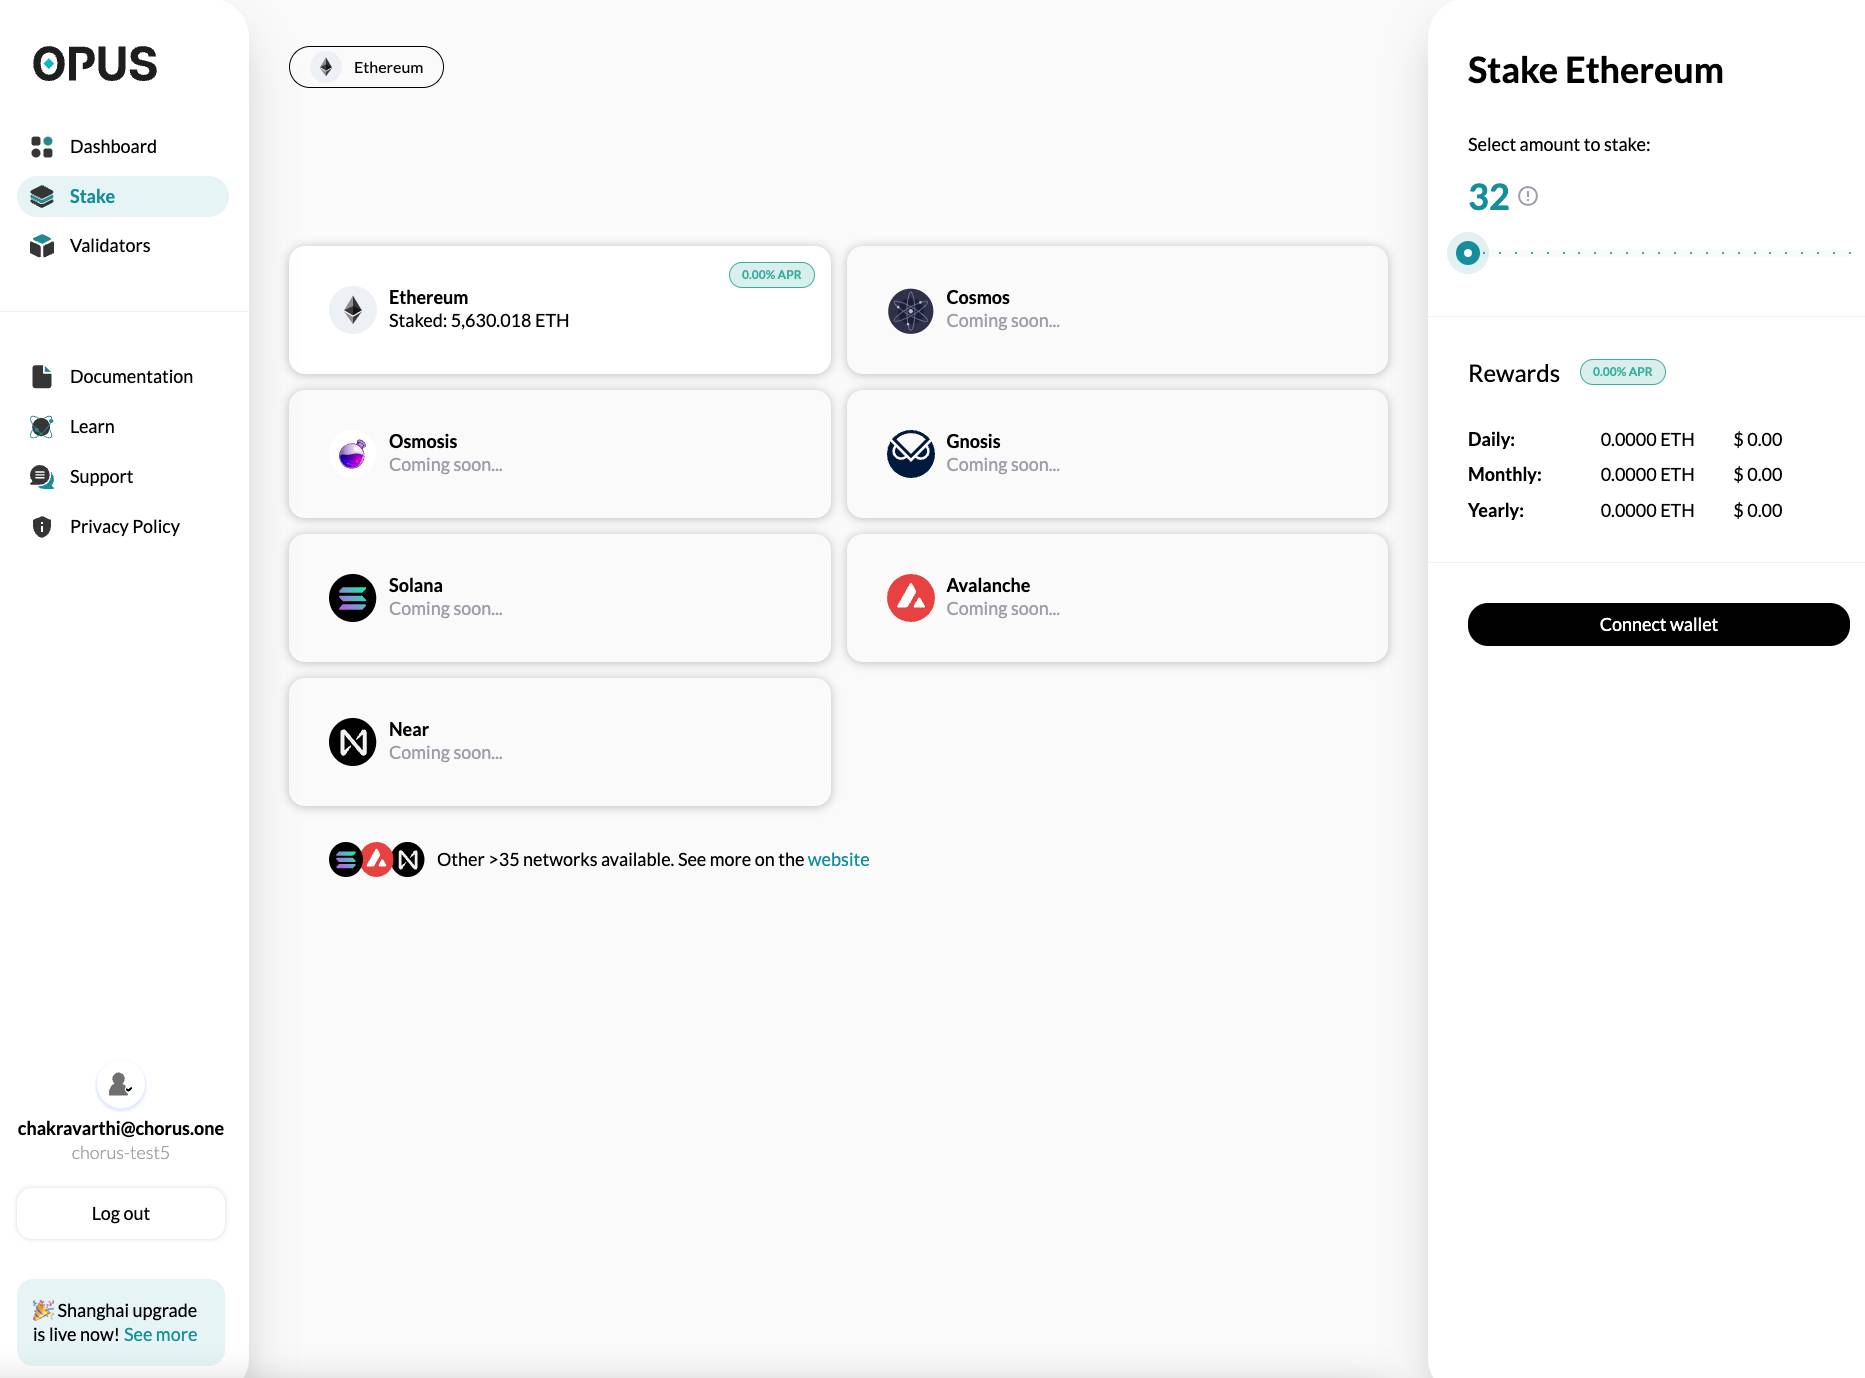
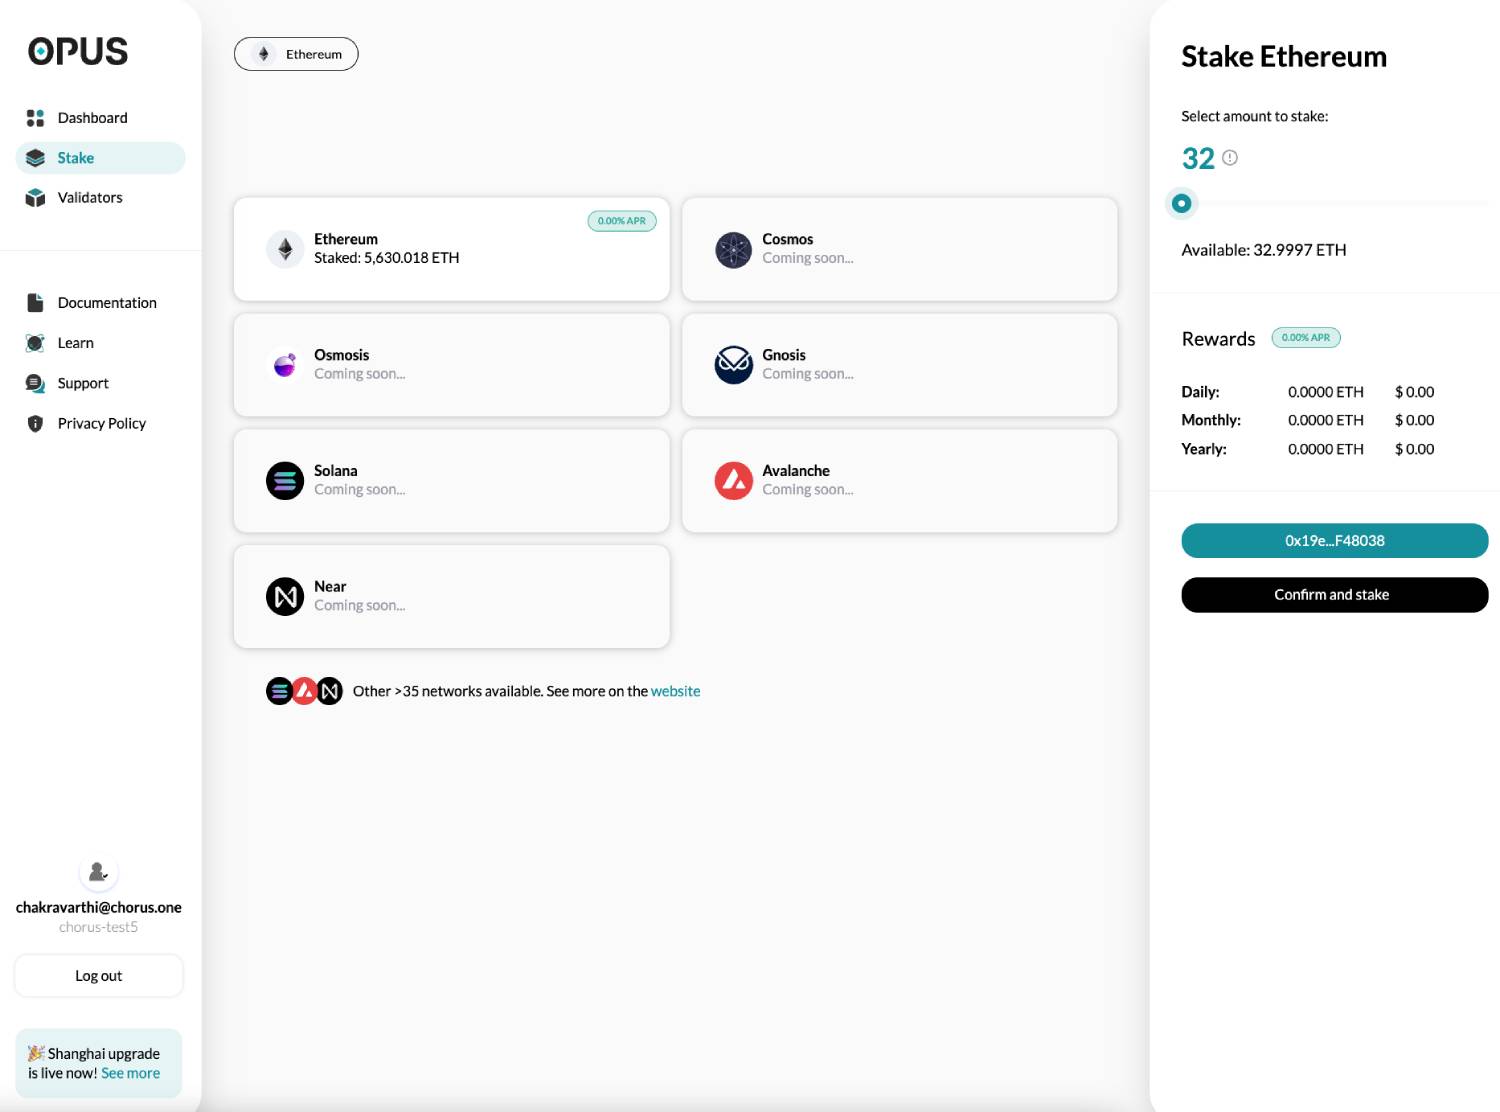
8. Select the amount of stake on the slider and click “Confirm & Stake”
9. Approve the transaction on MMI
10. Approve the transaction on Fireblocks
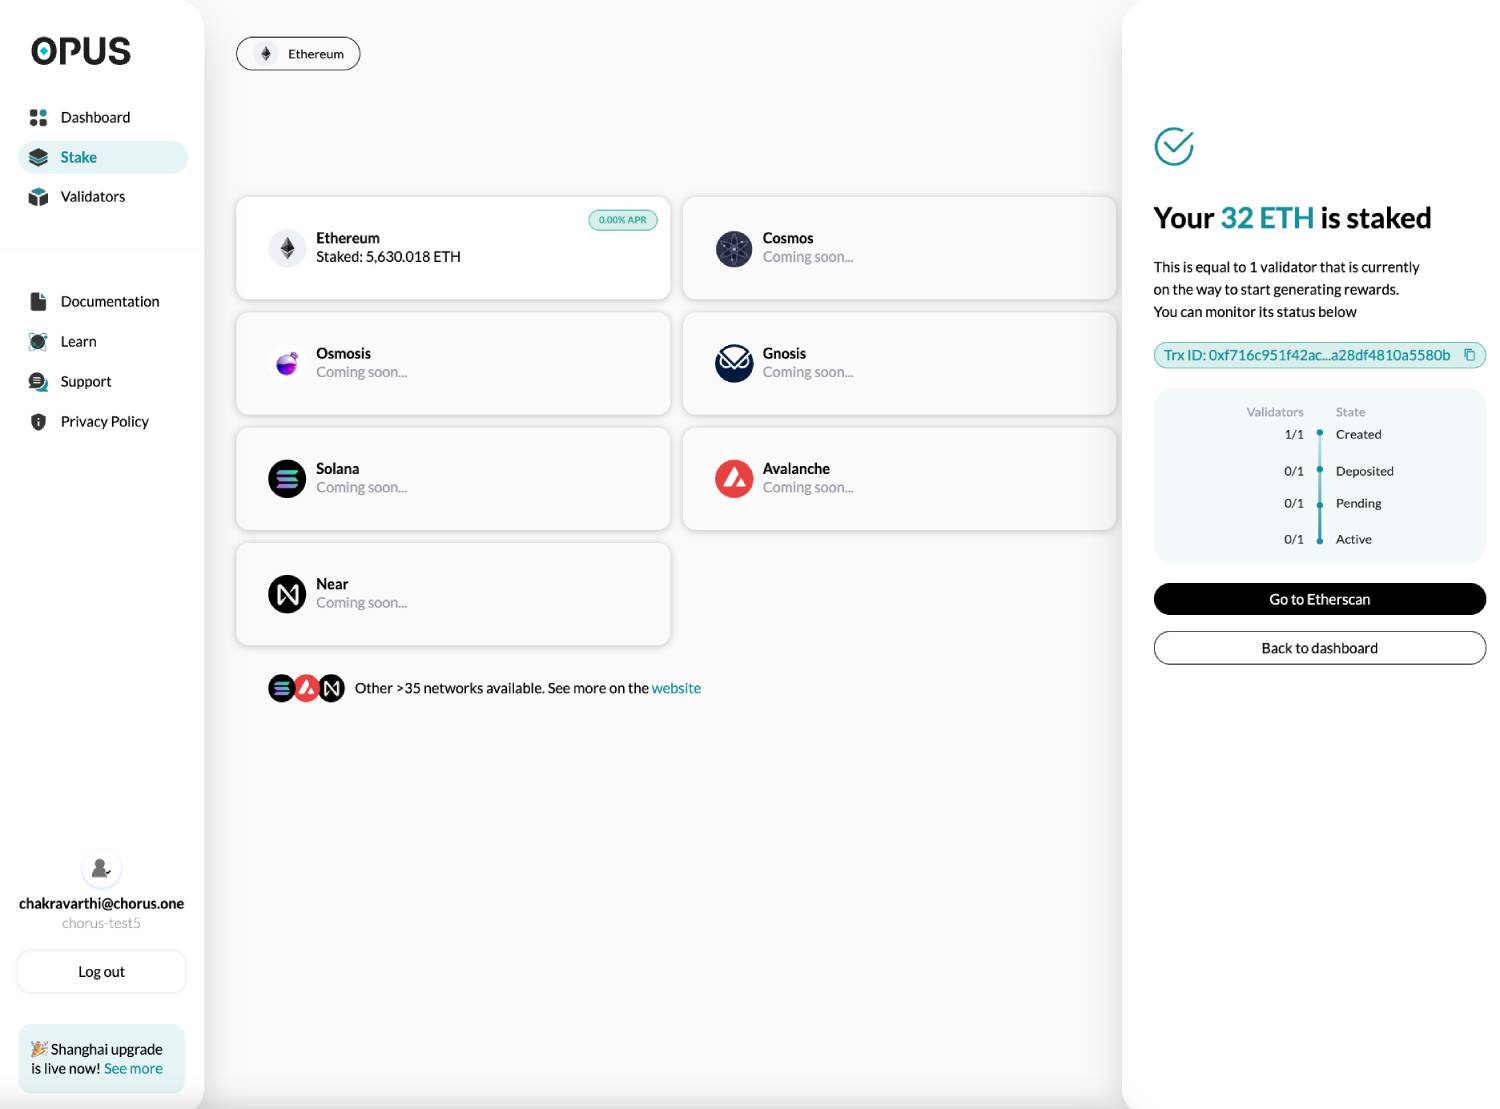
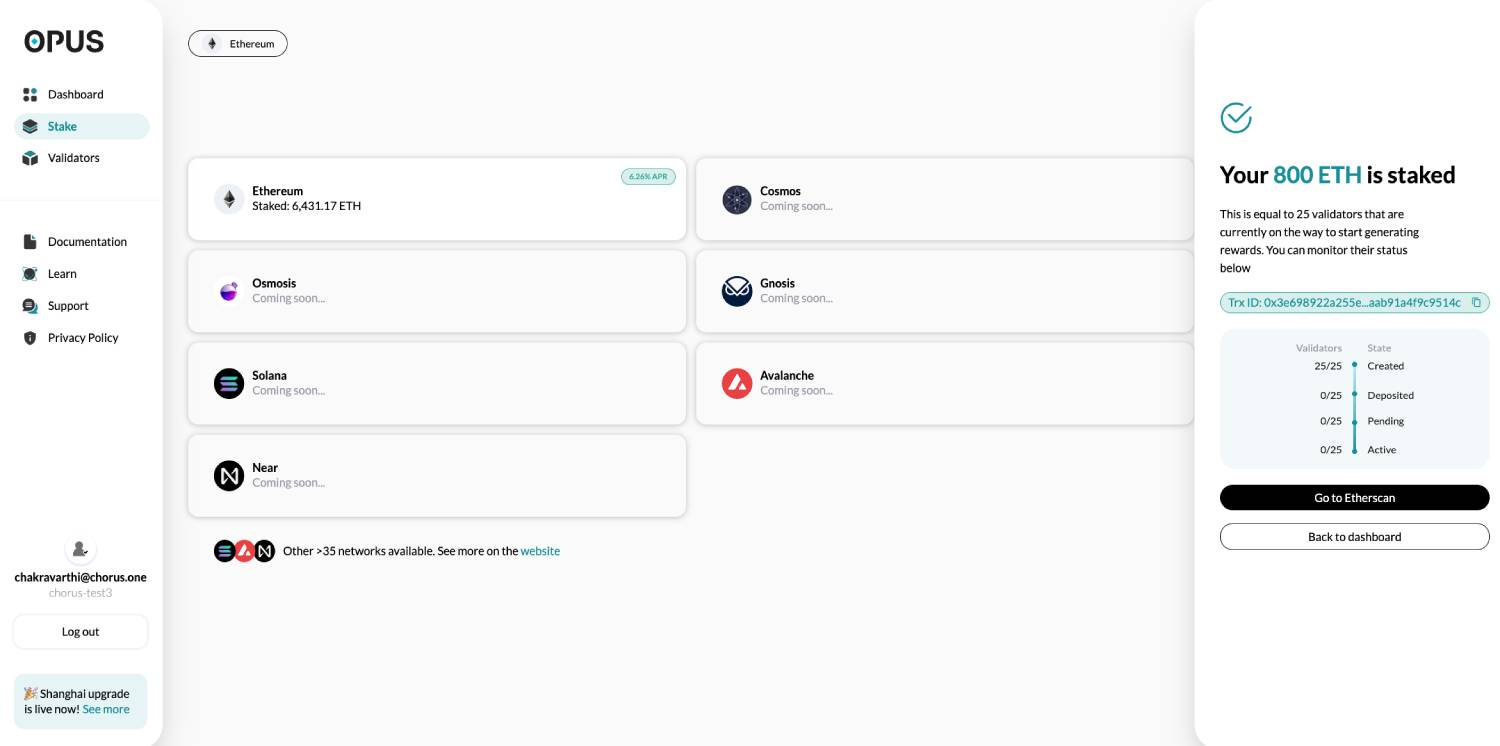
11. After the transaction is confirmed on Fireblocks, you will see the staking transaction confirmation screen on OPUS.
This step-by-step guide is designed to help you stake Ethereum on OPUS. Throughout this guide, we will break down the process into simple, manageable steps.
1. Connect Ledger to Metamask
💡 Tip: If you face the below error(0x650f), please follow this link to resolve the error.
💡 Tip: After this configuration, Metamask doesn’t have access to Ledger private keys. This configuration allows Ledger to leverage Metamask as a visual interface.

2. Enable Blind Signing on Ledger by following the steps shown in this link: https://support.ledger.com/hc/en-us/articles/4405481324433-Enable-blind-signing-in-the-Ethereum-ETH-app?support=true
You have now successfully connected Ledger to Metamask. Next step is to Login to OPUS Poral.
3. Our sales team must have sent you your login credentials. If not, please reach out to them here
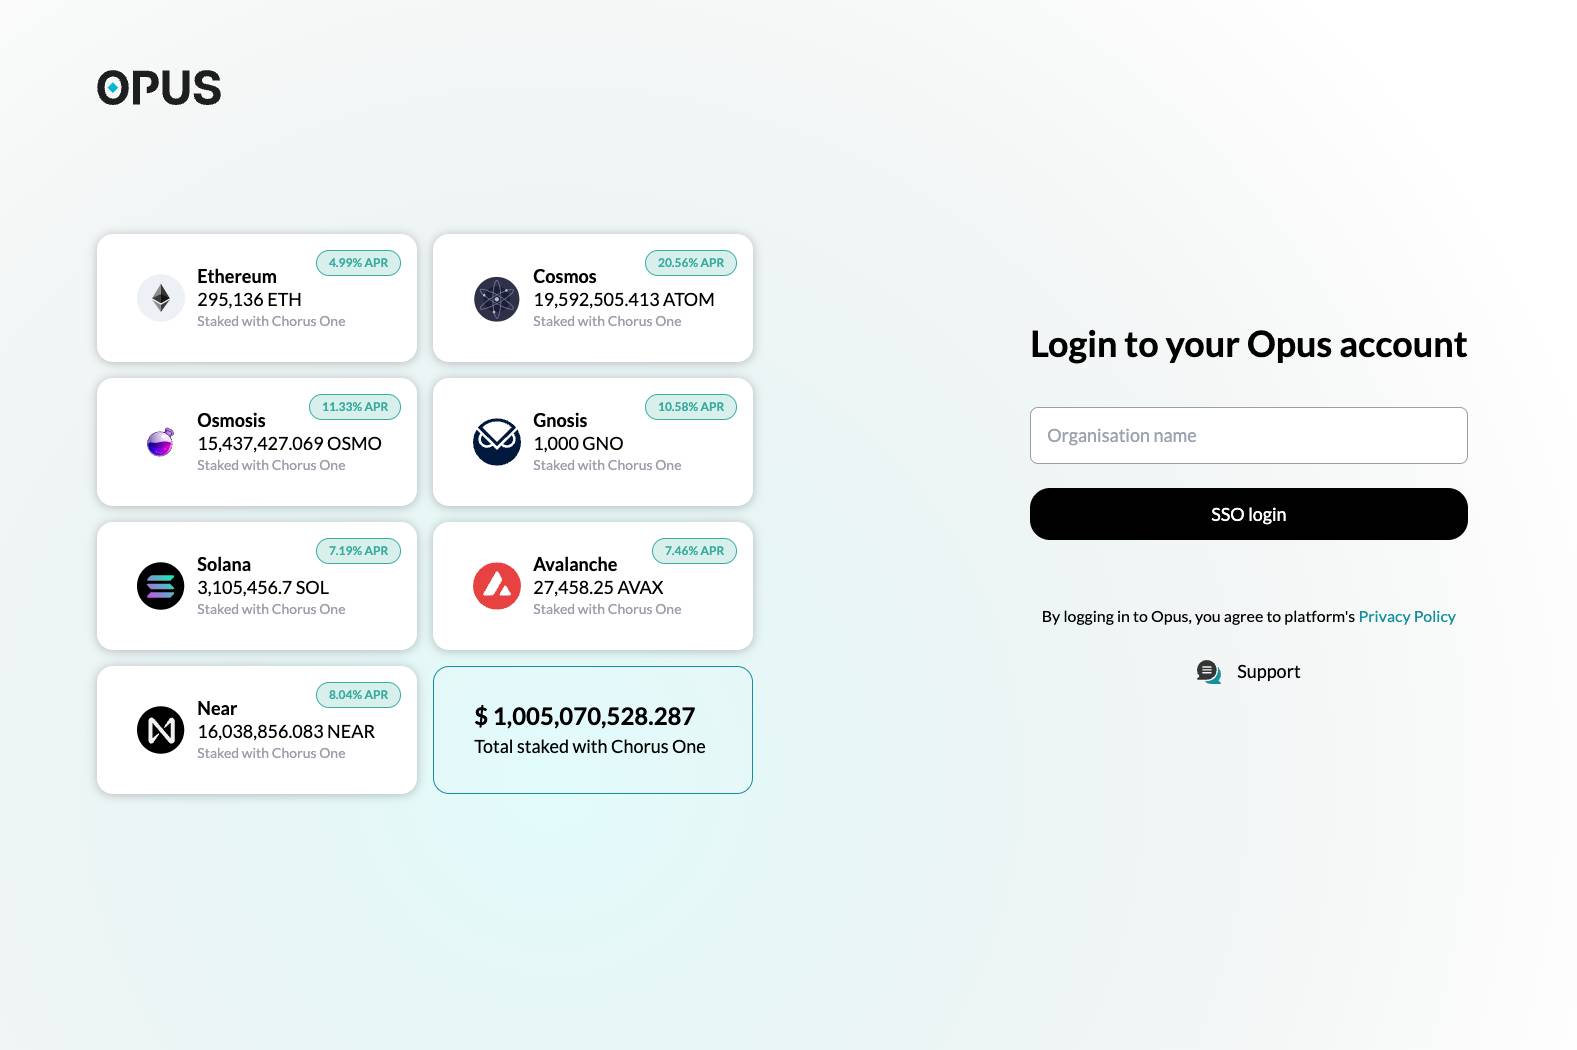
4. Now, please enter your organisation name, and login with SSO.
5. Connect Metamask to OPUS.
6. Select Amount of ETH using the Slider

💡 Tip: OPUS Staking slider helps you stake up to 800 ETH(25 Validators) in one transaction.
💡 Tip: OPUS staking screen shows the backward looking APR, and projected rewards.
7. Confirm stake transaction on Metamask.
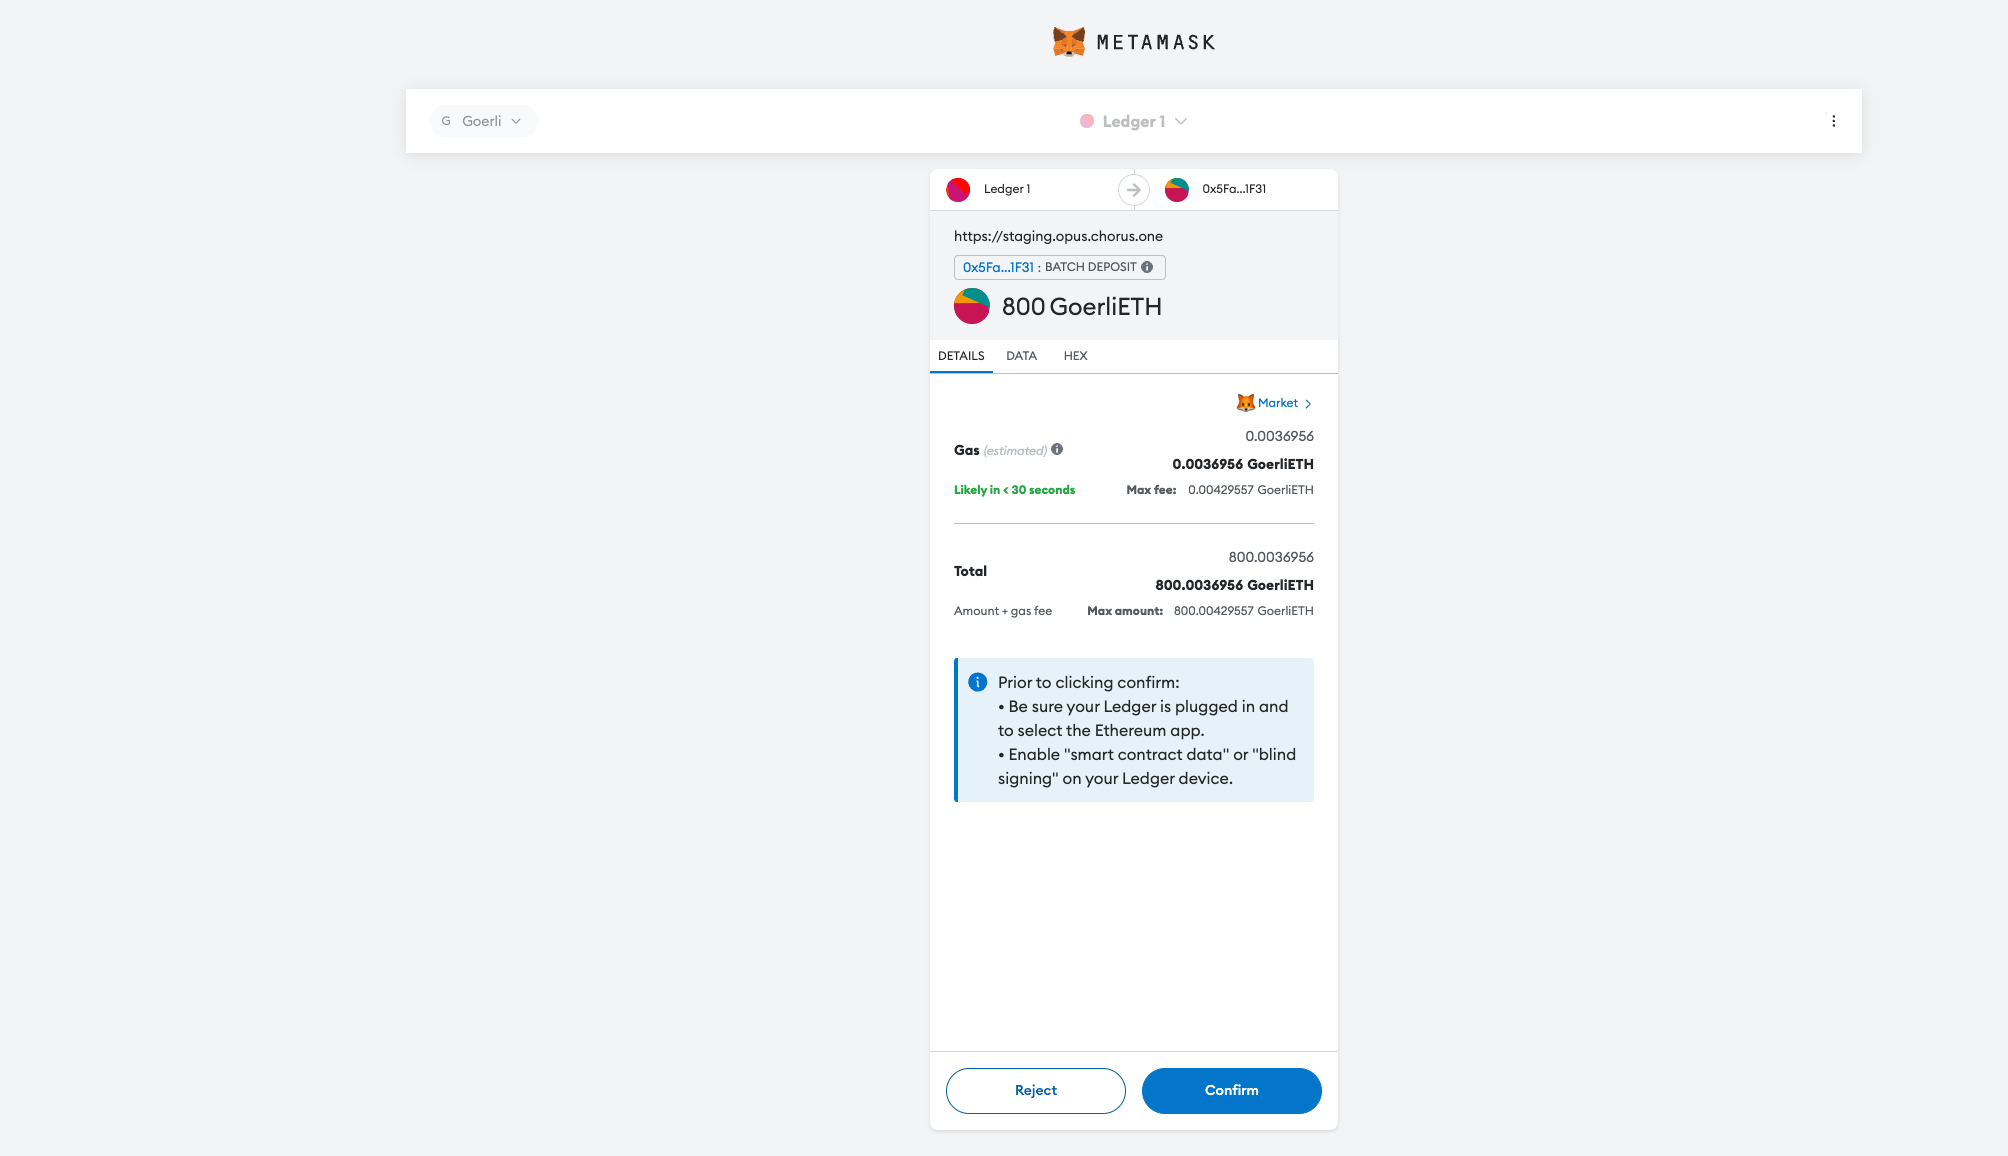
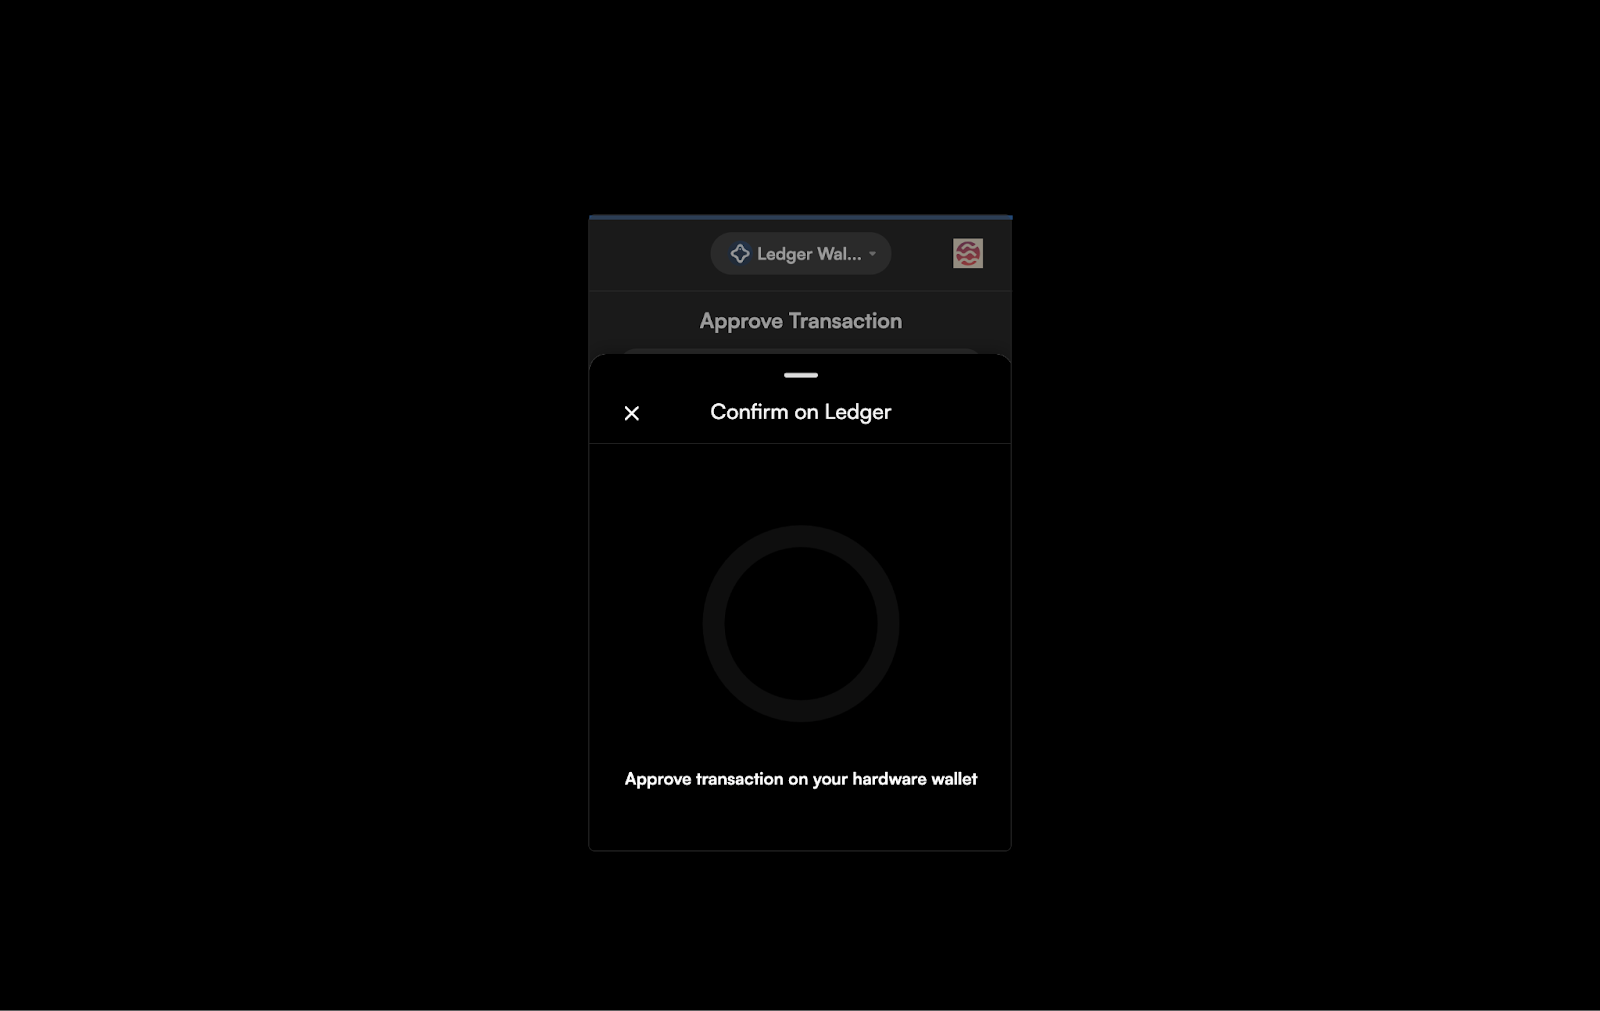
8. Approve transcation on Ledger
.gif)
You have now staked Ethereum on OPUS! To stake more, please follow the guide from step#6.
If you are facing any issues, please reach out to us at Chorus One support.
About Chorus One
Chorus One is one of the biggest institutional staking providers globally operating infrastructure for 40+ Proof-of-Stake networks including Ethereum, Cosmos, Solana, Avalanche, and Near amongst others. Since 2018, we have been at the forefront of the PoS industry and now offer easy enterprise-grade staking solutions, industry-leading research, and also invest in some of the most cutting-edge protocols through Chorus Ventures.
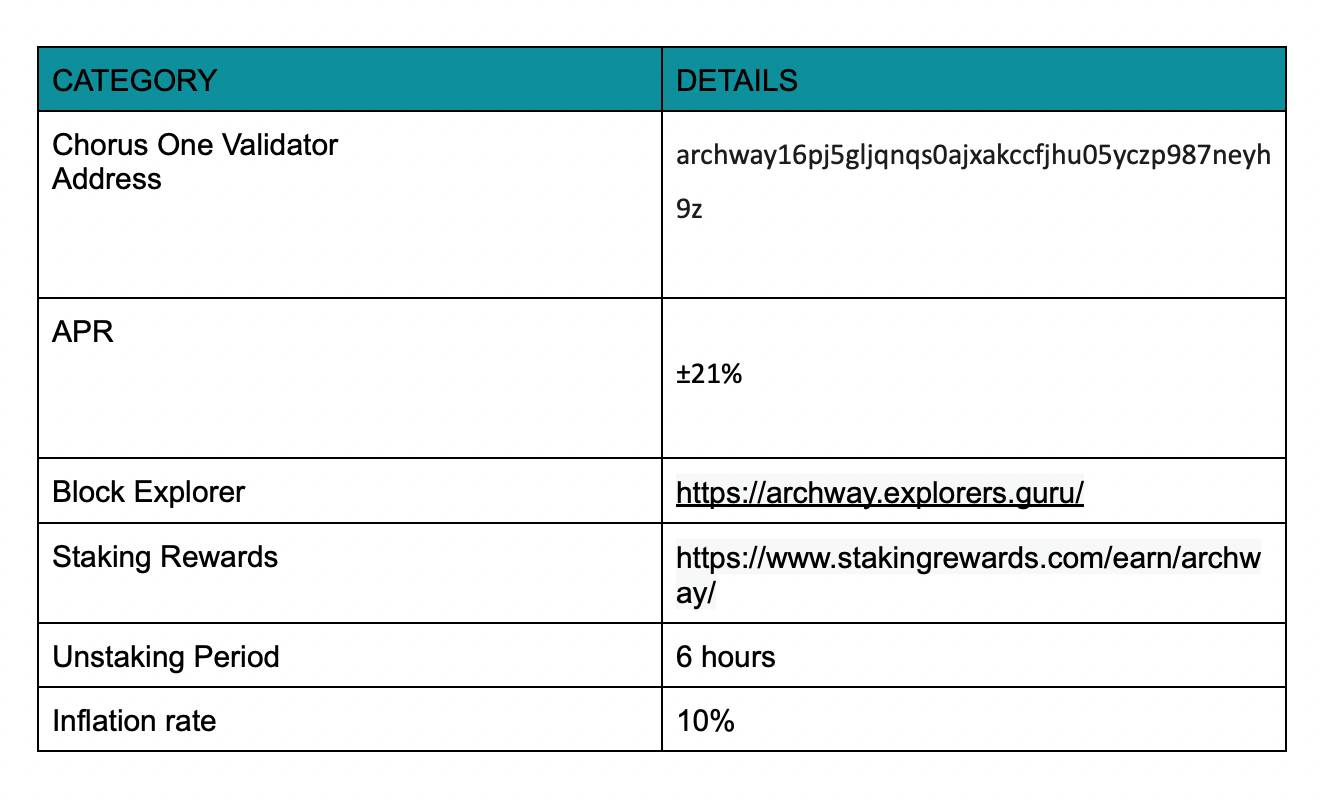
Archway Network is a novel blockchain platform that has garnered attention from developers and enthusiasts. Powered by Cosmos SDK, Tendermint, and CosmWasm, Archway boasts a robust architecture emphasizing speed, scalability, and security. Its standout feature is seamless interoperability through the Inter-Blockchain Communication (IBC) protocol, enabling smooth data and value exchange between different blockchains. With its innovative features and developer-centric focus, Archway Network emerges as a prominent player in the blockchain landscape.
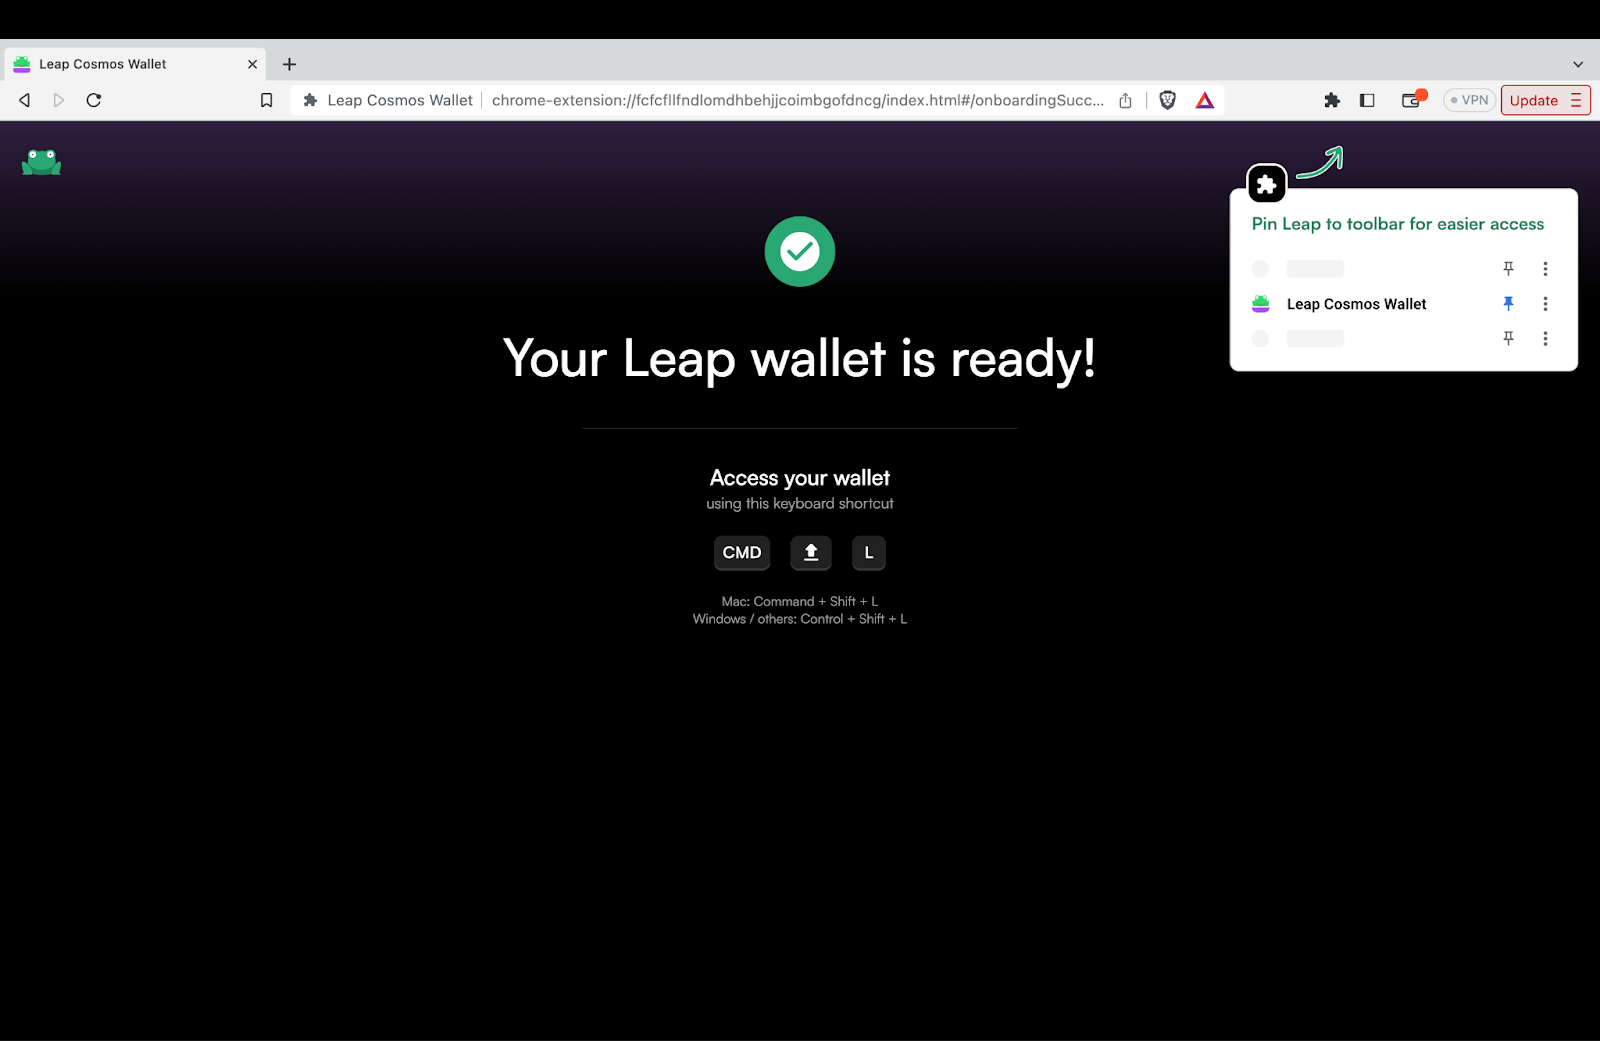
Ensure that you have the Leap wallet extension downloaded and enabled in your browser.
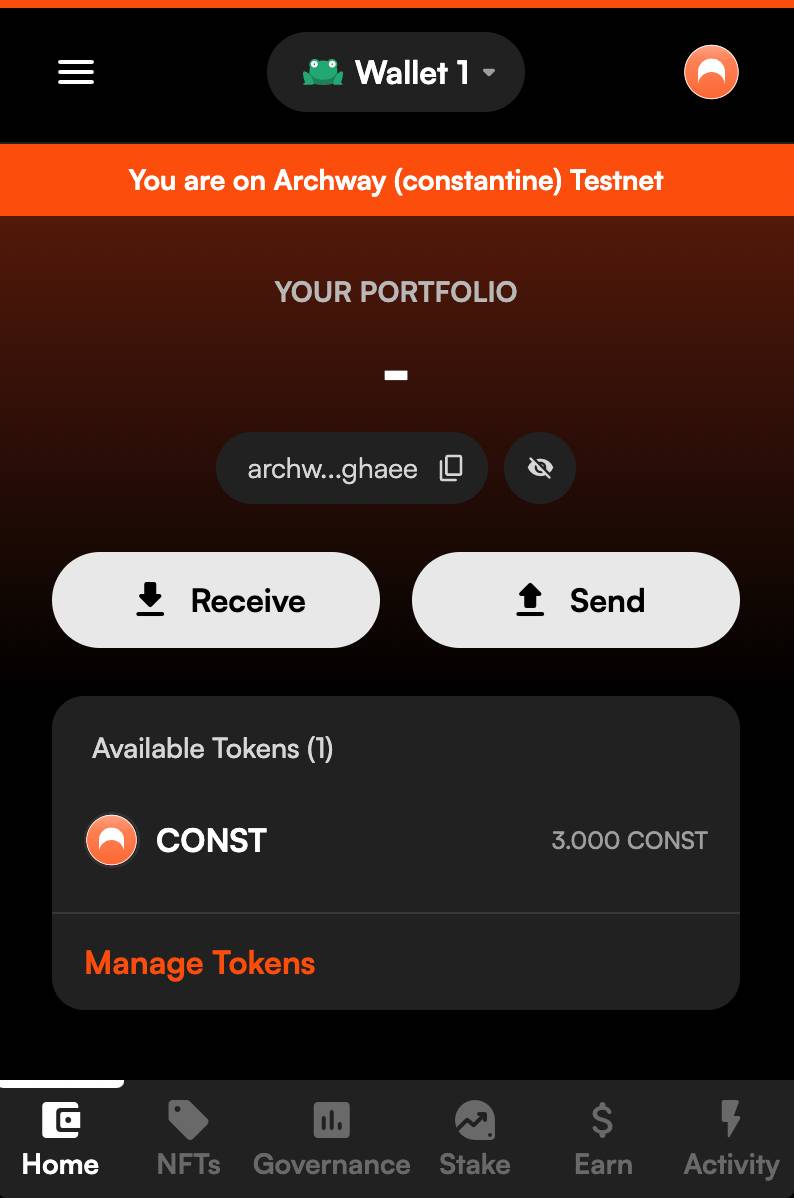
Ensure that you have sufficient $ARCH tokens for staking.

You have now successfully staked $ARCH with Chorus One!
About Chorus One
Chorus One is one of the biggest institutional staking providers globally operating infrastructure for 40+ Proof-of-Stake networks including Ethereum, Cosmos, Solana, Avalanche, and Near amongst others. Since 2018, we have been at the forefront of the PoS industry and now offer easy enterprise-grade staking solutions, industry-leading research, and also invest in some of the most cutting-edge protocols through Chorus Ventures.
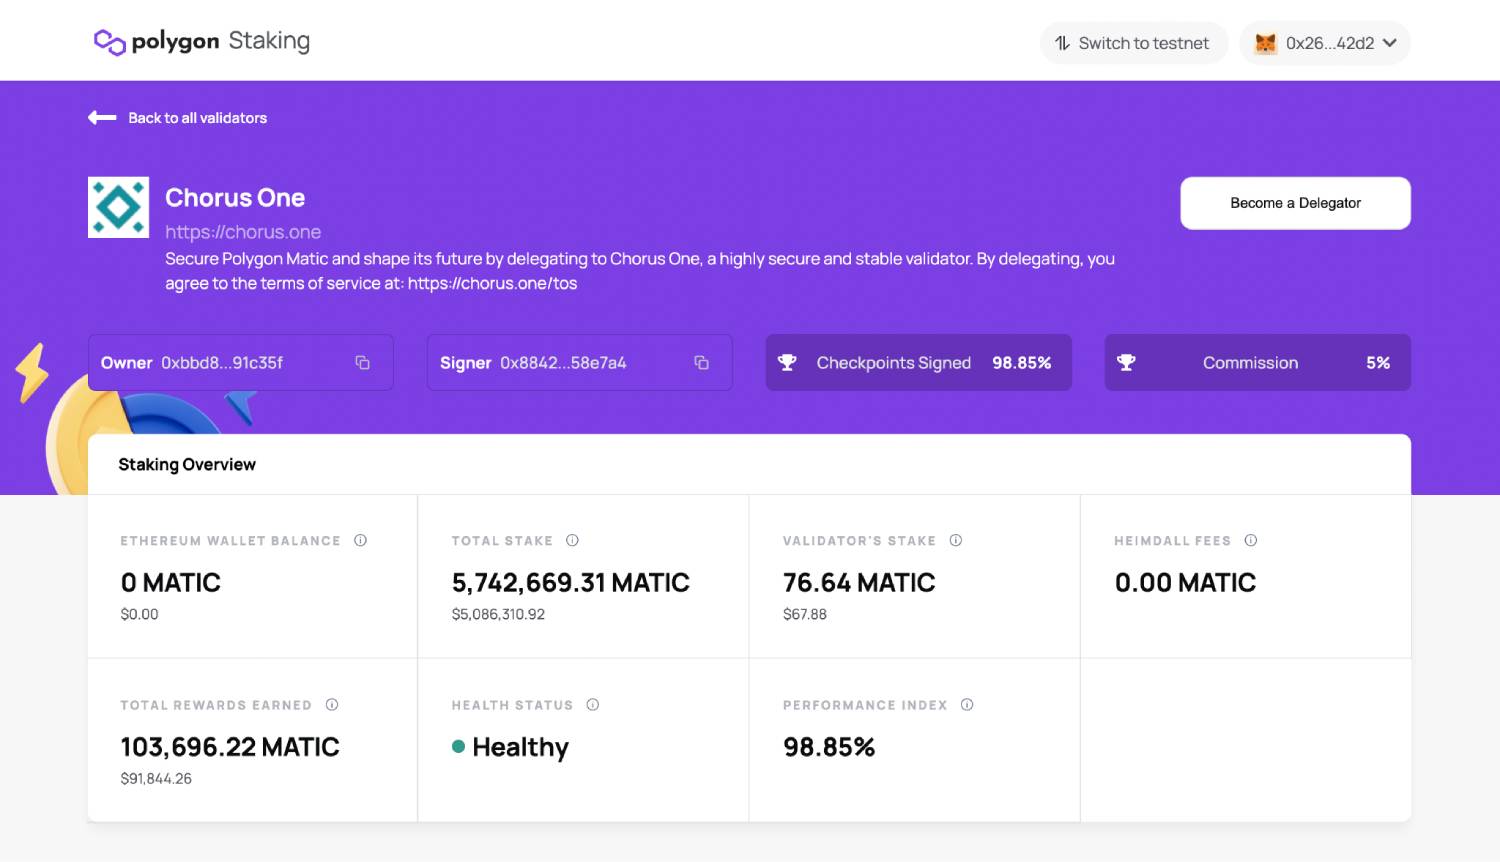
Polygon is a Layer 2 scaling solution built on Ethereum that aims to provide multiple tools to improve the speed and reduce the cost and complexities of transactions on blockchain networks.
Overview

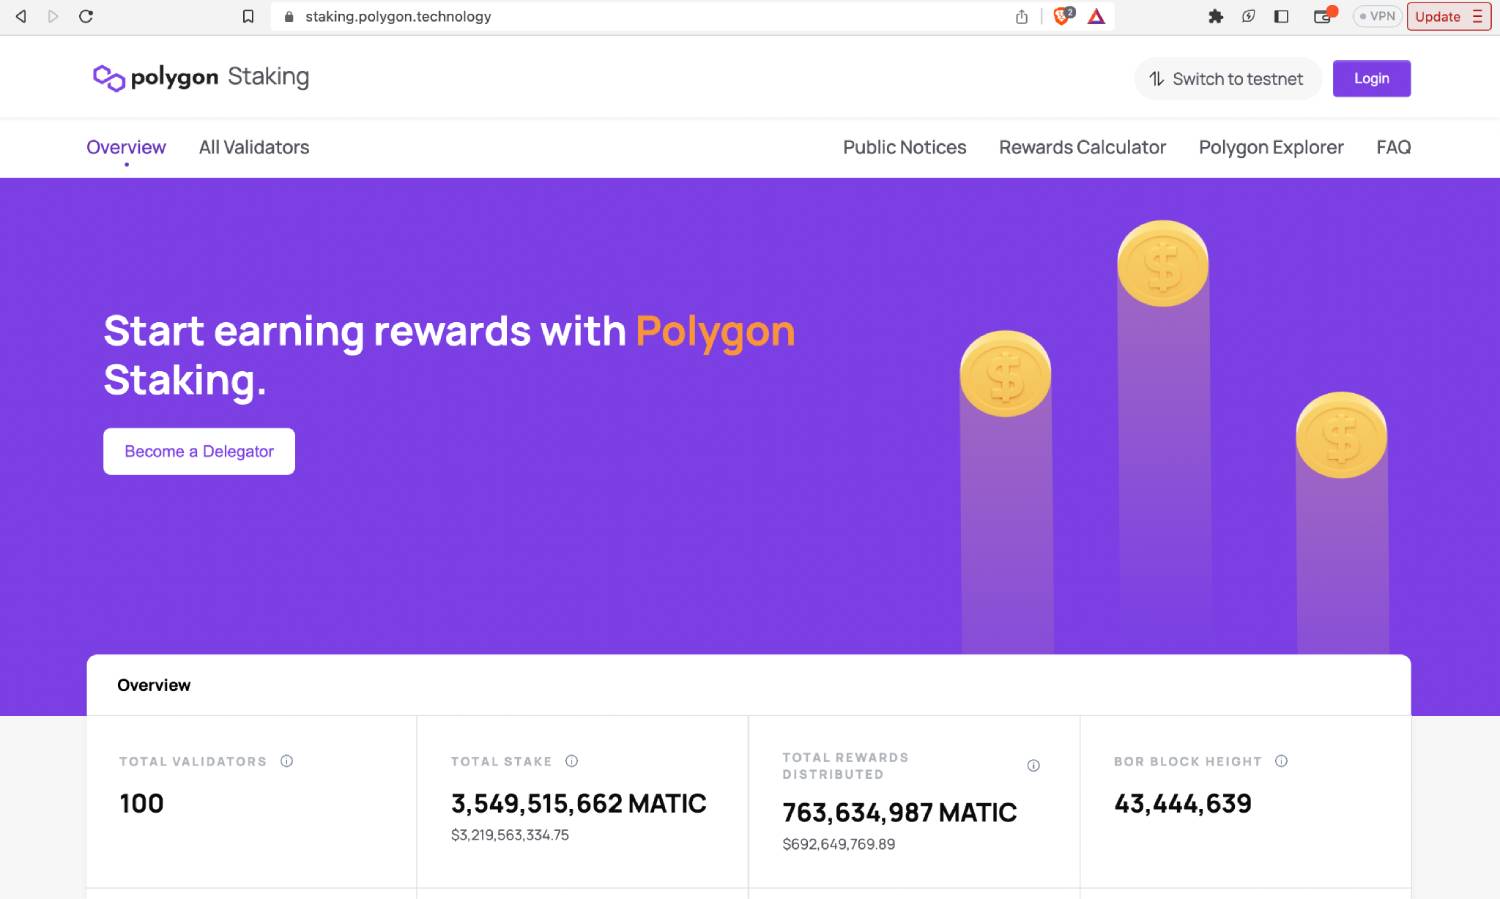
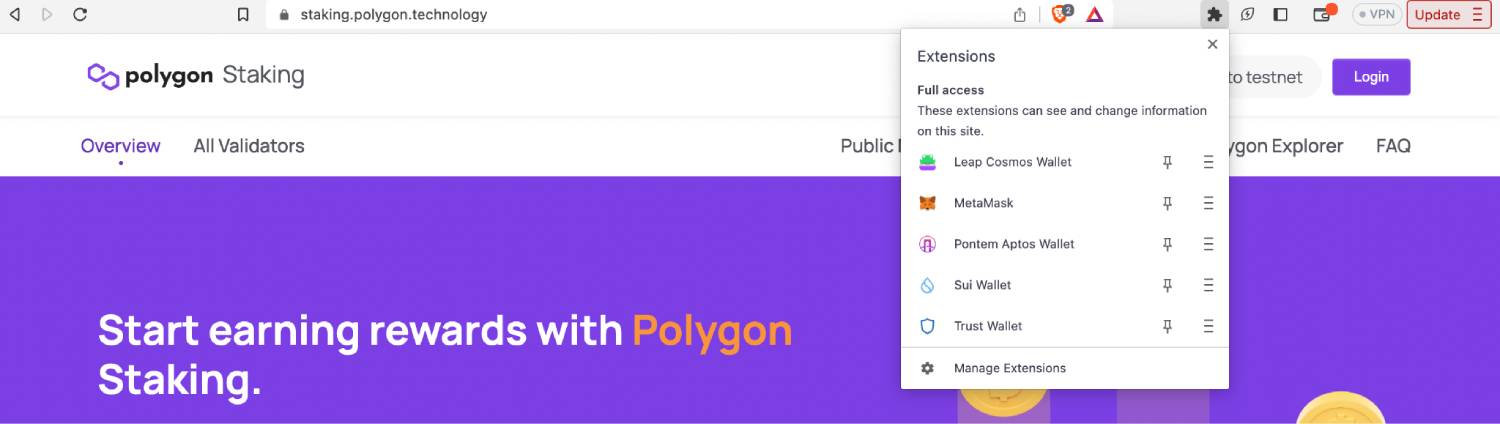
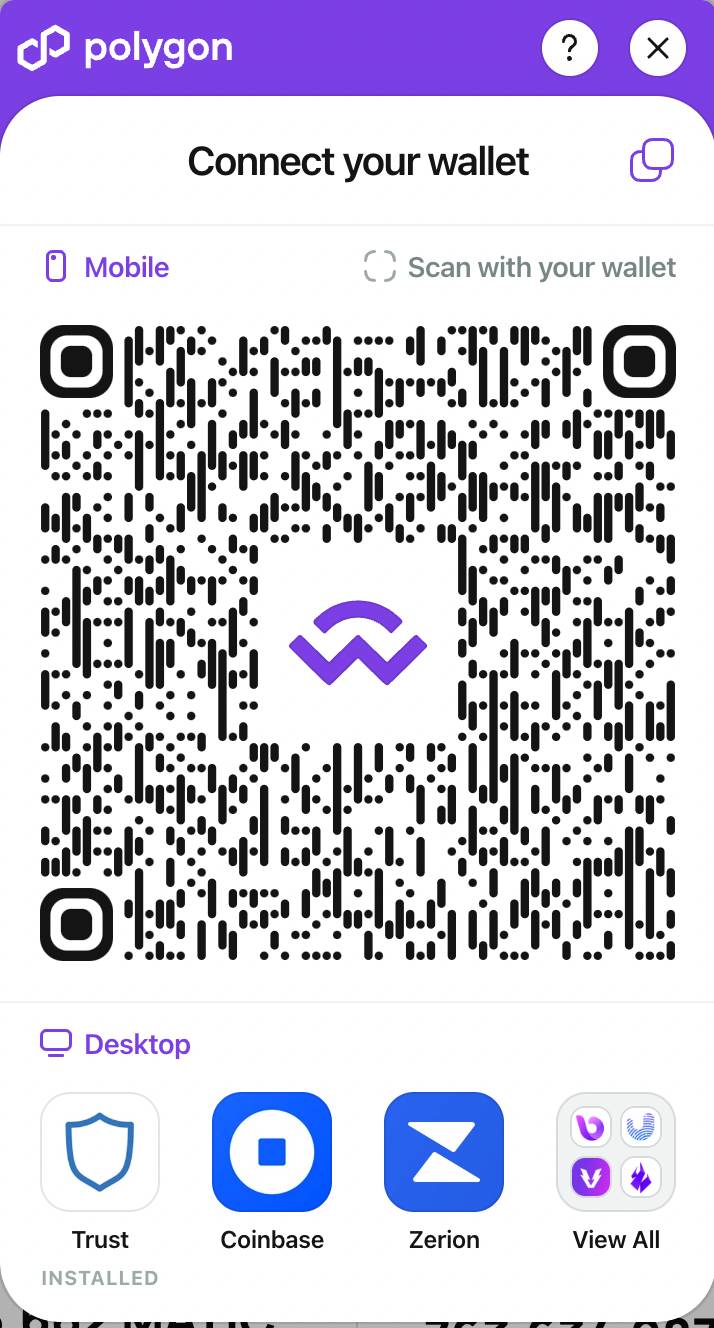
Ensure that the browser has integrated any of the wallets supported by Polygon.
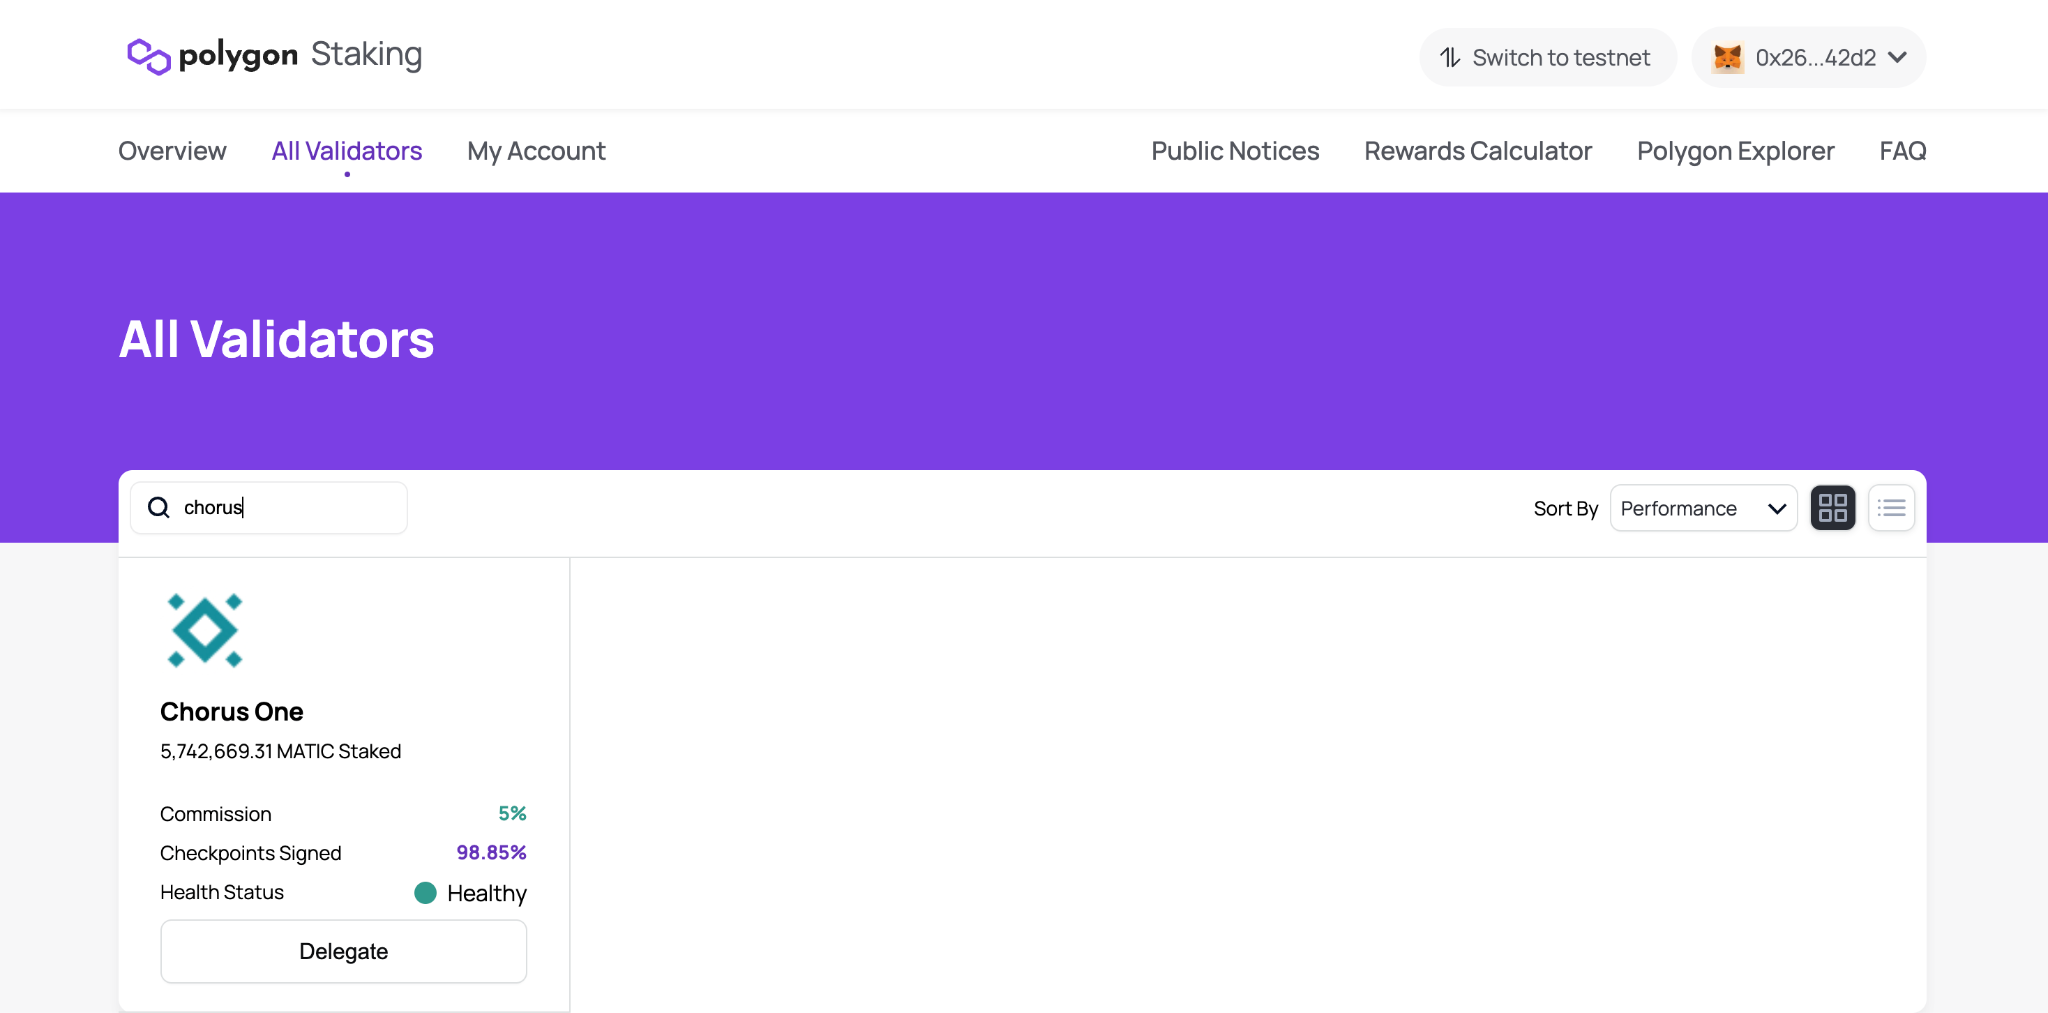
Click on ‘Chorus One’ to verify all the details. Ensure that the Validator address (shown as ‘Owner’) is 0xbbd83024be631bb6f3dd3c0363b3d43b5d91c35f.
Note: The commission rate to stake $MATIC with Chorus One is 5%.
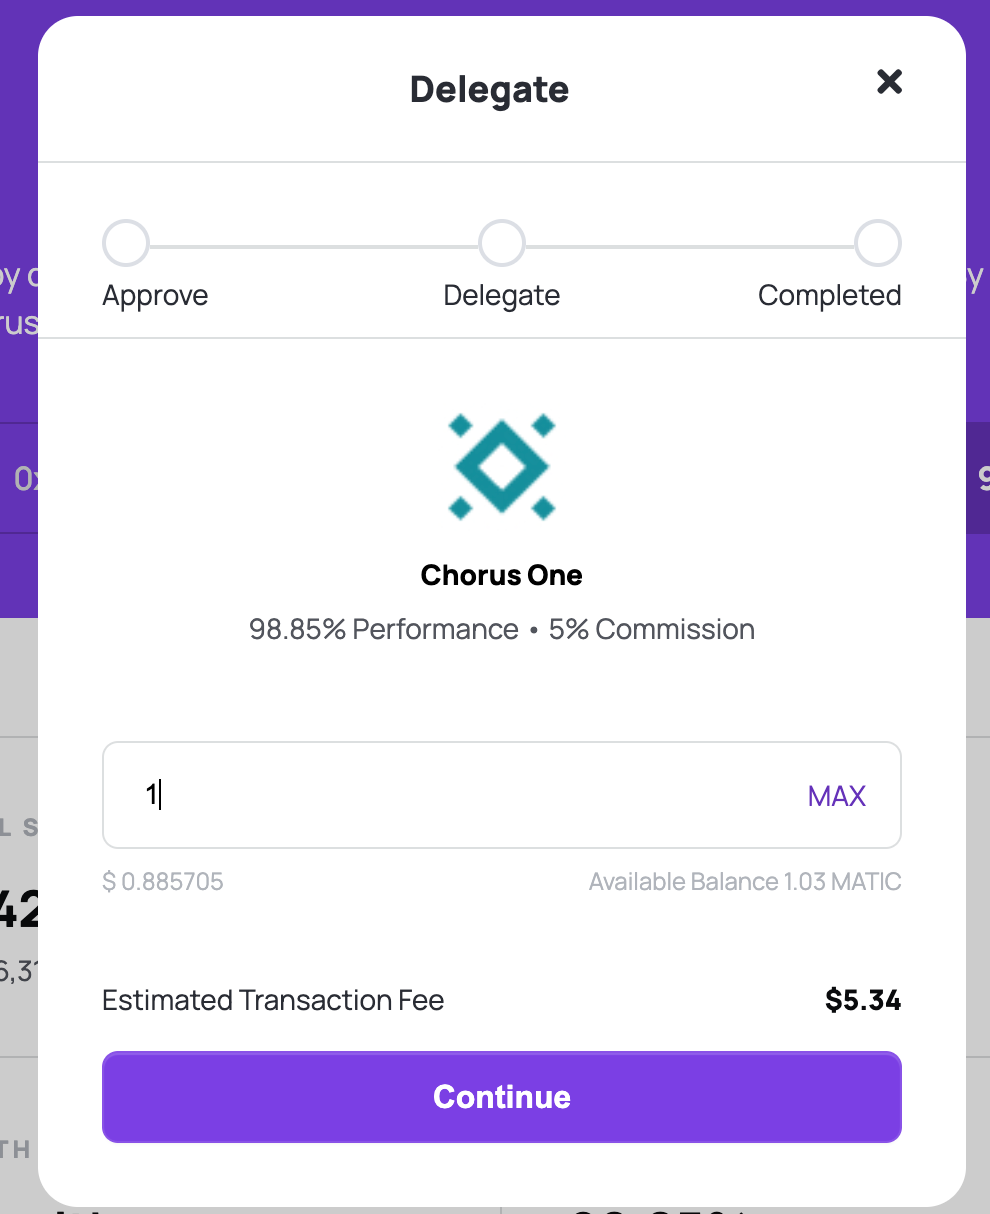
You have now completed the process and staked your $MATIC with Chorus One!
About Chorus One
Chorus One is one of the biggest institutional staking providers globally operating infrastructure for 40+ Proof-of-Stake networks including Ethereum, Cosmos, Solana, Avalanche, and Near amongst others. Since 2018, we have been at the forefront of the PoS industry and now offer easy enterprise-grade staking solutions, industry-leading research, and also invest in some of the most cutting-edge protocols through Chorus Ventures. We are a team of over 50 passionate individuals spread throughout the globe who believe in the transformative power of blockchain technology.
Sui is a Layer 1 blockchain and smart contract platform designed to make digital asset ownership fast, private, secure, and accessible to everyone.
Overview
In case you don’t have the SUI wallet extension installed on your browser already, visit https://chrome.google.com/webstore/detail/sui-wallet/opcgpfmipidbgpenhmajoajpbobppdil and Install the extension.
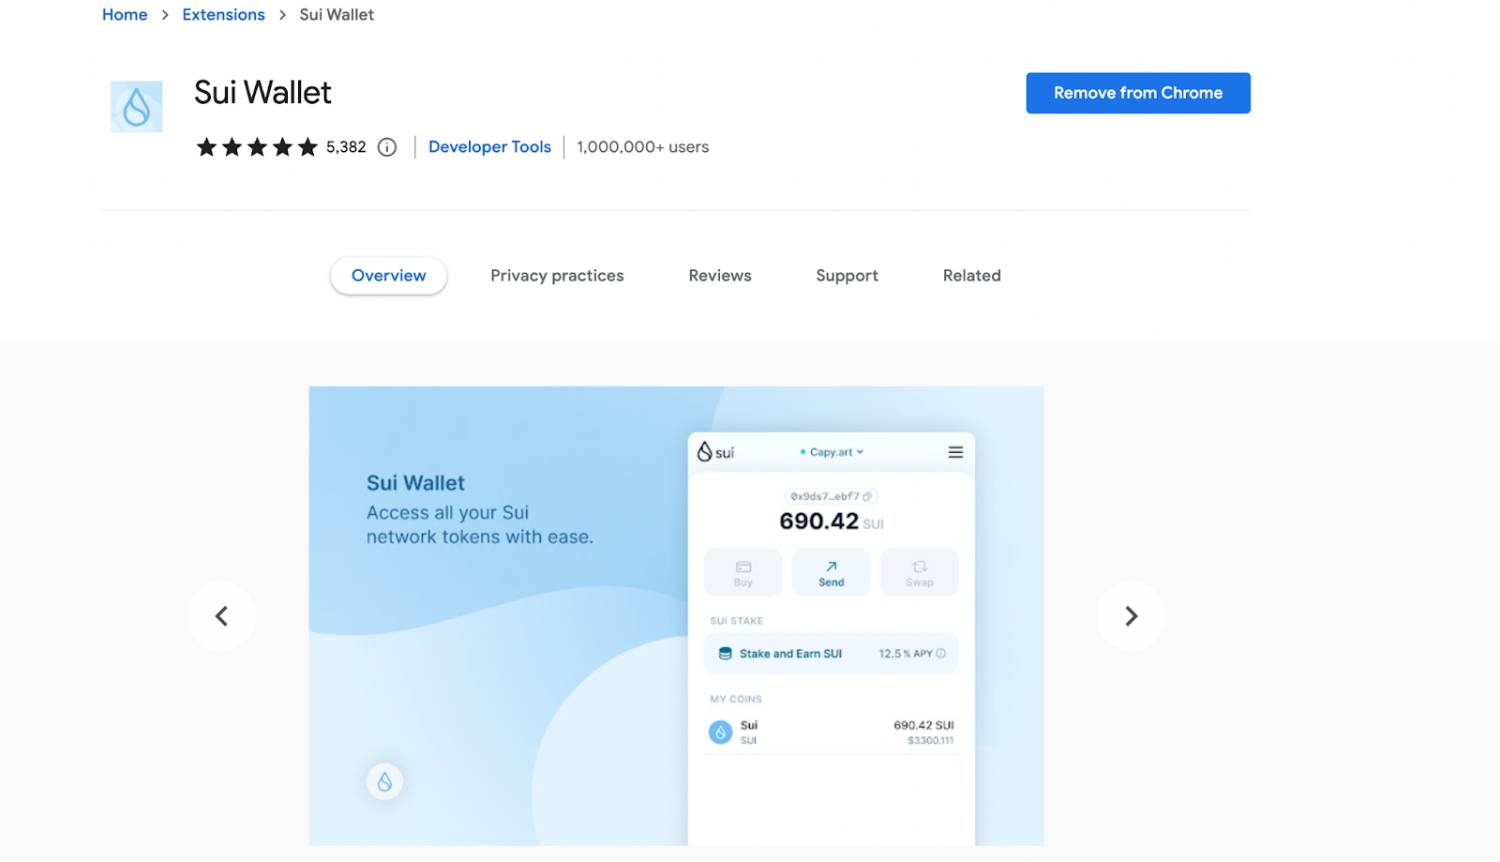
Click on ‘Install SUI for Chrome’ if you are using a Chrome browser or Brave if you are using the Brave browser and follow the installation instructions.
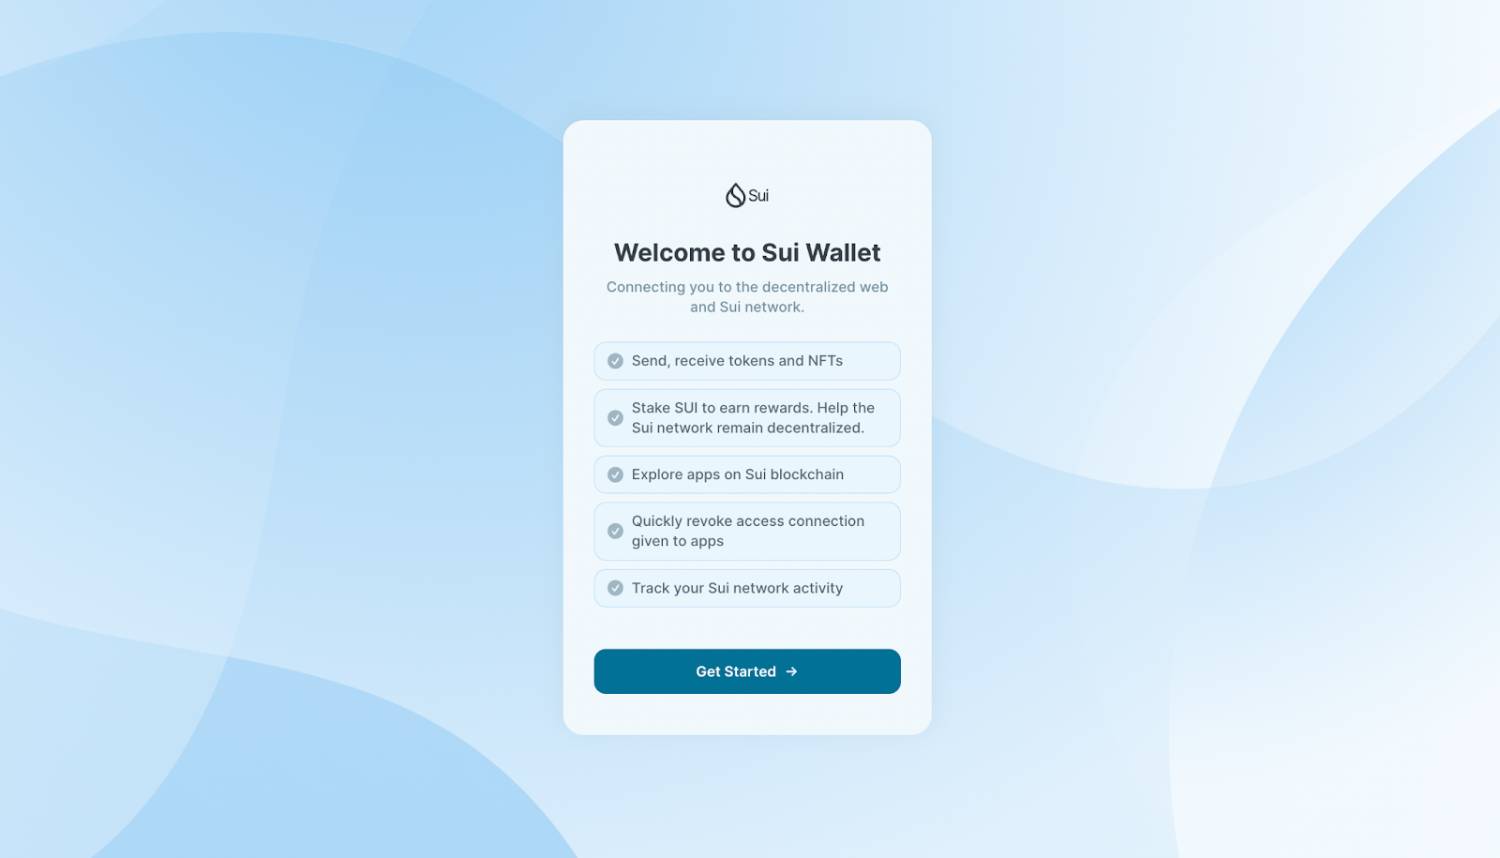
Click on the extension in the Chrome/Brave toolbar and the following page will open up.
Click on Get Started to create your account. Then, create a secure password for your wallet.
| You will be shown 12 words as your mnemonic seed. Back it up securely (read the warning below)
| Back up your mnemonic seed securely
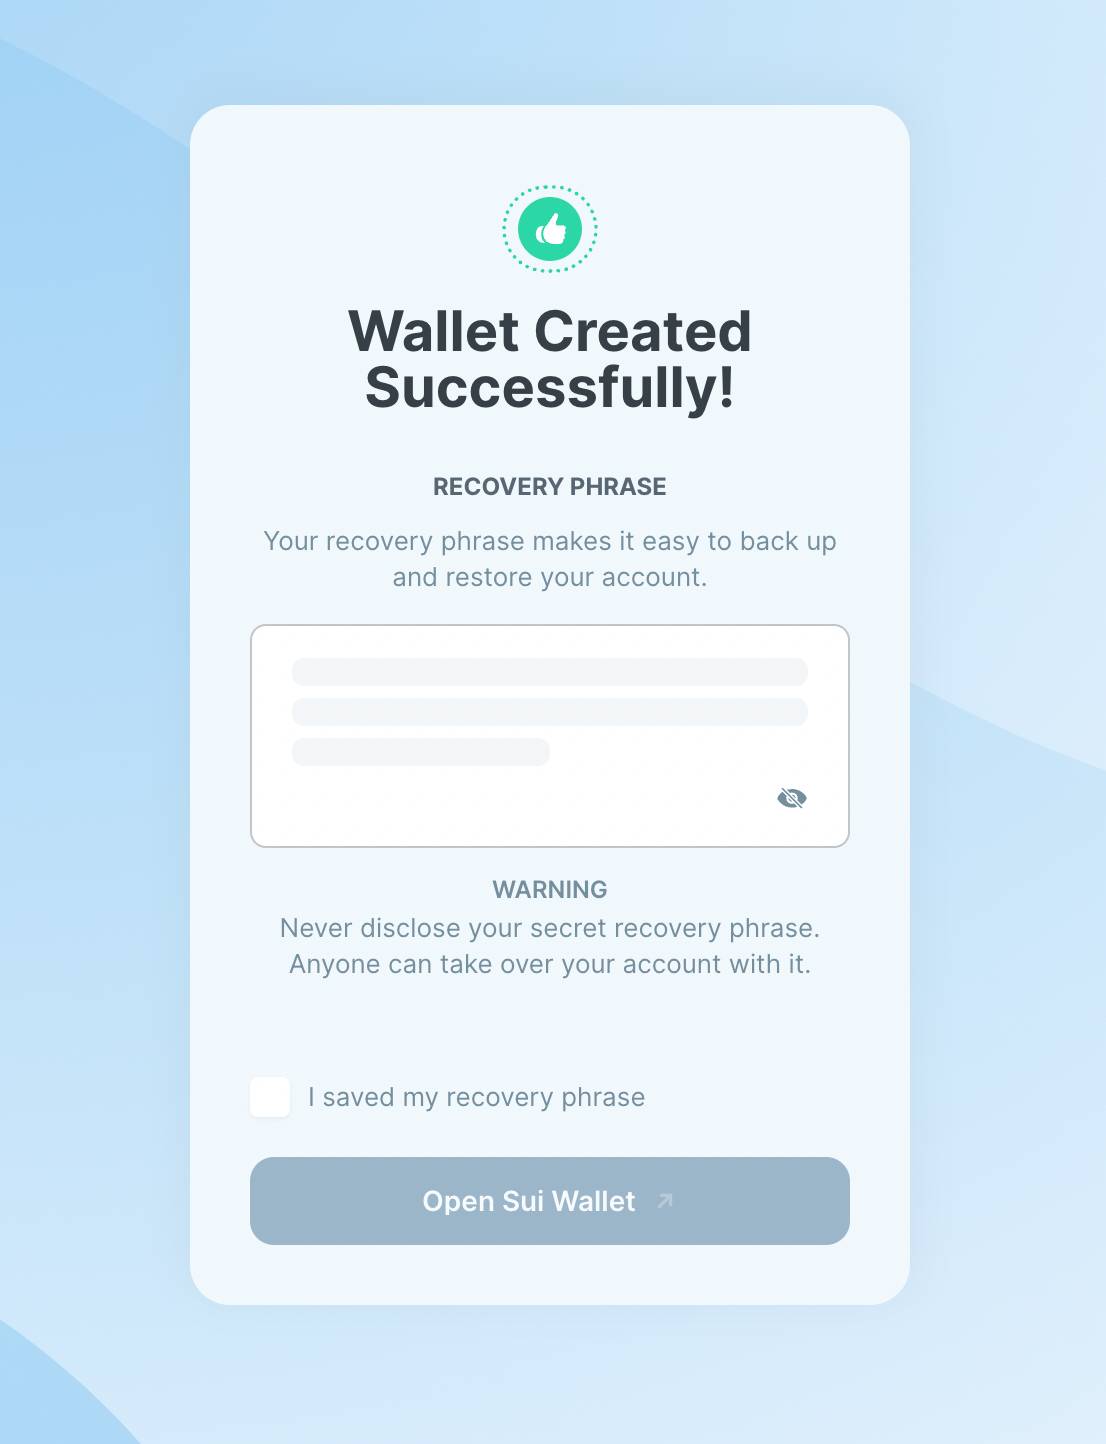
Finally, click on Open Sui Wallet to create your account.
3. Log in to your account
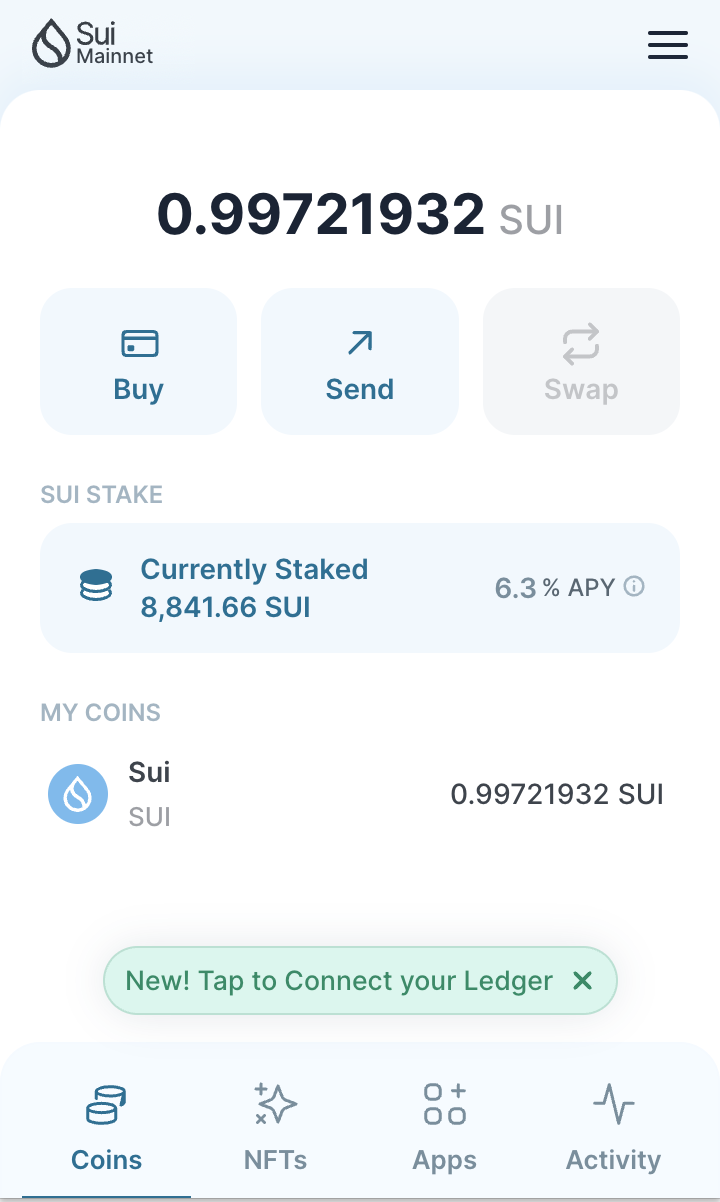
Once you have created your account, click on the extension to view your address.
4. Stake your SUI
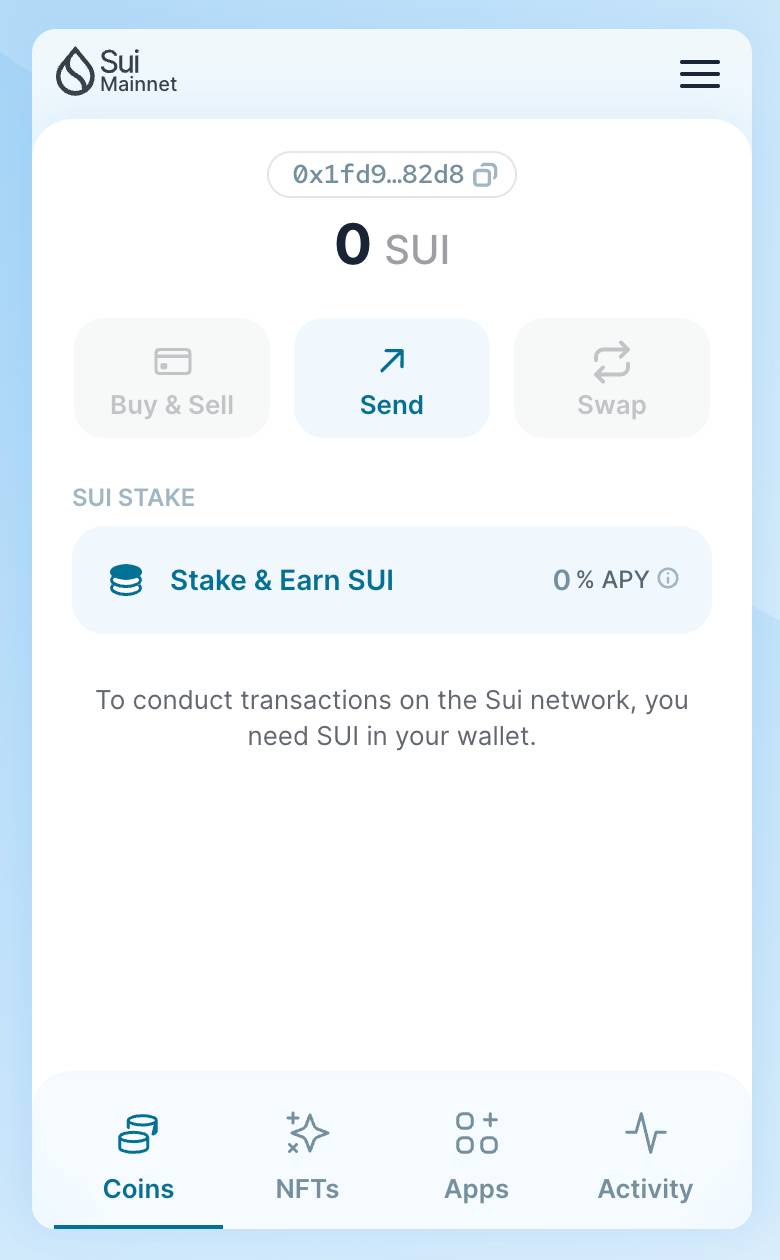
If you don’t already have SUIs in your account, fund it with some tokens. You may use an exchange to transfer the SUI tokens to your address or get it from someone who already holds them.
Ensure you’re on the correct network - Mainnet.
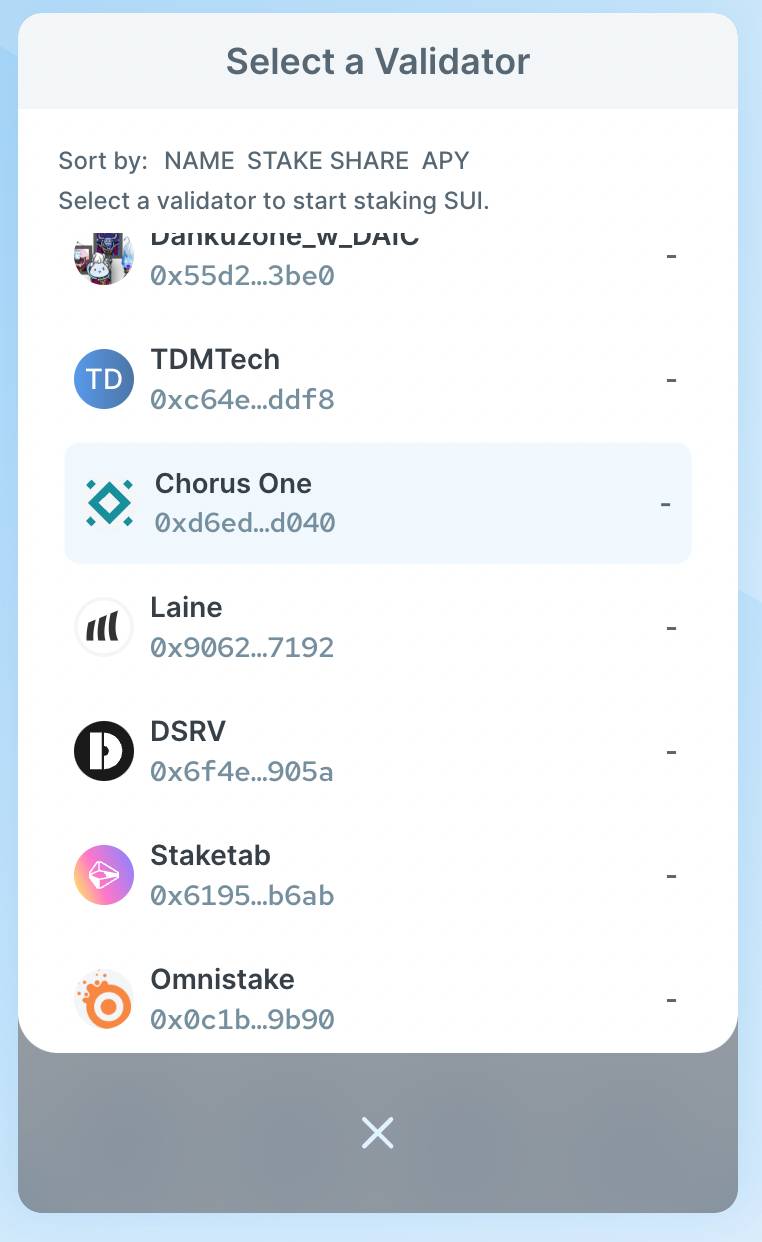
Click on “Stake & Earn SUI”
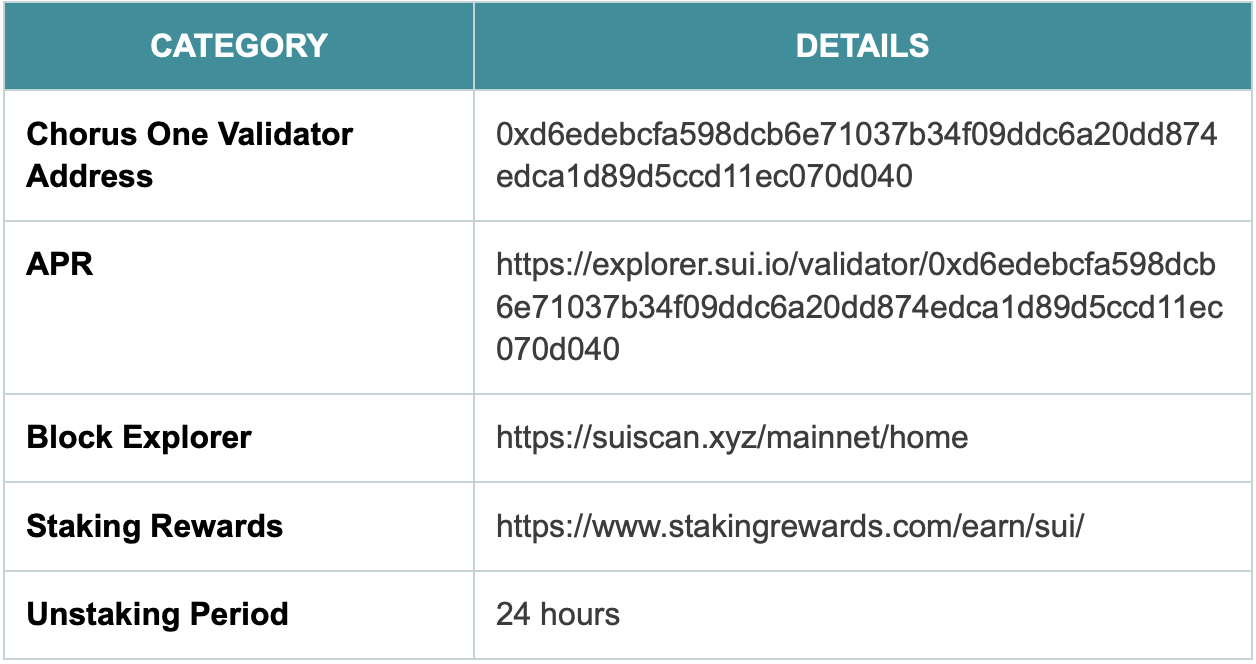
Find “ Chorus One” validator in the list and verify that the validator address by visiting https://explorer.sui.io/validator/0xd6edebcfa598dcb6e71037b34f09ddc6a20dd874edca1d89d5ccd11ec070d040 and confirming that the Chorus One address is 0xd6edebcfa598dcb6e71037b34f09ddc6a20dd874edca1d89d5ccd11ec070d040.
Select and click “Select Amount”. Enter the amount of SUI tokens you want to stake.
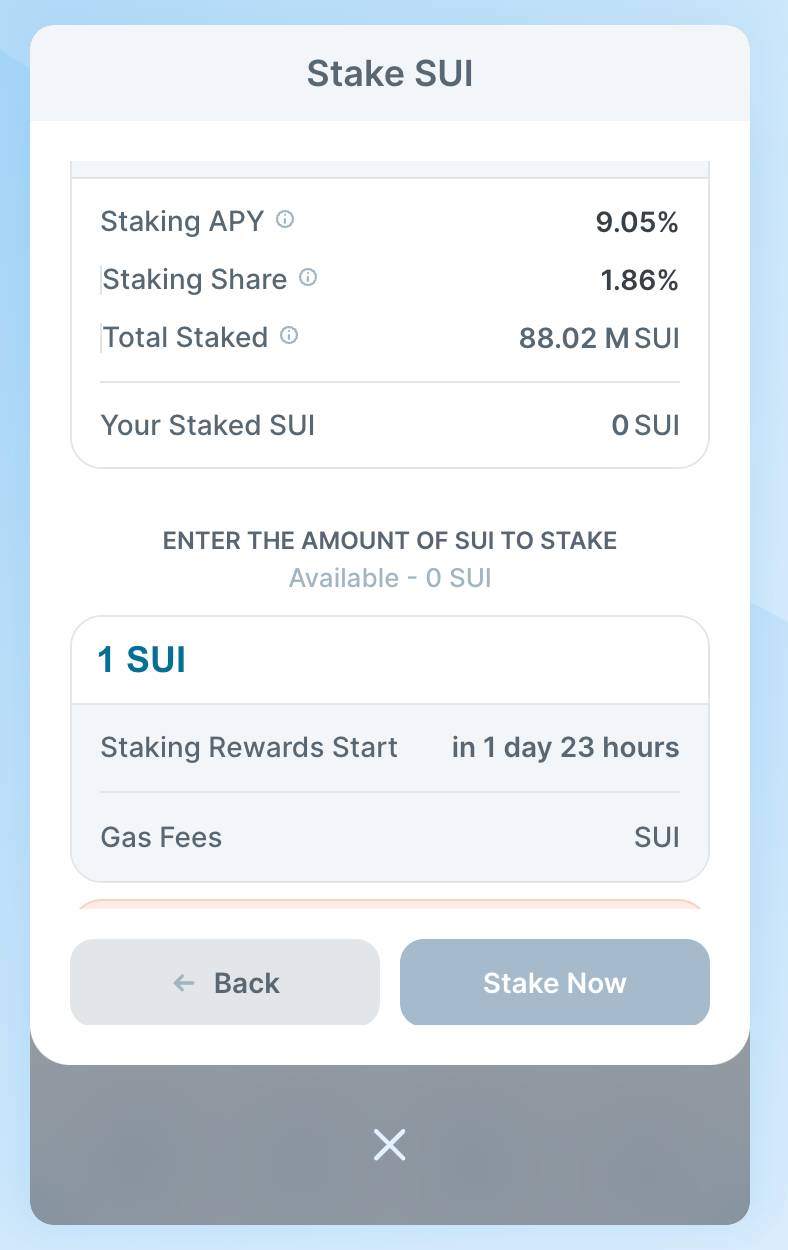
Click on “Stake Now”.
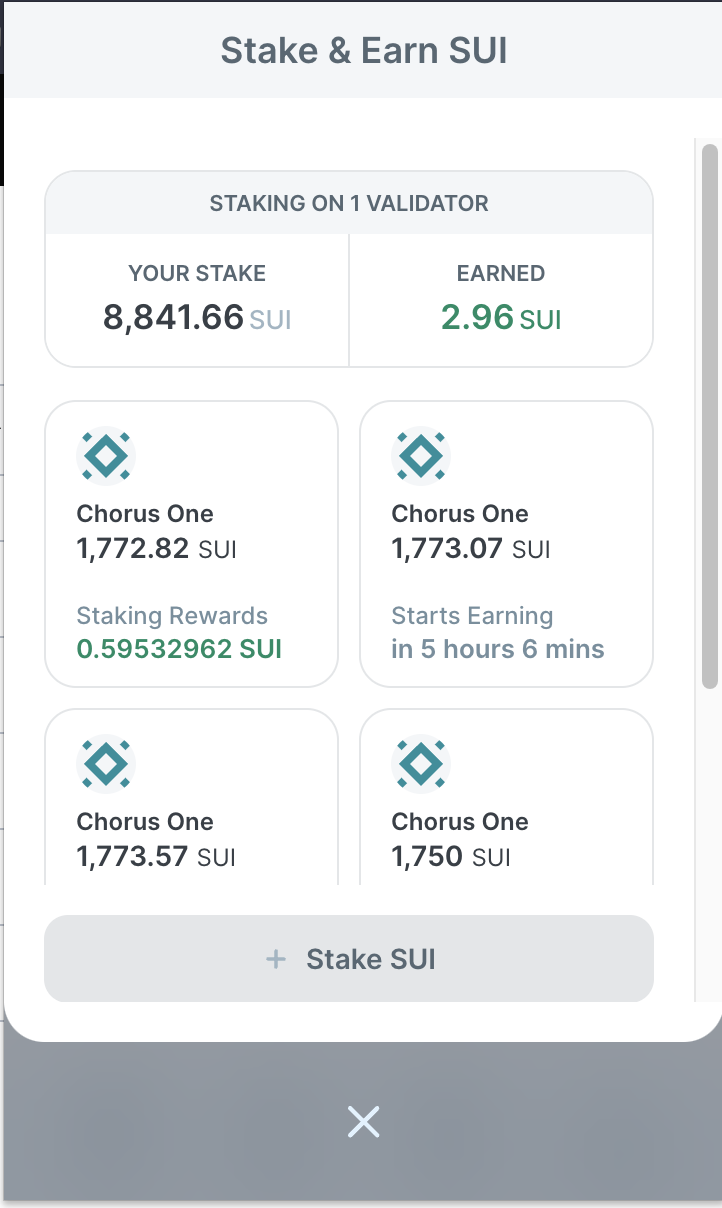
Over time you will see rewards getting accumulated in your account. You can simply go to the SUI extension to claim them.
How to Unstake SUI
1. To unstake, log into your account and click on "Currently Staked".
2. Select the amount of SUI tokens that you want to unstake.
.png)
.png)
.png)
Akash is a decentralized marketplace, where cloud providers (providers) can lease their computing power to users (tenants). The Akash marketplace functions by conducting reverse auctions whereby the tenant creates orders for computing power, and providers bid on these orders. When the tenant chooses a provider, they create a lease. After this, the user deploys a Docker container on the Akash Container Platform where users are able to then run any cloud-native application and access a range of cloud management services like Kubernetes.
Please note that the unstake period is 21 days. This means that you can only unstake and withdraw coins to your wallet after this time has passed. We wish you profitable staking!
In case you don't have the keplr extension installed in your browser visit https://www.keplr.app/ and click on Install extension.


Click on Install Keplr for Chrome if you are using a Chrome browser or Brave if you are using the Brave browser and follow the installation instructions.
Click on the extension in the Chrome/Brave toolbar and the following page will open up.

In case you do not have an existing Keplr account you can create a new account
You will be shown 12 words as your mnemonic seed. Select24 words option for a more secure mnemonic. Back it up securely (read the warning below)
Back up your mnemonic seed securely.
Enter an account name and a passphrase to unlock your wallet. You will be asked for the mnemonic again. Enter the 24 words in order. This is to make sure you remember the mnemonic.

Finally, click on Next to create your account
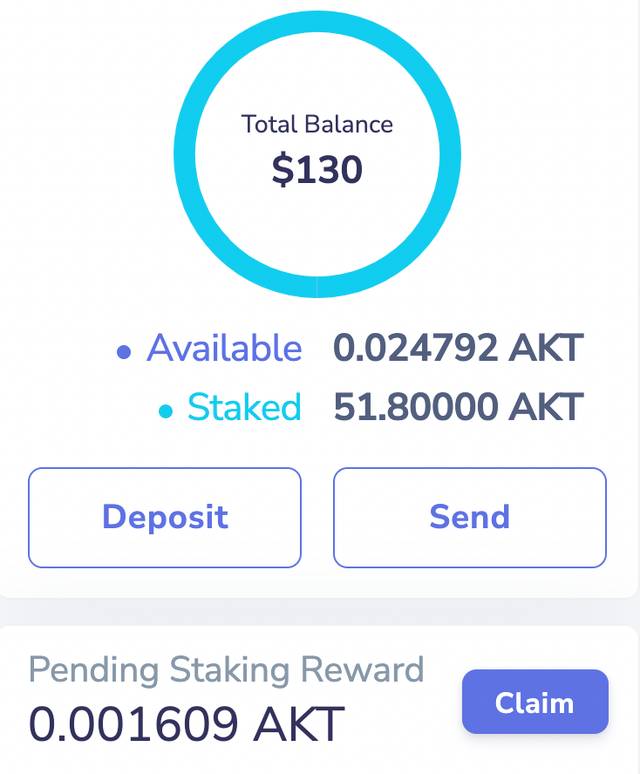
Regardless of whether you already have an account or if you created it just now you may now click on the extension to view your address or visit https://wallet.keplr.app/#/akashnet/stake to see the full dashboard.

If you don't already have AKT in your account fund it with some tokens. You may use an exchange to transfer the AKT tokens to your address or get it from someone who already holds those.
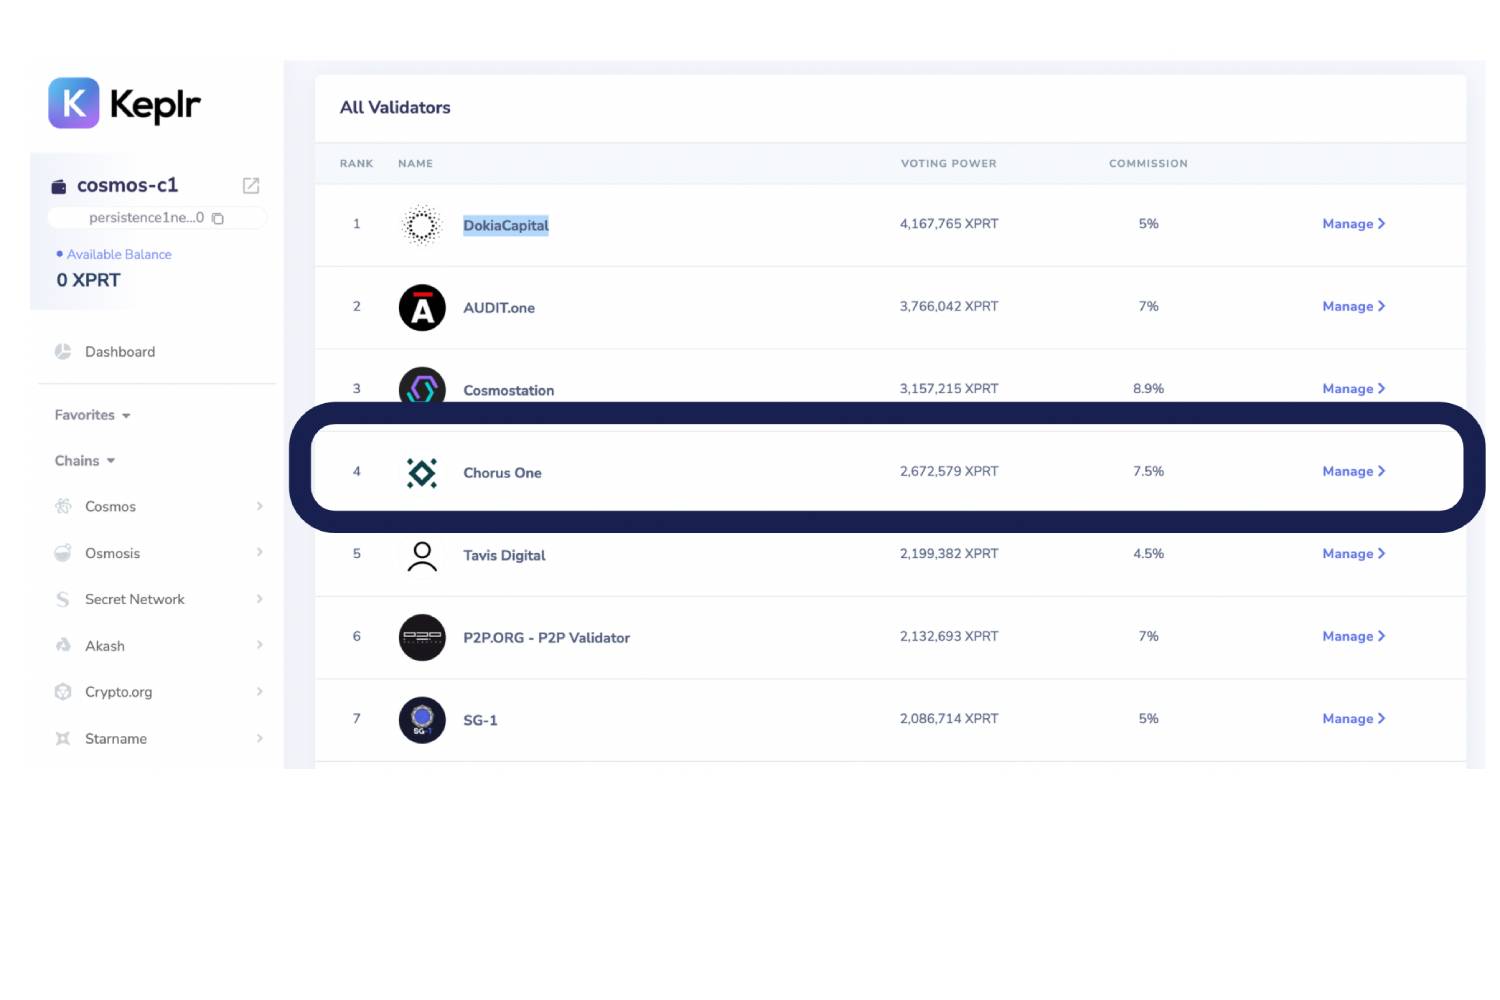
To stake click on the Akash network in the left panel and click on Stake

You will be shown a list of validators with whom to stake on the right side. Scroll to Chorus One and click on Manage.
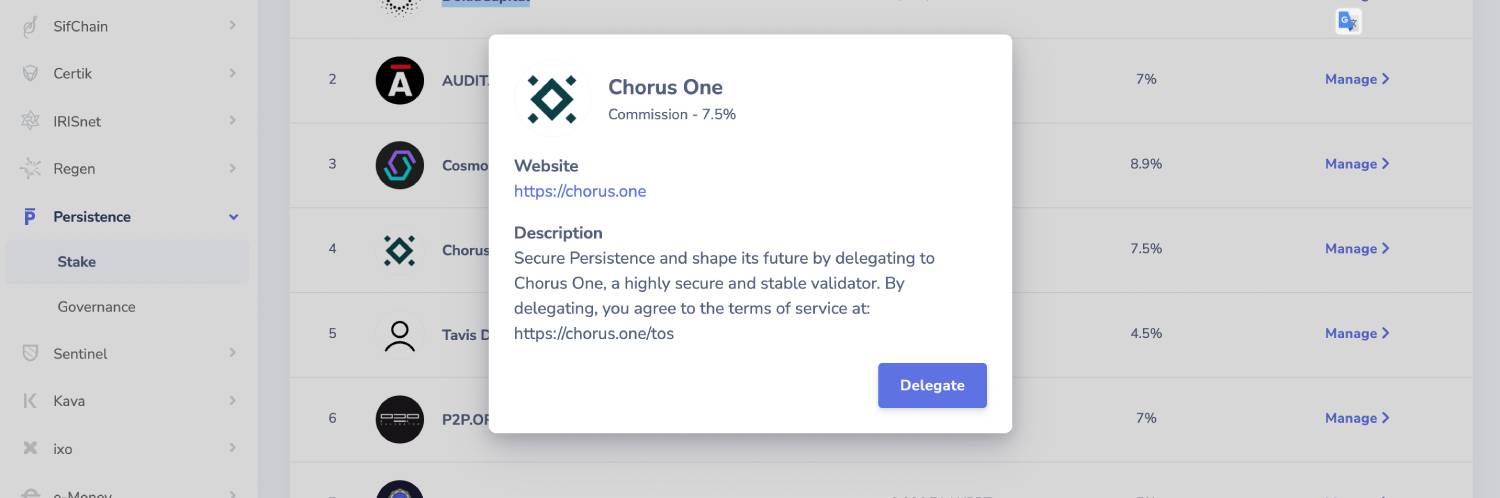
A modal with Chorus One's description will pop up. Click once on Delegate to enter the amount of tokens you want to stake.
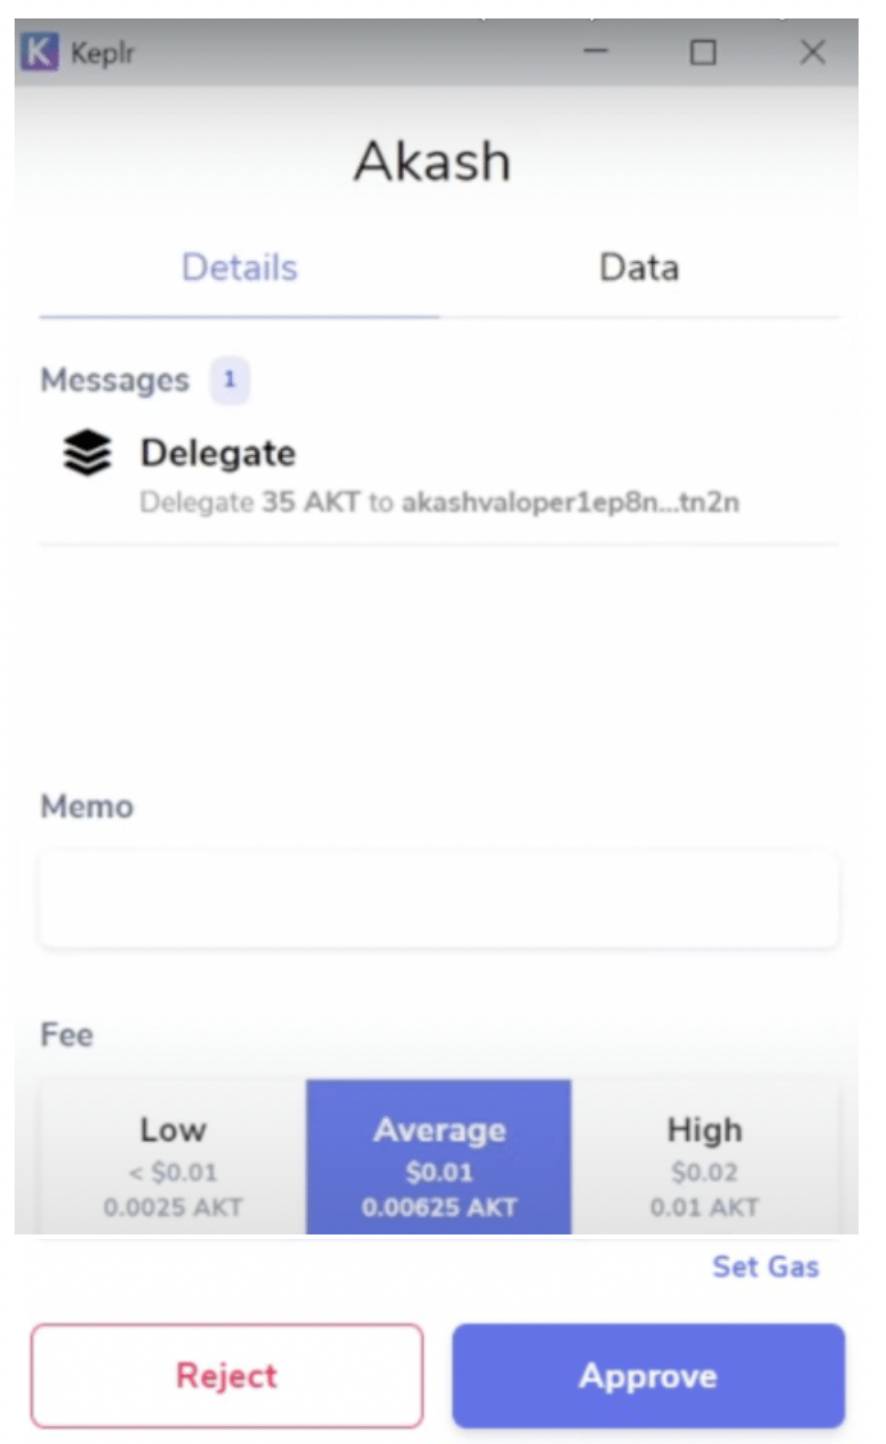
Clicking on Delegate again will take you to Keplr wallet for approval. Approve the transaction and you will be able to see your stake.

There is a 21-day unbonding process for staked AKTs during which delegator AKTs do not earn rewards and cannot be transferred, exchanged, or spent. AKTs can, however, be slashed during the unbonding period.
After some time you will see rewards getting accumulated in your account. You can simply go to the Keplr extension to claim them.