
Chorus One Validator
kyvevaloper16pj5gljqnqs0ajxakccfjhu05yczp987rv492n or use:
Recommended Wallets
Block Explorer
Staking Rewards
https://www.stakingrewards.com/asset/kyve-network
Unstaking Period
21 Days
Kyve Network (KYVE) is a blockchain protocol focused on data availability and management, enabling developers to securely store, validate, and retrieve data in a decentralized way.
It achieves this by combining efficient data storage with a consensus layer, ensuring that the data is both immutable and verifiable. By leveraging its unique data archiving mechanisms, Kyve allows applications, especially in blockchain and Web3 ecosystems, to access reliable historical data without the need for centralized storage solutions. This makes it a beneficial infrastructure for projects requiring accurate data retrieval, such as DeFi protocols, oracles, and analytics platforms.
This combination of decentralization, scalability, and reliability allows Kyve to serve an important role for managing the growing demand for decentralized data in the blockchain space.
For the focus of this guide, we recommend using the Keplr wallet. While Leap is usable, this guide will be walking through a demonstration with Keplr.
However, if you would like to use Leap wallet and stake directly to the Chorus One validator via Mintscan, you can reference the quick guide below to start your Leap wallet.
If you already have a wallet installed, feel free to skip ahead to: Stake your KYVE


In case you don't have the Keplr extension installed in your browser, please visit https://www.keplr.app/ and click on 'Install Keplr'.


Click on Install Keplr for Chrome if you are using a Chrome browser or Brave if you are using the Brave browser and follow the installation instructions.
Click on the extension in the Chrome/Brave toolbar and the following page will open up.

In case you do not have an existing Keplr account you can click 'Create a new wallet'.
If you already have a wallet to use, you can select 'Import an existing wallet' or you can connect with a compatible hardware wallet, such as a Ledger device.

If you choose to create a new wallet you will be shown 12 words as your mnemonic seed.
Please be sure to back up your mnemonic seed securely.
Never share this seed phrase with anyone, as they will have access to your funds.
Next, enter an account name and a passphrase to lock and unlock your wallet. You will be asked for the mnemonic again.

After verifying your 12 or 24 word phrase, you will be prompted to select any other Cosmos Hub networks you'd like to add to your wallet.
No need to add any other networks if you don't plan on using them yet. You can always select more networks later.
However, it is advisable to have 'Cosmos Hub' selected when creating your new wallet.

Once you selected the relevant networks you want to use, click 'Save' and you'll be all set to go.

Regardless of whether you already have an wallet or if you just created it, you can now click on the Keplr extension to view your address or visit https://wallet.keplr.app/?tab=overview to see your full Keplr dashboard.

If you don't already have some KYVE in your wallet, you can fund it with some tokens. You may use an exchange to transfer the tokens to your address or get them from a trusted third party that already holds some.
If you want to stake from the browser extension wallet, you can either navigate to the Keplr dashboard (shown below) or scroll down on the wallet screen and select KYVE.
Alternatively, you can connect Keplr to the Mintscan explorer and stake to the Chorus One validator at this address: kyvevaloper16pj5gljqnqs0ajxakccfjhu05yczp987rv492n
Or you can navigate to thenChorus One staking page and click on 'Stake Now'
Next, you will be prompted to stake.


If you click on KYVE directly from your wallet extension, you will see the option to stake. Click on that to be taken to the staking dashboard in Keplr.

Alternatively, if you are already on the Keplr dashboard, to stake click on the 'Stake' tab on the left hand side of the dashboard.

Once there, you will see three steps highlighted in the pink box in the screenshot below.
Scroll or through the list or search for the chain you want, in this case KYVE.

Once you've chosen the Chorus One validator, select how many KYVE tokens you wish to stake, then click the 'Stake' button at the bottom of the screen.
Clicking on Stake will take you to Keplr wallet for approval. Approve the transaction and you will be able to see your stake.

Please note that KYVE has a 21-day unbonding process (also known as unstaking).
During this period your stake no longer earns rewards and cannot be transferred, exchanged, or spent.
However, you can cancel the unstaking process if you wish without penalty.
After some time you will see rewards accumulating in your wallet.

You can simply go to the Keplr dashboard to claim them by selecting 'Claim' and approving the transaction.
If you wish to unstake your KYVE, you can do so from the same interface in Keplr that you used to stake.

Simply click on the validator you wish to unstake from and you will be prompted with the following screen.

Please note that KYVE undergoes a 21 day unbonding period when unstaking.

To proceed, click on 'Unstake' and follow the prompts to select the amount of KYVE you wish to unstake.
Then confirm and sign the transaction in your wallet.
And that's it! Your KYVE will begin unbonding which you can track from your Keplr dashboard under the Staking tab.
You can view and manage all ongoing unstaking transactions (undelegations) from your Keplr dashboard and cancel them if you change your mind.

After the unbonding period is complete you will be able to transact with your unstaked KYVE again!
Chorus One Validator
axelarvaloper16pj5gljqnqs0ajxakccfjhu05yczp987zac7km
Recommended Wallets
Block Explorers
https://www.mintscan.io/axelar or https://axelarscan.io/
Staking Rewards
https://www.stakingrewards.com/asset/axelar
Unstaking Period
21 Days
Axelar (AXL) is a decentralized interoperability network designed to facilitate seamless communication between different blockchain ecosystems. It provides a universal protocol that allows applications to connect and interact with multiple blockchains, enabling the secure transfer of assets, data, and messages across diverse networks.
Axelar achieves this by using a set of decentralized gateways and cross-chain communication protocols, ensuring compatibility and smooth integration with various blockchains, including both Layer 1 and Layer 2 solutions.
For the focus of this guide, we recommend using the Keplr wallet. While Leap is usable, this guide will walk through a demonstration with Keplr.
However, if you would like to use the Leap wallet and stake directly to the Chorus One validator via Mintscan, you can reference the quick guide below to start your Leap wallet.
In case you don't have the Keplr extension installed in your browser, please visit https://www.keplr.app/ and click on 'Install Keplr'.
Click on Install Keplr for Chrome if you are using a Chrome browser or Brave if you are using the Brave browser and follow the installation instructions.
Click on the extension in the Chrome/Brave toolbar, and the following page will open up.
If you do not have an existing Keplr account, you can click 'Create a new wallet'.
If you already have a wallet to use, you can select 'Import an existing wallet', or you can connect with a compatible hardware wallet, such as a Ledger device.
Alternatively, Keplr now offers the ability to associate your wallet with your Google account, however, this is a less secure way of establishing your wallet and is not recommended.
If you choose to create a new wallet, you will be shown 12 words as your mnemonic seed.
Please be sure to back up your mnemonic seed securely.
It is recommended to store it physically; never in a digital format or as a screenshot.
Never share this seed phrase with anyone, as they will have access to your funds.
A lost mnemonic seed phrase cannot be recovered.
Anyone with your mnemonic seed phrase can take control of your assets.
Next, enter an account name and a password to lock and unlock your wallet. You will be asked for the mnemonic again.
Enter the 12 or 24 words in order and case sensitive (all lower case).
This is to make sure you remember the mnemonic and confirm that you wrote it down correctly.
After verifying your 12 or 24-word phrase, you will be prompted to select any other Cosmos Hub networks you'd like to add to your wallet.
No need to add any other networks if you don't plan on using them yet. You can always select more networks later.
However, it is advisable to have 'Cosmos Hub' selected when creating your new wallet.
Once you've selected the relevant networks you want to use, click 'Save' and you'll be all set to go.
Regardless of whether you already have a wallet or if you just created it, you can now click on the Keplr extension to view your address or visit https://wallet.keplr.app/?tab=overview to see your full Keplr dashboard.
If you don't already have some AXL in your wallet, you can fund it with some tokens. You may use an exchange to transfer the tokens to your address or get them from a trusted third party that already holds some.
If you want to stake from the browser extension wallet, you can either navigate to the Keplr dashboard (shown below) or scroll down on the wallet screen and select AXL.
Alternatively, you can connect Keplr to the Mintscan explorer and stake to the Chorus One validator at this address: axelarvaloper16pj5gljqnqs0ajxakccfjhu05yczp987zac7km
Next, you will be prompted to stake.

Once you are on the Keplr dashboard, to stake, click on the 'Stake' tab on the left-hand side of the dashboard.
Once there, you will see three steps highlighted in the pink box in the screenshot below.
Scroll through the list or search for the chain you want, in this case AXL.
Once you've chosen the Chorus One validator, select how much AXL you wish to stake, then click the 'Stake' button at the bottom of the screen.
Clicking on Stake will take you to the Keplr wallet for approval. Approve the transaction, and you will be able to see your stake.

Next, you will likely be returned to the dashboard interface for AXL and see a screen similar to the following.

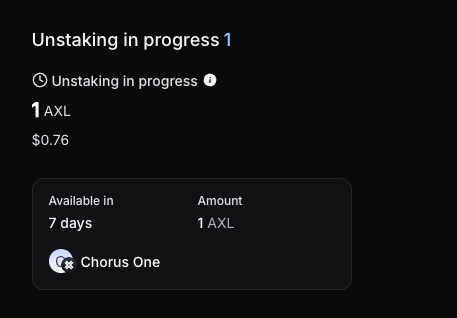
Please note that AXL has a 21-day unbonding process (also known as unstaking).
During this period, your stake no longer earns rewards and cannot be transferred, exchanged, or spent.
However, you can cancel the unstaking process if you wish without penalty.
After some time, you will see rewards accumulating in your wallet.
You can simply go to the Keplr dashboard to claim them by selecting 'Claim' and approving the transaction.
If you wish to unstake your AXL, you can do so from the same interface in Keplr that you used to stake.


Simply click on the validator you wish to unstake from, and you will be prompted with the following screen.

Please note that AXL undergoes a 21-day unbonding period when unstaking.
To proceed, click on 'Unstake' and follow the prompts to select the amount of AXL you wish to unstake.
Then confirm and sign the transaction in your wallet.
And that's it! Your AXL will begin unbonding, which you can track from your Keplr dashboard under the Staking tab.
You can view and manage all ongoing unstaking transactions (undelegations) from your Keplr dashboard and cancel them if you change your mind.
After the unbonding period is complete, you will be able to transact with your unstaked AXL again!
Aptos is a high-performance Layer 1 blockchain designed to deliver scalability, safety, and user experience for decentralized applications. Built by a team of experienced engineers, Aptos leverages the Move programming language to enable parallel transaction execution, robust security, and high throughput.
The network aims to provide an accessible and developer-friendly environment, fostering innovation across Web3, DeFi, and gaming applications.
Staking APT is a simple and rewarding way to contribute to the Aptos network. By choosing Chorus One, you are staking with a trusted validator committed to reliability and performance.
Minimum Stake
You must delegate a minimum of 11 APT to begin staking
Lock-Up/Unbonding Period
Unlocking your APT takes 0 to 30 days. During this period, you will still earn staking rewards.
Rewards Payout
Rewards accrue over time and auto-compound to your staked balance.
Recommended Explorer
https://explorer.aptoslabs.com/?network=mainnet
Recommended Wallets
Petra, Pontem, or Aptos Connect — Full list seen here
Chorus One Validator
Validator Address Direct Link or 0xda418307cff595ced2af5eb471ec11b1ad6a4907ef57d6e2eeb253bdd5bd9d0d
ARR
Refer to Staking Rewards for current rates
Before you start staking APT, ensure you have the following:
Navigate to the Chorus One Aptos Validator or search for the validator address using Aptos explorer.
0xda418307cff595ced2af5eb471ec11b1ad6a4907ef57d6e2eeb253bdd5bd9d0d
From the Chorus One validator on the block explorer, connect your Petra wallet by clicking on 'Connect' in the upper-right-hand corner of the screen.

Once connected with your Petra wallet, you will see your address in the upper-right-hand corner of the screen.
As a delegator, you will earn rewards on your stake minus any commissions for the operator, and you can perform the following operations:
As a delegator, you can unlock your stake at any time. However, the stake will only become withdrawable after the delegation pool’s lockup period expires.
During this time, your unlocked stake will continue earning rewards until your stake becomes withdrawable.
Enter the amount of APT you wish to unlock (unstake).
Staking rewards vary based on network parameters, validator performance and the total staked amount. Please refer to Staking Rewards for the most up-to-date ARR information.
You can unstake your APT at any time. However, the stake can only be withdrawn after the delegation pool's lockup period expires. This can range from 0 to 30 days.
Yes, your APT staking rewards are auto-compounded. The commission is paid to the validator when delegators unstake their positions.
No, currently, slashing is not enabled on the Aptos Network.
Yes, you can increase the amount of APT you have staked or unstake a portion or all of it at any time. It will then undergo the unlocking period that ranges from 0 to 30 days.
--
The wait is over! Babylon BTC staking goes live today, December 10, at BTC block 874,088 (around 11:00 UTC). With this new cap, Bitcoin holders can now stake their BTC seamlessly and earn rewards while contributing to the evolution of the Bitcoin ecosystem.
Cap 3 introduces new limits and features that make this staking opportunity both exciting and accessible:
Chorus One is proud to support Babylon as a trusted and experienced Finality Provider, ensuring a smooth and reliable staking experience for the Bitcoin community.
Ready to stake? Follow this step-by-step guide to get started:
Make sure your Bitcoin wallet is ready before staking goes live. Staking Rewards supported wallets include:
Browser Wallets:
Hardware Wallets:
👉 Note: When setting up your wallet, follow these guidelines:
1. Go to the Staking Interface:
Visit the Chorus One BTC Staking Dashboard.

2. Connect Your Wallet:
Select your wallet and sign the signature request to connect.

3. Enter Your Staking Amount:
Input the amount of BTC to stake (between 0.005 BTC and 5,000 BTC per transaction).

4. Set Transaction Fees:
Choose your preferred transaction fee. To increase your chances of staking before the cap fills, prioritize your transaction with a higher fee.

5. Confirm the Transaction:
Click “Stake” and confirm the transaction in your wallet.


6. Track Your Position:
Monitor your staked BTC via the Staking Terminal.

Unstaking is straightforward:
1. Submit an Unbonding Transaction: The unbonding period is 1,008 BTC blocks (~7 days).

2. Withdraw Your BTC: Once the unbonding period is complete, withdraw your BTC via the Staking Terminal.

Cap 3 Highlights:
Cap 3 represents a significant step forward for the Bitcoin community, enabling BTC holders to participate in staking while earning competitive rewards. It’s an innovative approach that combines the stability of Bitcoin with modern staking solutions.
Chorus One’s Expertise:
As a leading institutional staking provider, Chorus One has been at the forefront of blockchain innovation since 2018. With over $3 billion in assets secured across 60+ Proof-of-Stake networks, our enterprise-grade infrastructure and track record ensure a seamless staking experience.
Prepare your wallet today and join the staking revolution. For detailed instructions, check out the updated staking guide: How to Stake Bitcoin with Babylon.
Stake now with Chorus One: Stake BTC with Babylon.
Let’s shape the future of Bitcoin staking together.
About Chorus One
Chorus One is one of the largest institutional staking providers globally, operating infrastructure for over 60 Proof-of-Stake (PoS) networks, including Ethereum, Cosmos, Solana, Avalanche, Near, and others. Since 2018, we have been at the forefront of the PoS industry, offering easy-to-use, enterprise-grade staking solutions, conducting industry-leading research, and investing in innovative protocols through Chorus One Ventures. As an ISO 27001 certified provider, Chorus One also offers slashing and double-signing insurance to its institutional clients. For more information, visit chorus.one or follow us on LinkedIn, X (formerly Twitter), and Telegram.
Since the Paris upgrade, staking has been introduced on Tezos. Staking and delegating are different activities. After the Quebec proposal goes live in January, the delegation rewards will drop to 33% of the staking rewards. In other words, in 2025, you can earn 3x more return on your Tez if you stake vs. delegate.
Below is a brief overview of the differences between staking and delegating.

We have prepared a short guide to help you switch from delegating to staking. The guide is based on the Kukai wallet, but you can use the wallet of your choice.
Getting started
If you haven't delegated to a Chorus One baker yet, click on “Delegating & Staking” in the right corner of the wallet interface. Look for Chorus One on the bakers’ list. You can use the search button in your browser to find it.


About Chorus One
Chorus One is one of the largest institutional staking providers globally, operating infrastructure for over 60 Proof-of-Stake (PoS) networks, including Ethereum, Cosmos, Solana, Avalanche, Near, and others. Since 2018, we have been at the forefront of the PoS industry, offering easy-to-use, enterprise-grade staking solutions, conducting industry-leading research, and investing in innovative protocols through Chorus One Ventures. As an ISO 27001 certified provider, Chorus One also offers slashing and double-signing insurance to its institutional clients. For more information, visit chorus.one or follow us on LinkedIn, X (formerly Twitter), and Telegram.
Chorus One Validator: tnam1qxsx2ezu89gx252kwwluqp7hadyp285tkczhaqg0or search for Chorus One on the Namada Staking page.
Recommended Wallet: Namada Keychain (Chrome or Firefox only)
Block Explorer: https://namada.info/
Unstaking Period: 14 days
Namada (NAM) is a proof of stake (PoS) layer-1 blockchain from the Anoma foundation designed to prioritize privacy in multi-asset transactions using zero-knowledge proof technology and focusing on interchain asset-agnostic data protection.
Built on the Tendermint consensus engine, it uses a mechanism called Zcash Sapling Protocol to enable shielded transfers, allowing users to transact privately while supporting interoperability with other blockchains.
Namada stands out for its native multi-asset support, meaning any asset from connected chains or created within Namada can benefit from its privacy features without needing custom contracts.
The platform also introduces an innovative feature called Privacy as a Public Good. It rewards users for using private transactions by allocating a portion of transaction fees and staking rewards to fund privacy-centric initiatives.
Namada aims to enhance privacy across the blockchain ecosystem, offering a solution that seamlessly integrates privacy with usability, making it accessible for both developers and end-users.
1. Install the Namada Keychain browser extension
To begin, you will need to Namada Keychain, which can be downloaded here:
Please note that currently the Namada Keychain is only supported on Chrome and Firefox.
If you already have the Namada Keychain installed, skip ahead to: How to stake

Example of the Namada Keychain webpage.
Next, set up your wallet by either creating a new wallet via a 12 or 24-word phrase from the Namada Keychain, or connect via Ledger which will require having already installed the Namada app from Ledger Live.
If you are creating a new wallet from the Namada Keychain directly, please be sure to store your 12 or 24-word phrase securely.
You will be prompted to enter some random words from your seed phrase to ensure you wrote it down correctly. Next, you will be prompted to set a password for your Namada Keychain.
Your seed phrase cannot be recovered if lost. Please be sure to write this down somewhere secure and never share it with anyone.
Anyone with access to your seed phrase will have access to your funds.
2. How to stake
Next, navigate to https://interface.namada.tududes.com/ to view the overview interface for Namada.

Example of the Namada overview interface.
You can search for Chorus One in the search bar or enter the Chorus One validator address to find the correct validator from the Staking interface.
tnam1qxsx2ezu89gx252kwwluqp7hadyp285tkczhaqg0Simply click on 'Stake' and you will be brought to the staking page.

Example of the Namada staking interface.
You may need to search for Chorus One again to find it from the list of available validators.

Example of staking 50 NAM to Chorus One.
Simply enter how much NAM you wish to stake with Chorus One and then complete the transaction in your Namada Keychain and sign the transaction.

You will be prompted to enter the password you set for your Namada Keychain wallet to finalize the transaction.

Once you have approved the transaction, you have successfully staked your NAM!
3. Increasing and managing your NAM stake
If you'd like to increase or manage your NAM stake, you can do so from the Namada Overview page or the Namada Staking page.

Enter the amount of NAM you would like to increase your stake by.
Follow the same steps as before to approve and finalize your staking transaction.
4. Unstaking your NAM
If you wish to unstake your NAM, this can be done from the Namada Staking page which will provide an overview of your staked balances and which validators you have delegated to.
Below is an example of how it may look for you.

Example of the Namada Staking interface.
To unstake, simply click on the 'Unstake' button and follow the prompts to approve and finalize the transaction, similar to the steps taken to stake your NAM originally.
When unstaking your NAM, please note that it will take 14 days to complete during which time your staked balance will not be earning staking rewards.
After this period has passed, your NAM will become liquid again and you can transact with it.
If you are an institutional investor looking to stake Namada (NAM) with Chorus One, please reach out to us via our staking request form.
About Chorus One
Chorus One is one of the largest institutional staking providers globally, operating infrastructure for over 60 Proof-of-Stake (PoS) networks, including Ethereum, Cosmos, Solana, Avalanche, Near, and others. Since 2018, we have been at the forefront of the PoS industry, offering easy-to-use, enterprise-grade staking solutions, conducting industry-leading research, and investing in innovative protocols through Chorus One Ventures. As an ISO 27001 certified provider, Chorus One also offers slashing and double-signing insurance to its institutional clients. For more information, visit chorus.one or follow us on LinkedIn, X (formerly Twitter), and Telegram.
Category Details:
Staking details:
Details for Investors:
Locked tokens are not eligible for staking in this first phase. It will be at a later stage
Starknet has been designed to enhance Ethereum's capabilities while maintaining its core values of security and composability. It operates as a permissionless Validity-Rollup, also known as a zero-knowledge rollup (ZK rollup), which is a Layer 2 solution built to improve the scalability of the Ethereum network.
As an L2 blockchain, Starknet empowers developers and decentralized applications to perform large-scale computations at significantly reduced costs. This scalability is achieved without compromising Ethereum’s inherent strengths, such as its decentralized nature.
Starknet uses an advanced cryptographic system known as STARK proofs (Scalable Transparent Argument of Knowledge). These proofs ensure transactions are both secure and verifiable, even when processed off-chain, which helps to maintain Ethereum’s high standards of trust and transparency.
A unique feature of Starknet is its use of Cairo, a purpose-built programming language designed to maximize efficiency and performance in the Starknet ecosystem. Cairo is used to write smart contracts, enabling developers to harness its full potential for creating innovative and high-performance applications.
With Starknet, the Ethereum ecosystem can achieve faster transaction speeds, lower costs, and improved scalability, making it a vital piece of the blockchain scalability puzzle included in Ethereum’s roadmap.
The launch for Starknet will happen in different phases, which are the following:
Phase 1:
Phase 2:
Phase 3:
Phase 4:
In order to stake with Chorus One, you can go to the staking rewards app available here
Once there, connect your wallet (Argent X or Braavos). If you’re visiting the website for the first time, you’ll need to grant the application access and approve a signature request.

Next, enter the amount of STRK you want to stake with Chorus One.

Click “Stake”, then confirm the transaction in your wallet to complete the staking process.

Congratulations! You have successfully staked your STRK. Click the button to track your staked STRK position in the Staking Terminal. You can also view the transaction details on Starkscan.

You can now monitor your stake, claim staking rewards, and unstake directly using the Staking Rewards Terminal, available here: https://www.stakingrewards.com/terminal
About Chorus One
Chorus One is one of the largest institutional staking providers globally, operating infrastructure for over 60 Proof-of-Stake (PoS) networks, including Ethereum, Cosmos, Solana, Avalanche, Near, and others. Since 2018, we have been at the forefront of the PoS industry, offering easy-to-use, enterprise-grade staking solutions, conducting industry-leading research, and investing in innovative protocols through Chorus One Ventures. As an ISO 27001 certified provider, Chorus One also offers slashing and double-signing insurance to its institutional clients. For more information, visit chorus.one or follow us on LinkedIn, X (formerly Twitter), and Telegram.
EigenLayer recently upgraded to M2 Contract. This made it necessary for EigenPods created prior to this to be upgraded. So if your EigenPod was created prior to Stage 2, you will need to upgrade your EigenPod per the steps below. EigenPods that were created prior to M2 contract upgrades are required to have their balances reset to zero, then generate the proofs through the EigenLayer app in order to ensure proof accounting is accurate.
Note: This guide is useful for the native restaking users who want to delegate to Chorus One operator but don’t see any restaked tokens. This can happen when you restaked before the M2 upgrade. Following this guide you will start seeing your restaked tokens which can then subsequently be delegated to Chorus One
1. Go to https://app.eigenlayer.xyz/restake and connect your wallet

2. You will see a button to upgrade your EigenPod. Click Upgrade Eignepod

3. You will be shown a fee recipient warning, review the warning and click Continue


4. In case you have accrued any Consensus Rewards you might be asked to queue the withdrawal of the rewards before you can upgrade your EigenPod. Click Confirm.

5. Observe the Restaking Activated confirmation and explanation that Restaking will be available after the next beacon state update.


6. You can wait for the amount of time mentioned in the message. Come back later and hit the restake button to Restake your ETH

7. Once you restaked your ETH you can follow the steps in this delegation guide to delegate your restaked ETH to Chorus One operator

About Chorus One
Chorus One is one of the biggest institutional staking providers globally, operating infrastructure for 50+ Proof-of-Stake networks, including Ethereum, Cosmos, Solana, Avalanche, and Near, amongst others. Since 2018, we have been at the forefront of the PoS industry and now offer easy enterprise-grade staking solutions, industry-leading research, and also invest in some of the most cutting-edge protocols through Chorus Ventures. We are a team of over 50 passionate individuals spread throughout the globe who believe in the transformative power of blockchain technology.


