
.png)
12C9U6zSSoZ6pgwR2ksFyBLgQH6v7dkqqPCRyHceoP8MJRo2
16XF84j2wQ9wjkqRM2Y8ceCaw8dQu7t3ve9P9XbBj5kaRZxY
You can nominate validators (also known as staking) on Polkadot-JS UI using the following steps
Create a Polkadot account if you don’t have one already. Get the browser extension by visiting Polkadot.js.org/extension

Click on the extension card and add it to your browser.
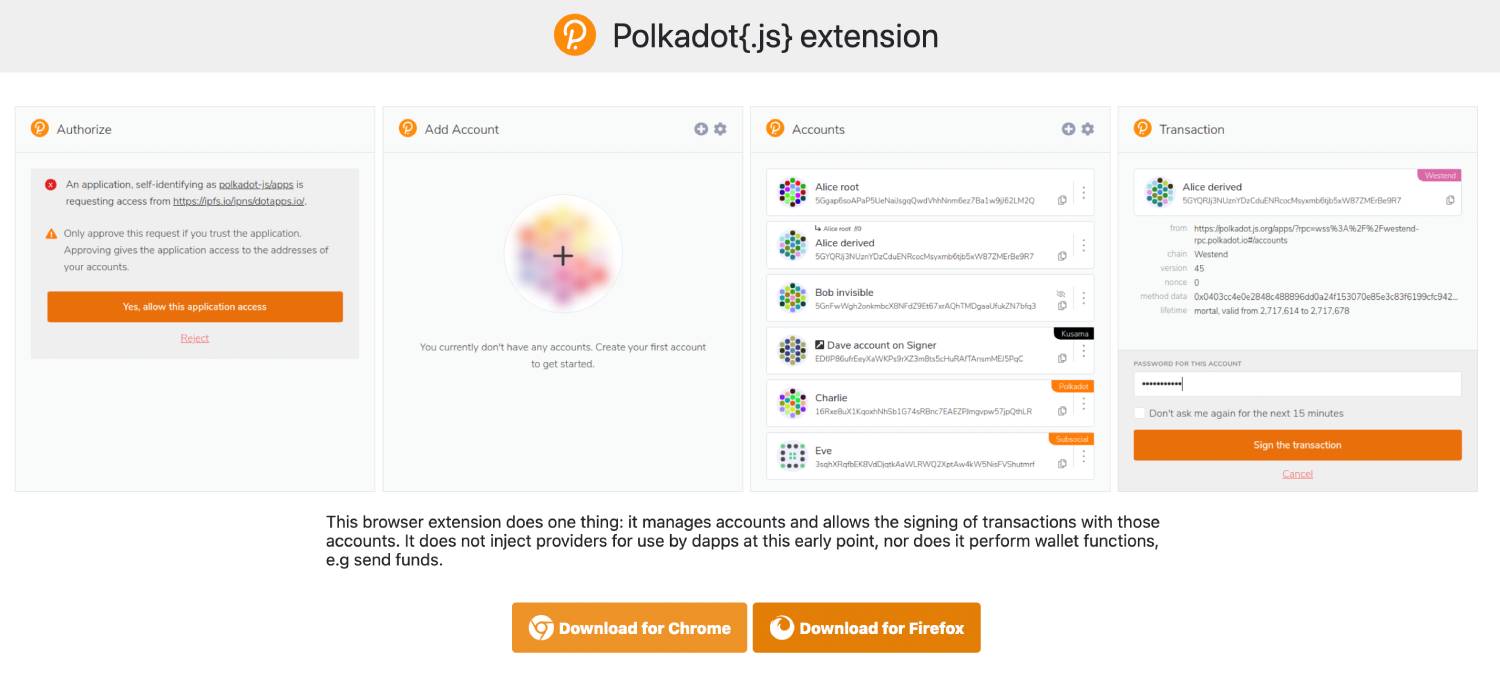
After adding to your browser it will appear as a P icon in the toolbar

Please note it is recommended to create two accounts: one to use as the controller account and one to use as your stash account. Learn more about this here

If you want to know more details about how to create an account you can visit the official docs here.Also, make sure you leave a small amount of DOT transferrable in your stash account and that your controller has more than 1 DOT in it. This is in order to have enough liquid funds for paying transaction fees when bonding and unbonding funds.


In this step, we will actually go through the process of staking which is comprised of bonding the tokens and nominating the validators.


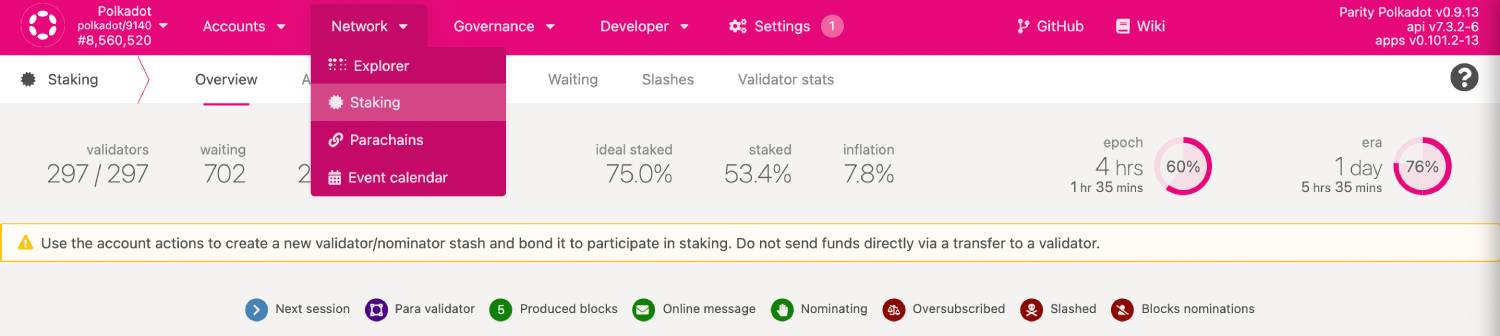
Go to the Polkadot-JS UI main page. Click the Staking link under the Network tab at the top. Click “Account actions” (on top). It may take a while to load. If you're using a Ledger, skip the following steps and check the section below.
You need to bond funds to nominate a validator. So go ahead and click the + Nominator button(top right).

Choose your Stash and Controller accounts. It is more secure to choose separate stash and controller accounts. So make sure you create a separate controller account first in the same manner as you created your stash account. Again, make sure you have funds in your controller account.

Then select the amount you want to bond and the rewards destination and click "Next"
In the next screen select Chorus One as the validator. Finally, click Bond and Nominate.

Enter the password for your account and click Sign & submit.
Sign the transaction using your stash account
Additionally, if you need to change the nominated validators or unbond your balance you just need the controller account to perform the transaction.
Before you begin staking, please pay close attention to these important points:
How to stake using Ledger
Make sure both the ledger live app and device are up to date

Go to manager in the left panel and install Polkadot app if you haven't already

Add your account by going to the Accounts tab in the left panel and clicking on the Add Account

Choose Polkadot in the popup that appears upon clicking Add Account

Follow the instructions to create the new account

Once you have an account you can buy DOTs directly from the Ledger Live app.

In case you are unable to buy DOTs directly from Ledger Live you may use an exchange to do so.
To stake go to the Accounts tab in the left panel and click on the account for which you want to perform the staking operation

Once you have your account opened click on Manage on the top-right and under it select Earn Rewards

Then enter the amount of DOTs you want to bond

To compound your rewards you can select the Bonded Balance tab instead of the Available Balance tab. Click Continue and confirm the bonding transaction on your device. Finally Nominate a validator in the next step

Polkadot allows Nominated proof of staking where you are allowed to nominate up to 16 validators. By clicking on the Nominate byou will be able to select the validator. Search for Chorus One and click Continue.

Congratulations!! You are now staking your Polkadot! You may see your rewards in the portfolio section

You can also see the video tutorial on the official Polkadot youtube channel


